How to Use Electro Footer Section
About Electro Footer Section
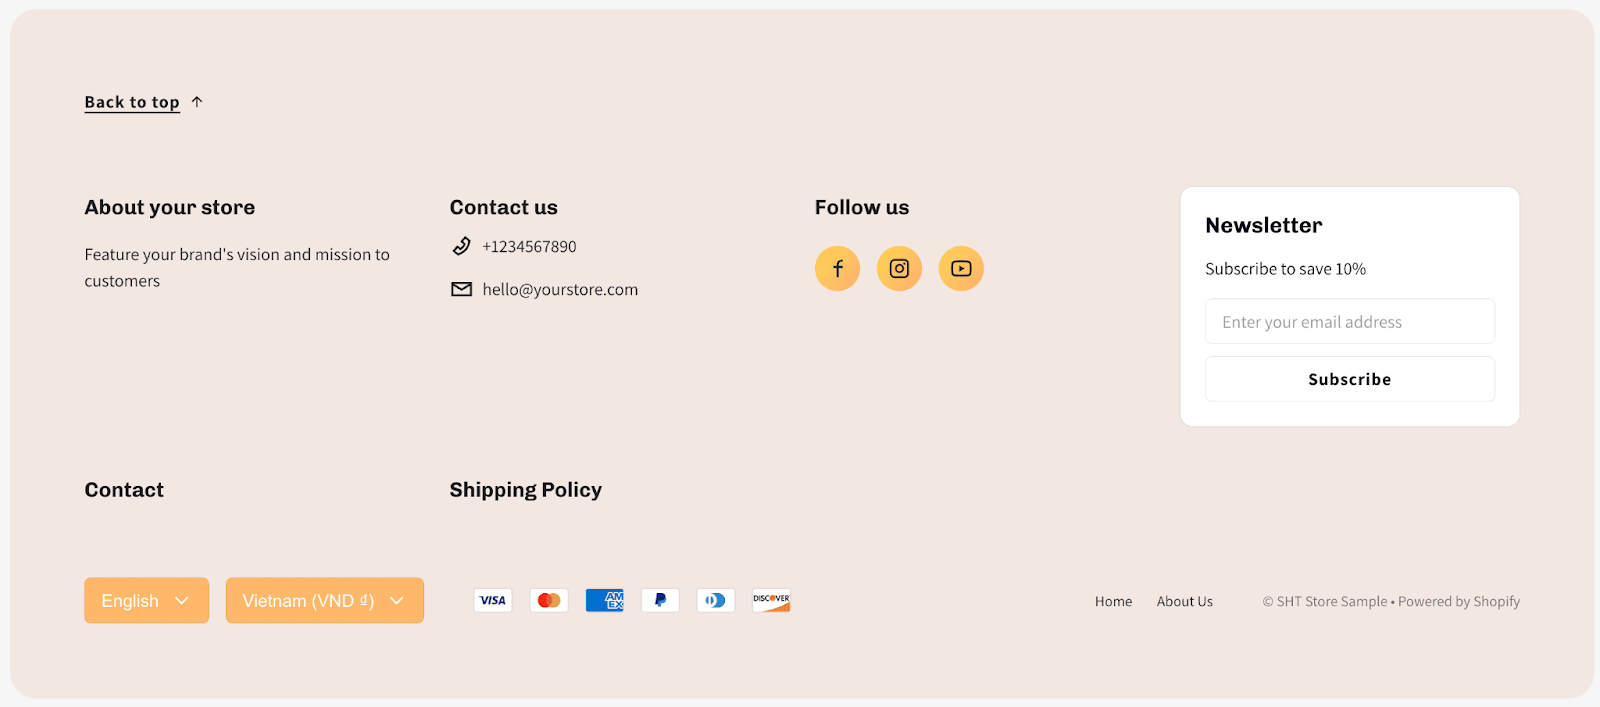
The Electro Footer section appears at the bottom of every page on your store. This section typically includes contact information, social media accounts, shipping details, and more.
This article will show you how to customize Electro Footer in the Electro theme.
How To Access Electro Footer Section
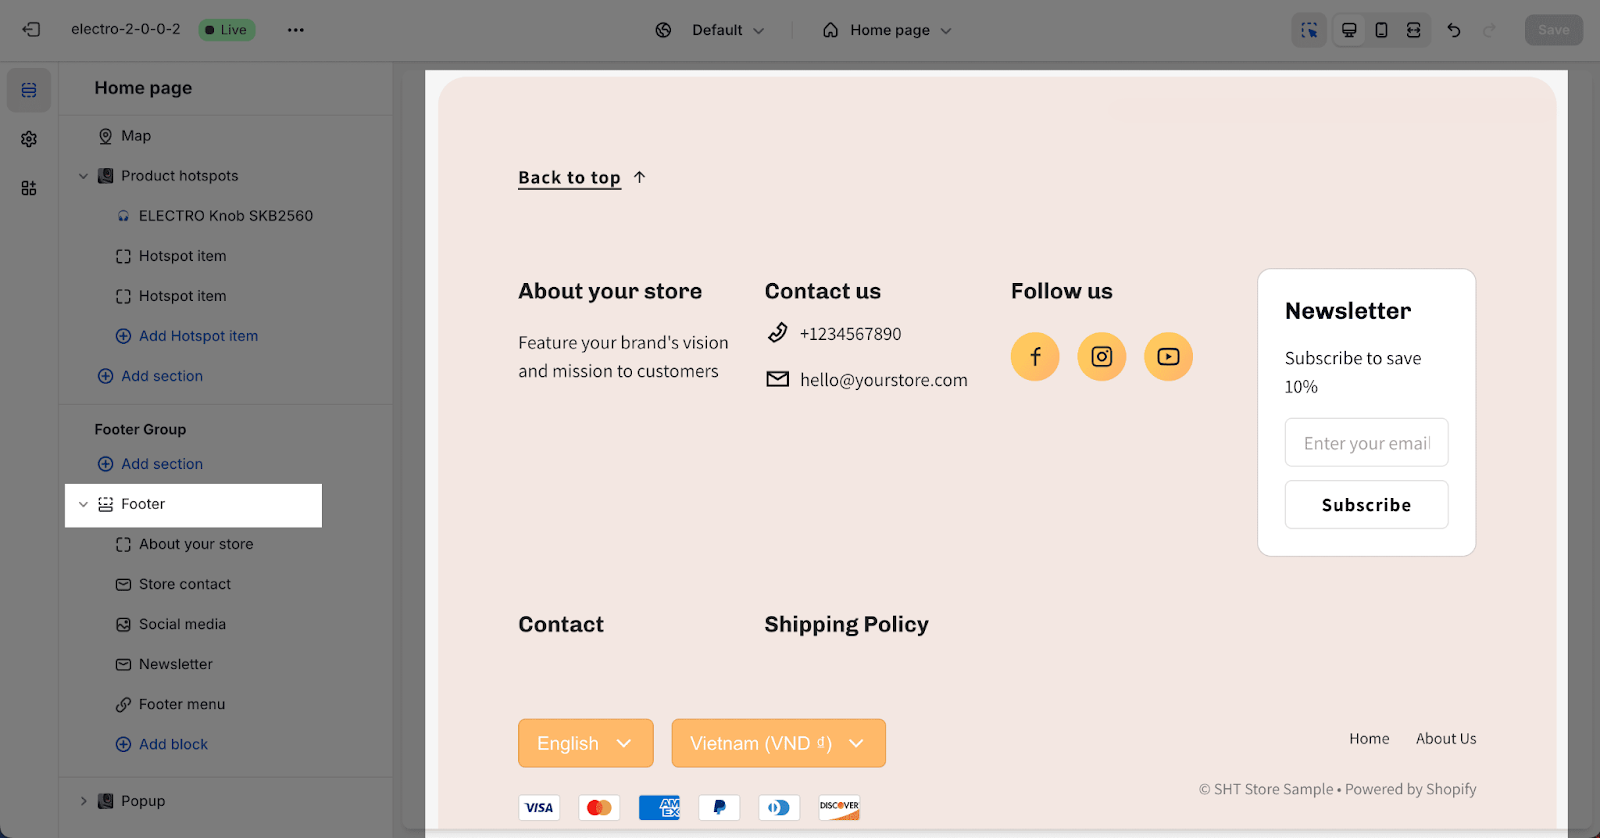
- Step 1: Go to Online Store > Themes > click on Customize
- Step 2: Scroll down to the bottom of the page to find the Footer section
How To Configure Electro Footer Section
To start configuring the Electro Footer section, click on the section. The Electro Footer section has five main settings cards: General, Currency Selector, Language Selector, Payment Methods, and Quick Links.
General
In the Electro Footer section, you can customize the following general settings:
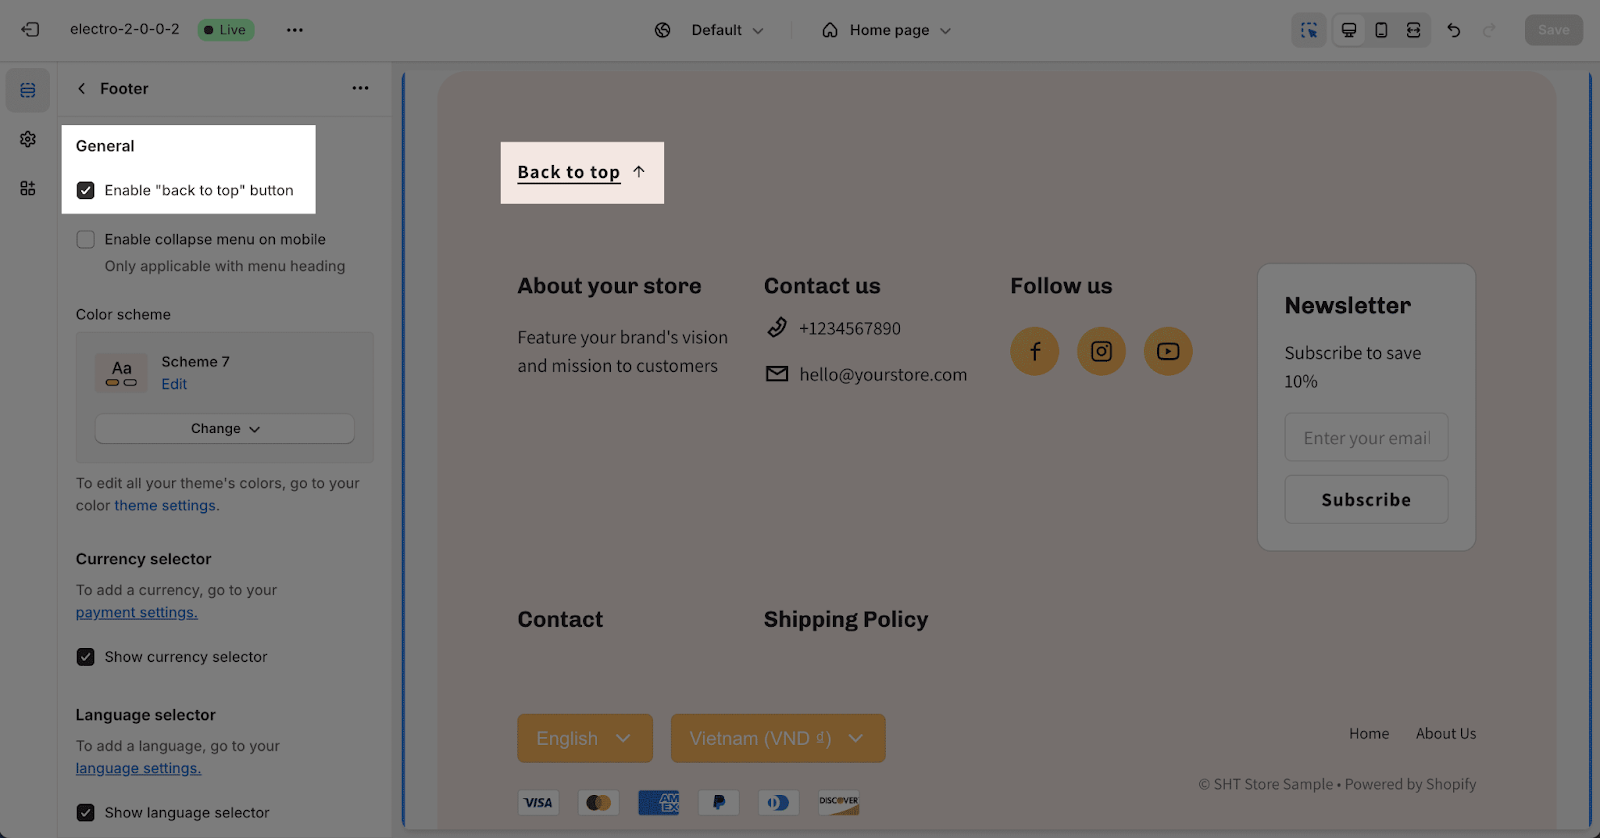
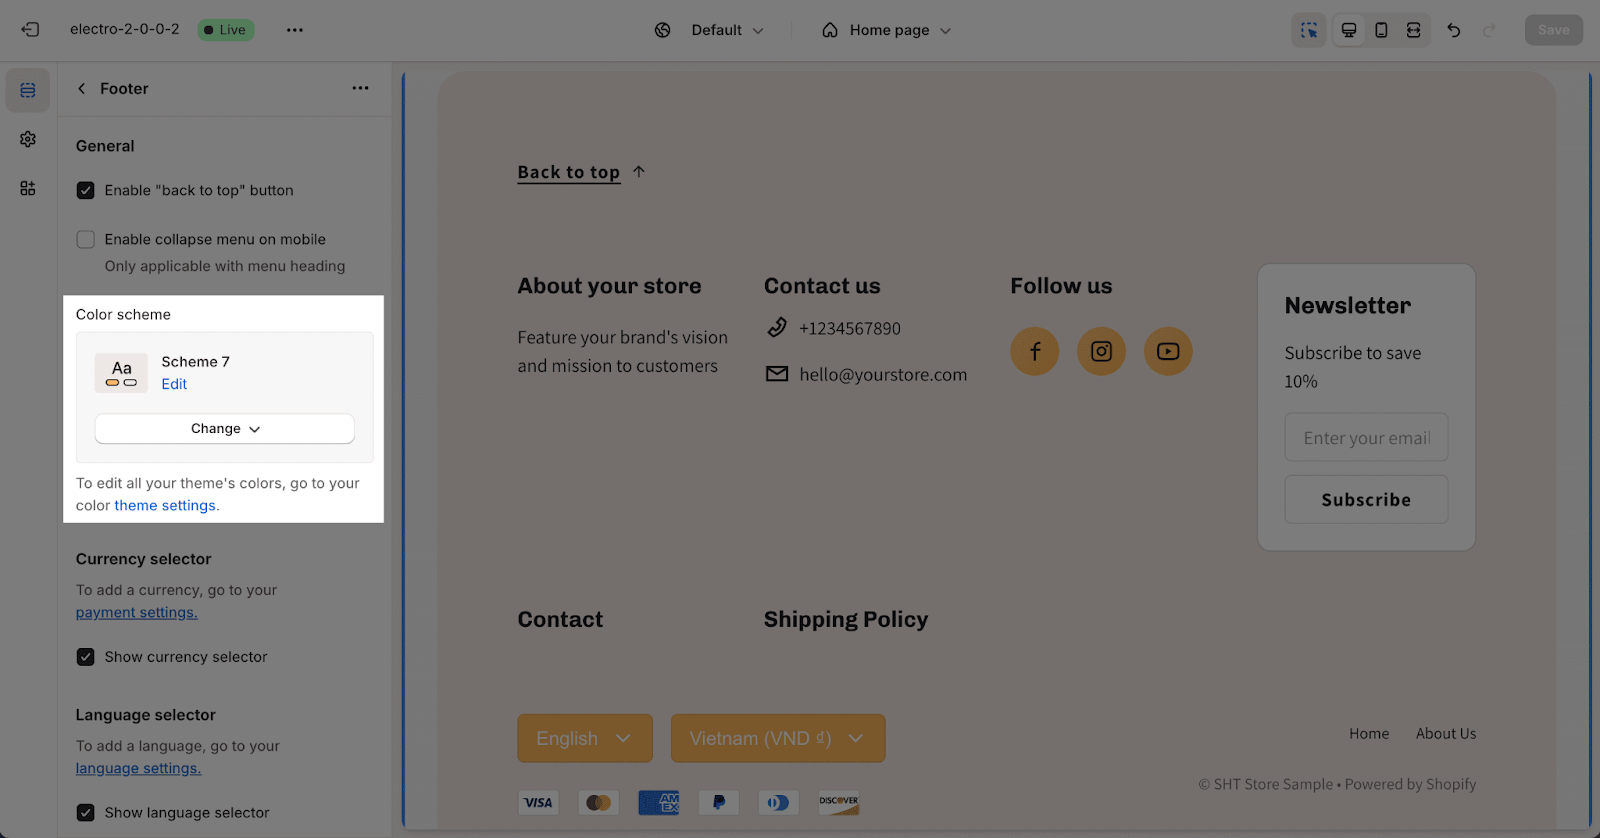
- Enable “Back to Top” Button: Show or hide the “Back to Top” button.
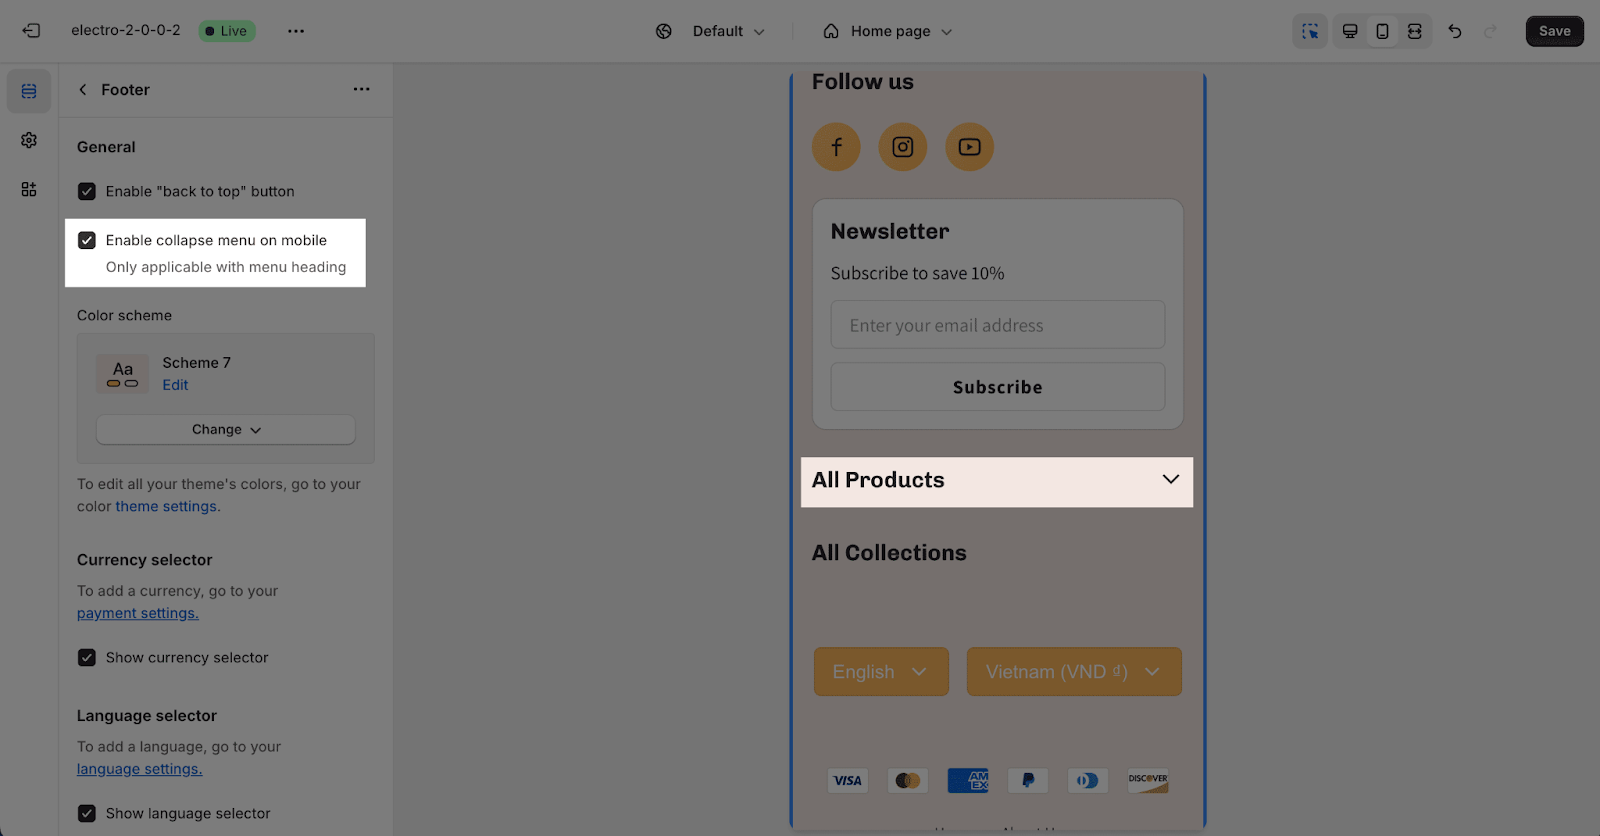
- Enable Collapse Menu on Mobile: Collapse menu headings on mobile devices.
- Color Scheme: Choose from the available color schemes for the section background, button, icon, and text color. To change the scheme settings, access the Theme settings > Colors.
Currency Selector
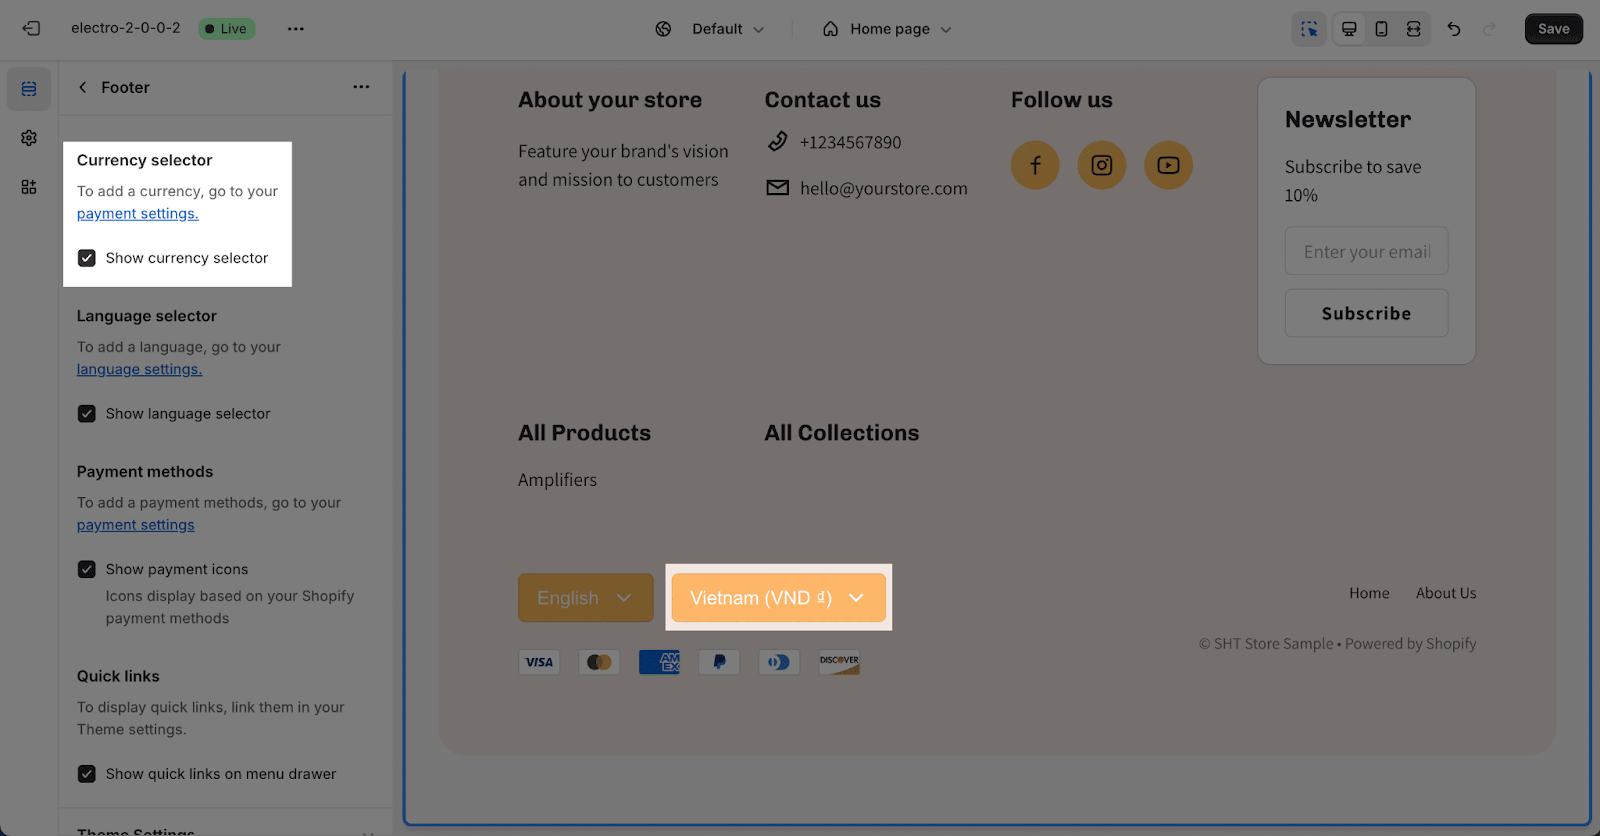
The currency selector allows visitors to choose their preferred currency for viewing prices. To enable the currency selector, you need to add a currency to your Shopify store’s payment settings.
Here’s how to enable the currency selector in Shopify:
- Go to your Shopify admin and click on Settings > Payments.
- In the Shopify Payments section, click on Manage.
- Under Currency Conversion, check the box next to Enable multi-currency.
- Click on Save.
Once you have added a currency, you can enable the currency selector in the footer section of your store. The currency selector will now be displayed in the footer.
Language Selector
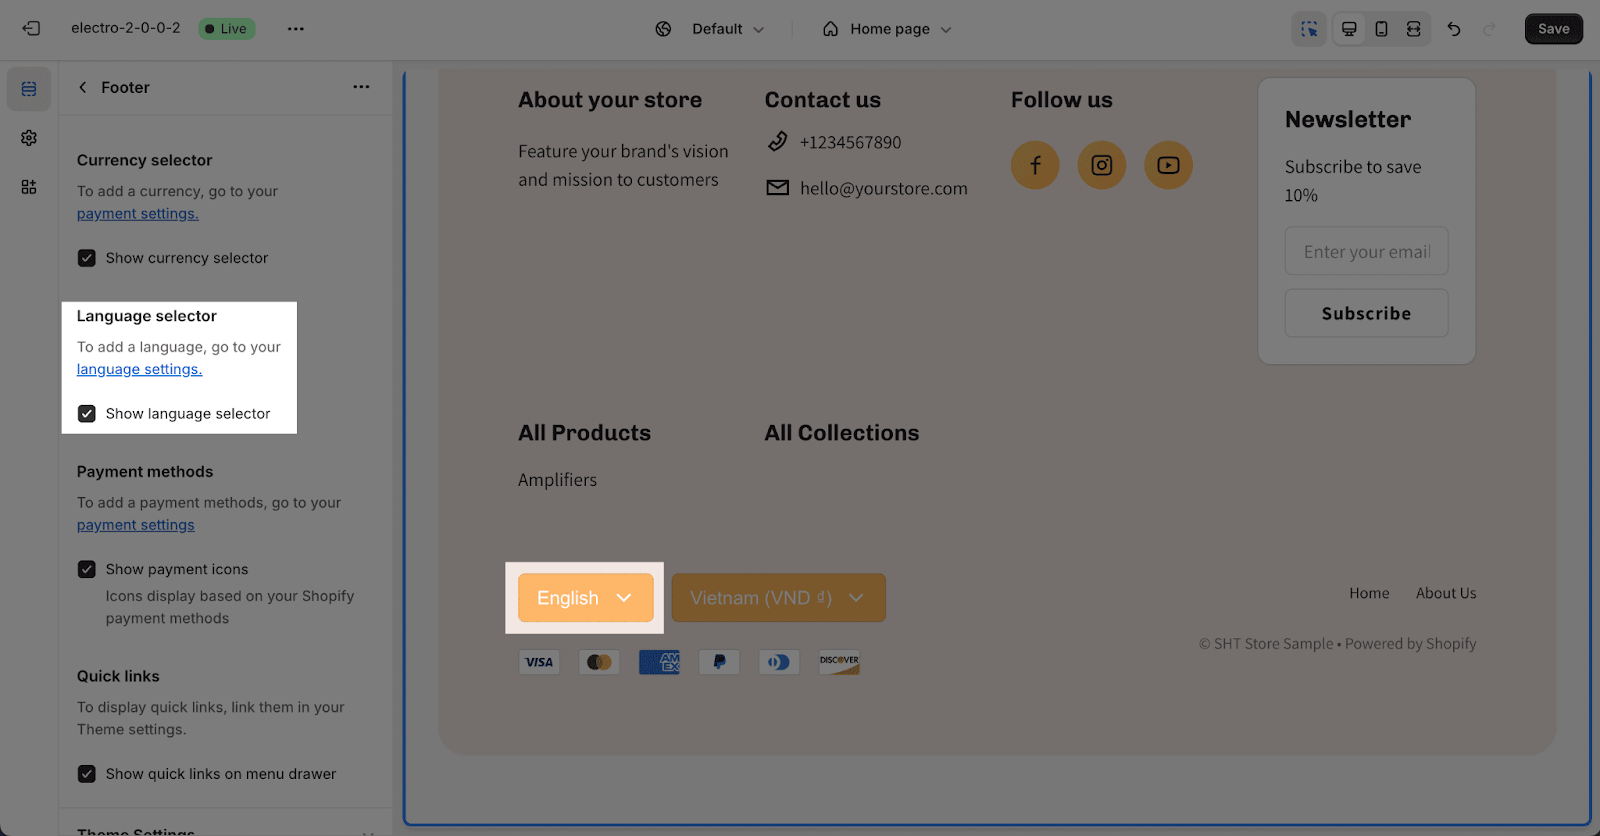
To enable the language selector, add a language to your Shopify store’s language settings.
Note: The language selector will be displayed if:
- Your store has two or more languages.
- All languages are published.
- This feature only works if your store has multiple languages. To set this up, please follow the Shopify guide on adding and managing languages on your site.
After enabling the language selector, it will appear next to the currency selector.
Payment Method
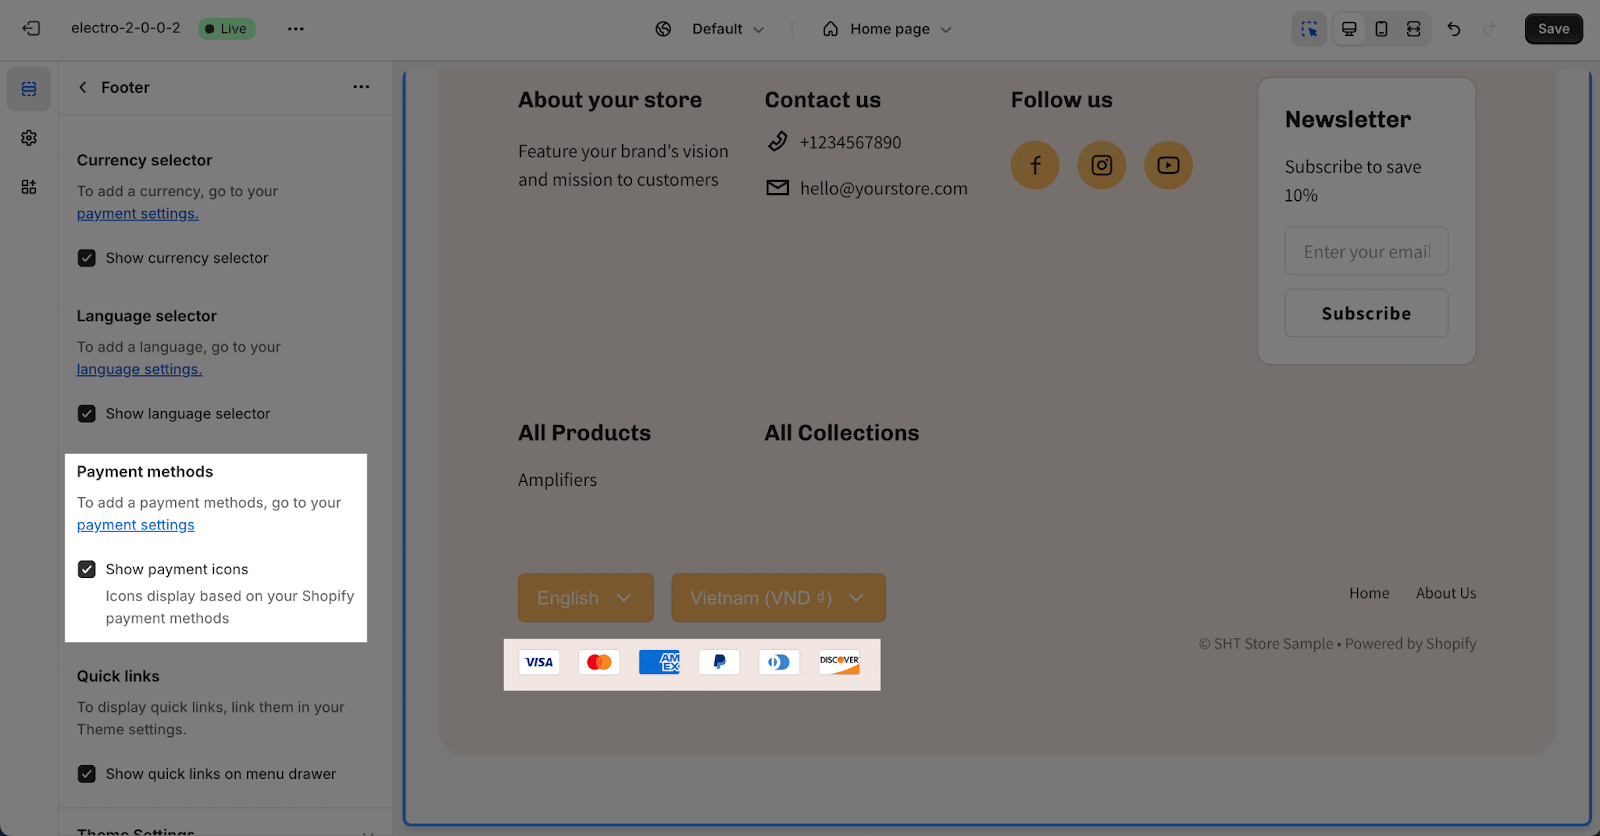
To enable the “Show payment method” option, first, add a payment method in your Shopify store’s payment settings. You can also enable or disable the “Show payment icon” based on your Shopify payment method.
Quick Links
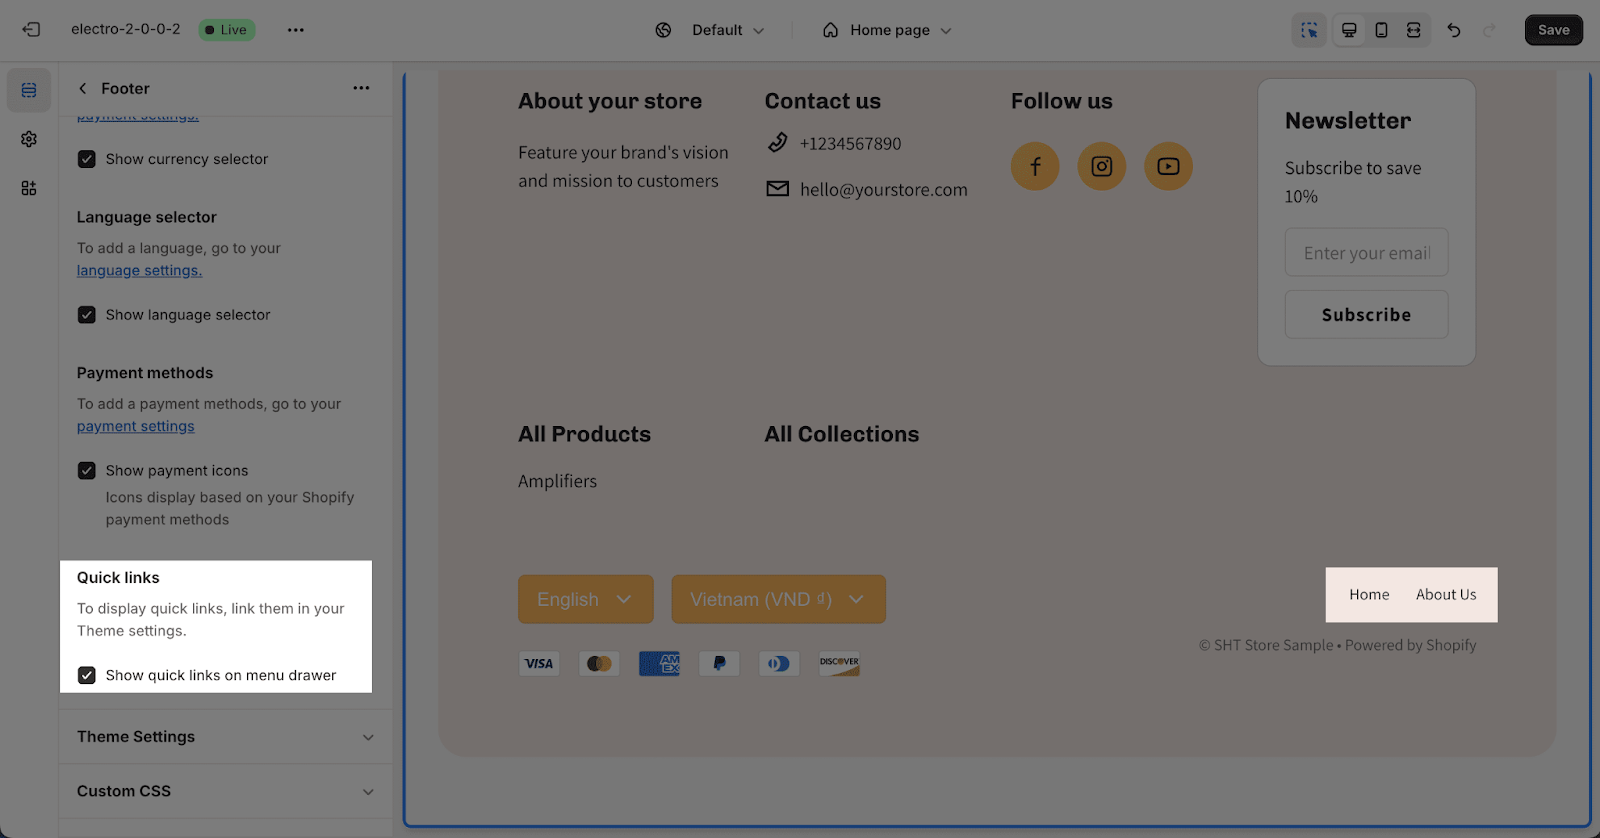
You can Show quick links on the menu drawer here.
Please note that you have to set up the quick link from the Theme Settings.
Configure Footer Section Blocks
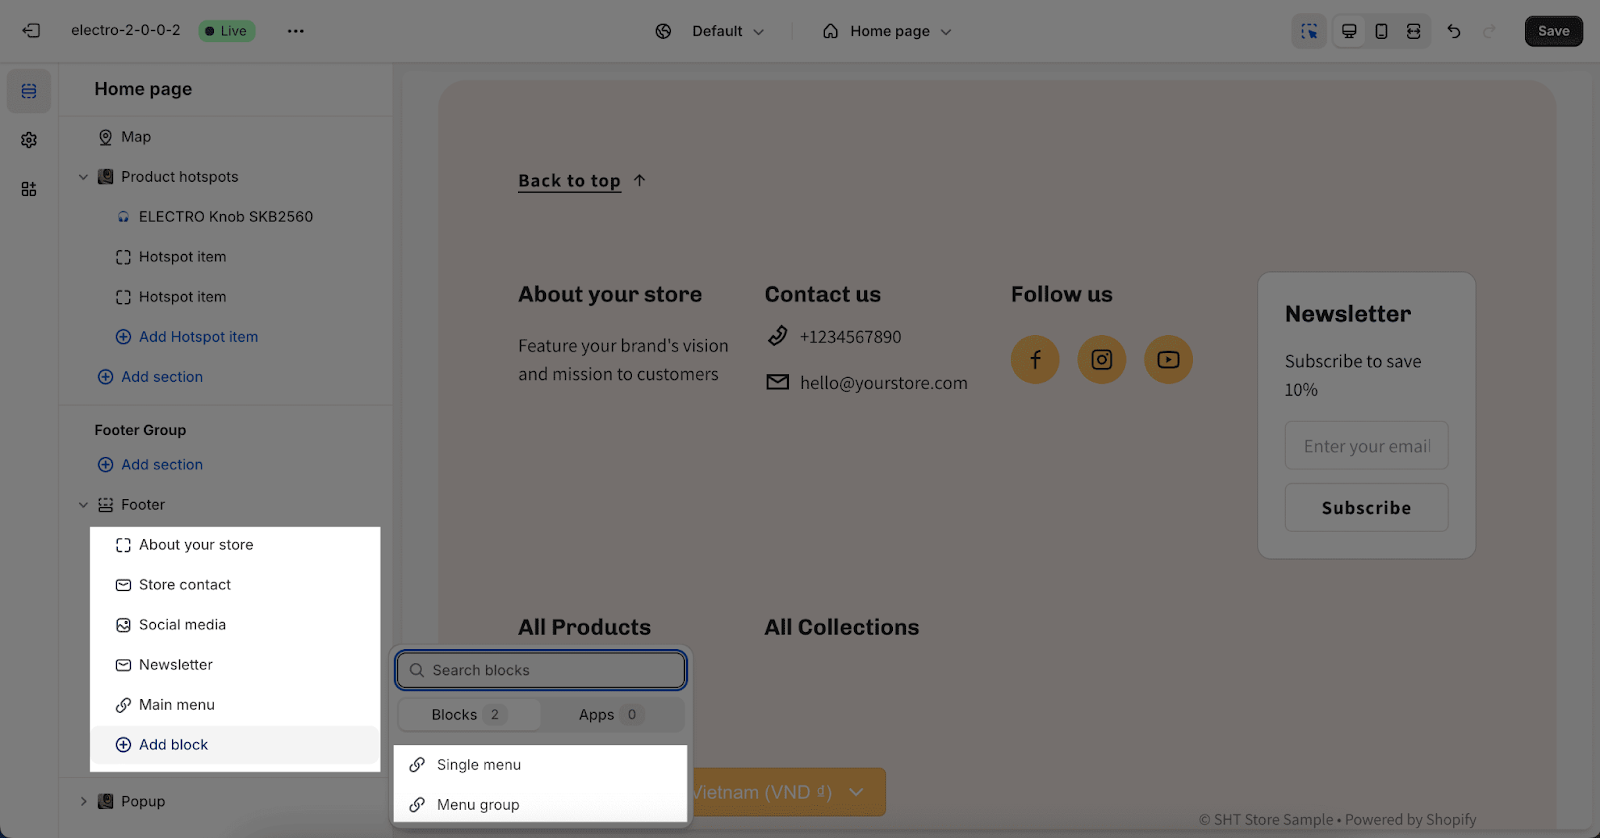
To access blocks, click on Add block in the footer section. You can add the following types of blocks to the footer:
Note:
- The number of these types is limited to 1
- Block: Store information
- Block: Store contact
- Block: Newsletter
- Block: Social media
- These blocks can be added unlimited on the section
- Block: Menu Group
- Block: Single menu
To customize a block in the Footer section, click on the block to start editing.
Store Information
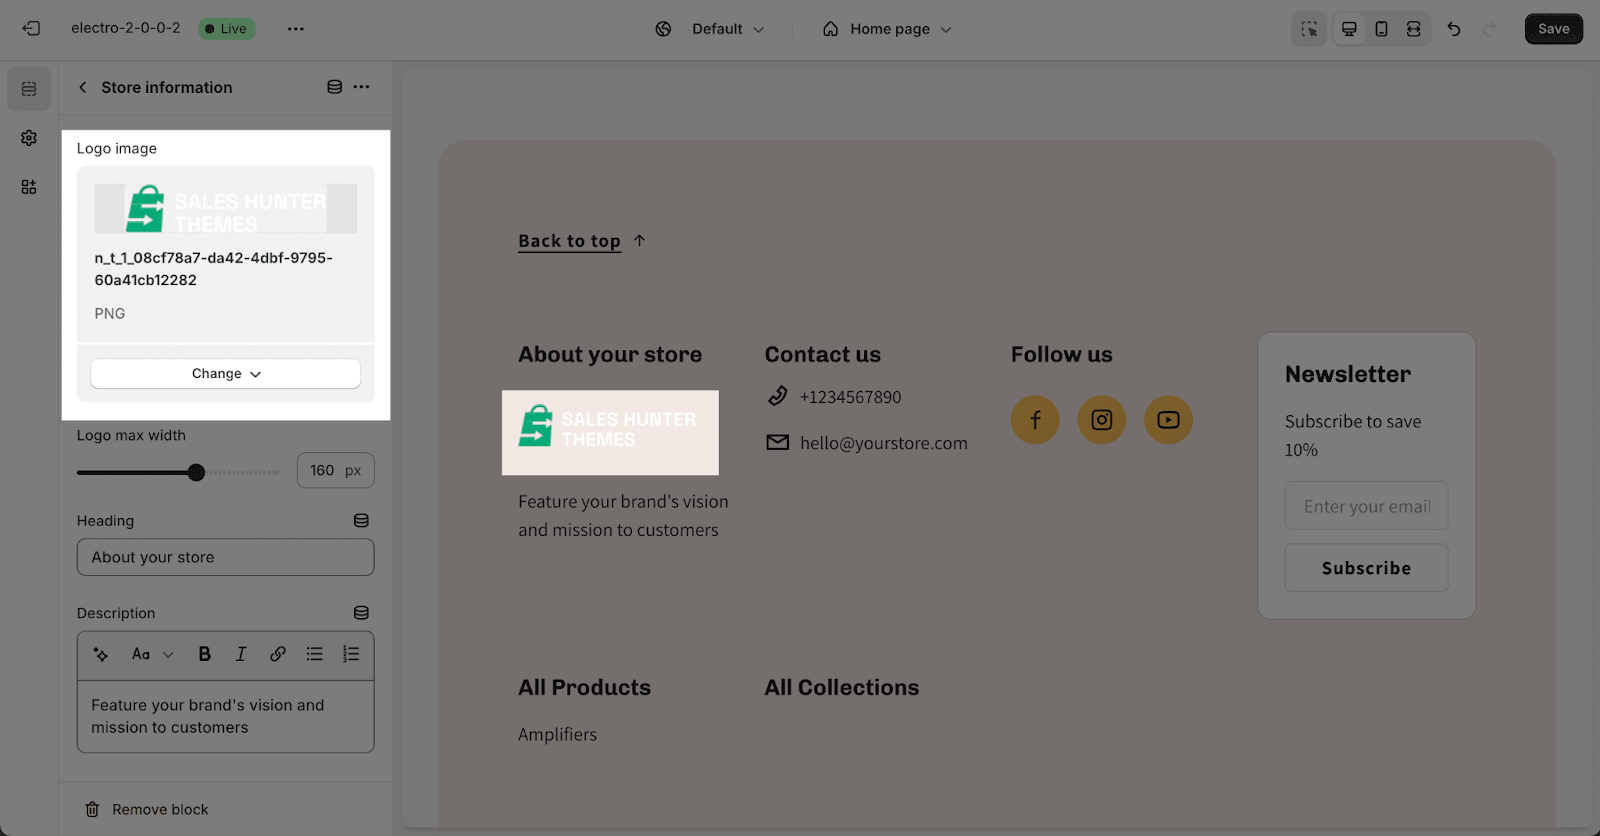
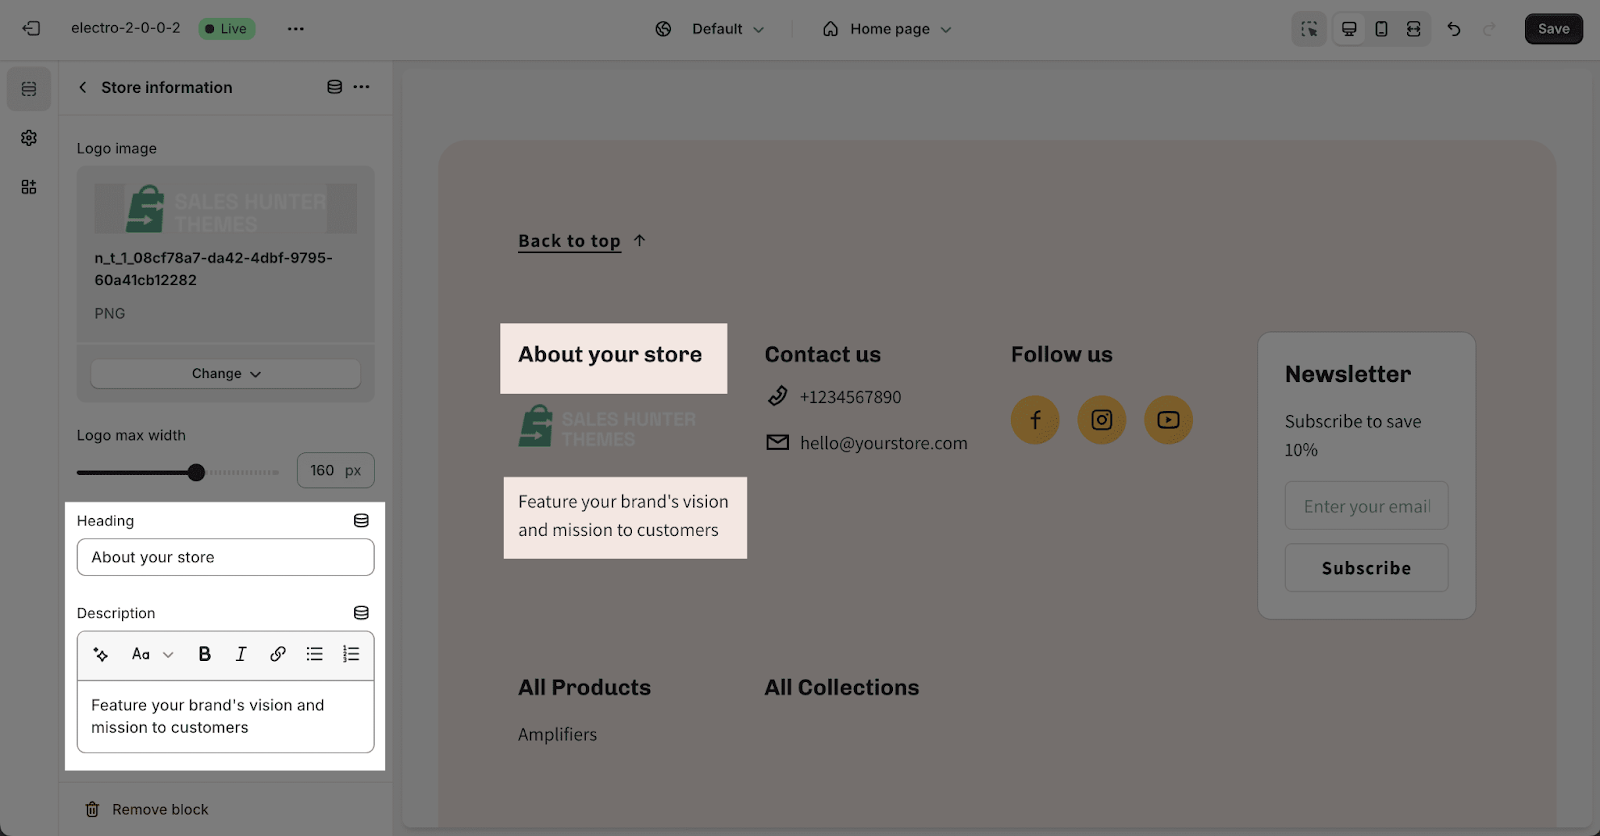
To add a Footer logo image, click the Select image button. The media manager will open. Upload the logo from your computer or select it if it’s already uploaded to Shopify Files.
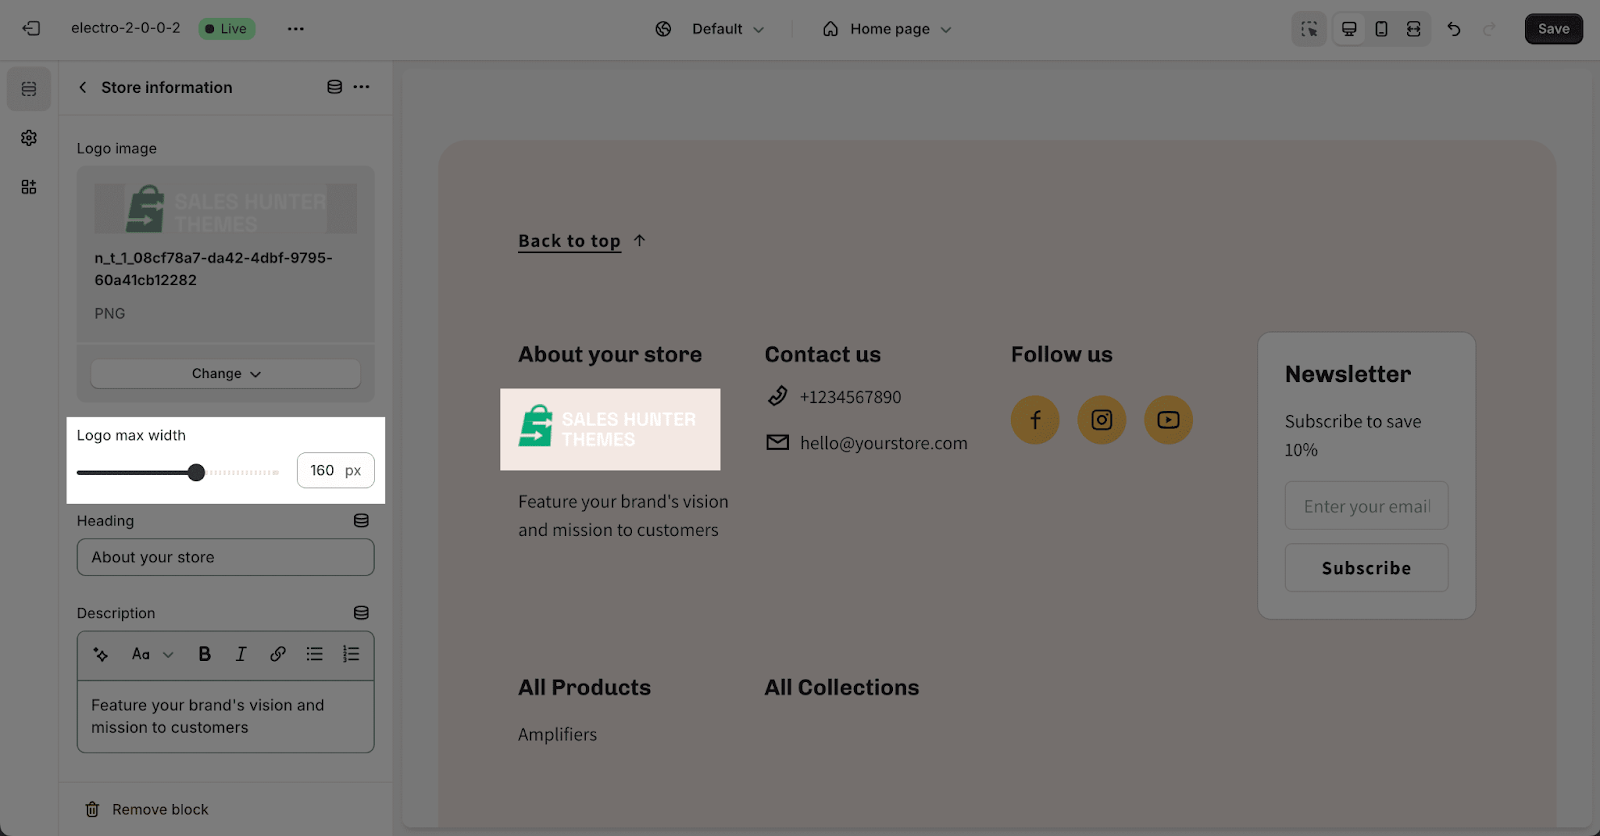
Then, you can adjust the Footer logo’s max-width: comes from 40px to 240px with the default is 160 px.
You can also add a heading and description for the Footer section. To remove the text, simply delete the content in the text box.
Store Contact
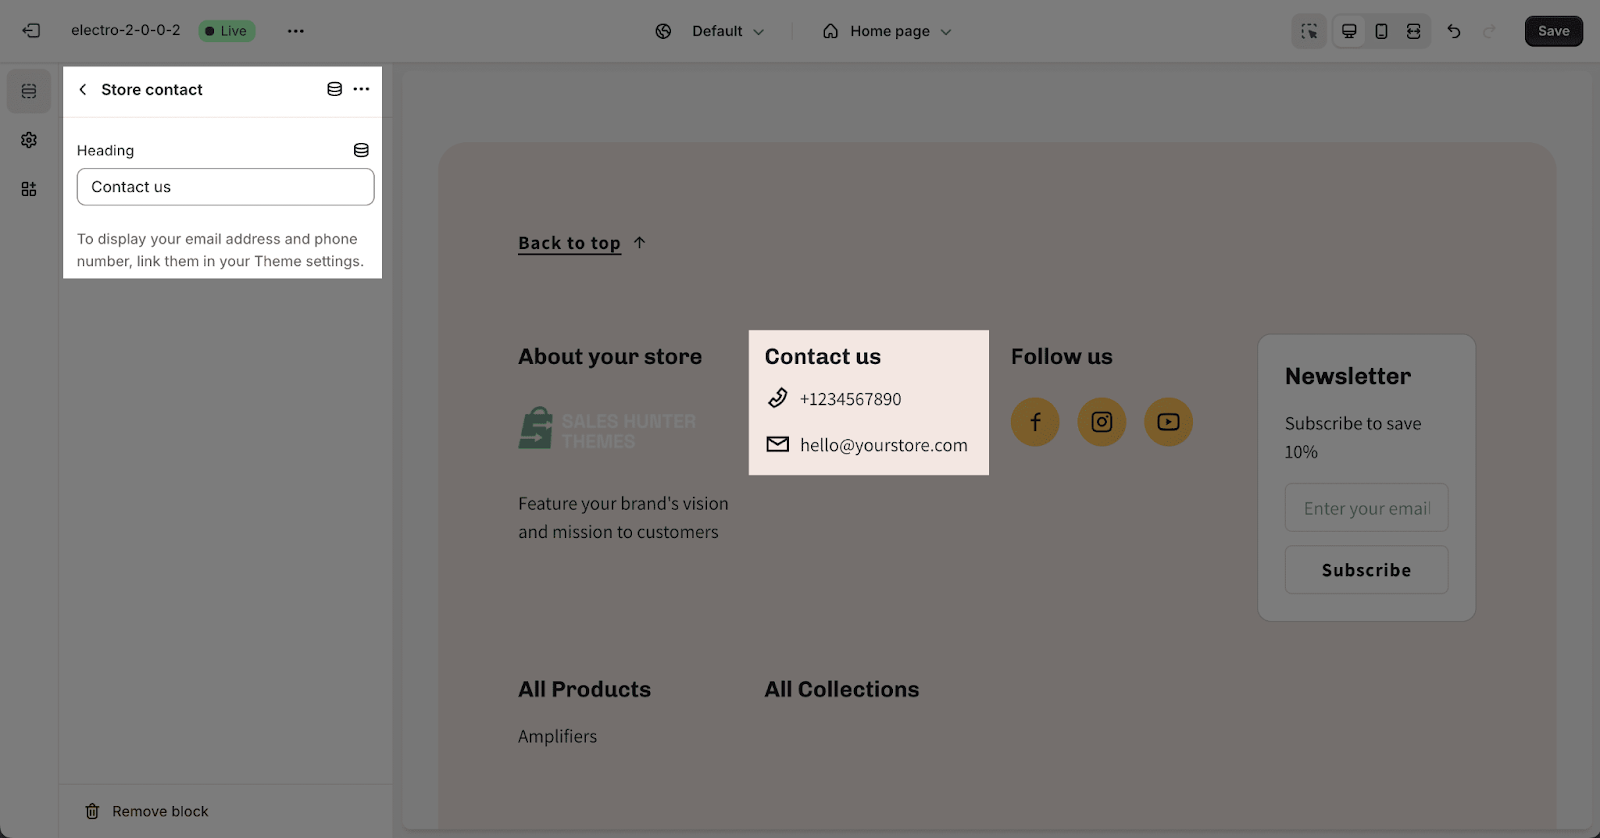
This section allows you to input heading text for the Footer. You can also enable or disable the display of your email address and phone number. To display them, set them in your Theme settings:
- Access Theme settings from the menu bar.
- Click on the Email address and phone number section.
Social Media
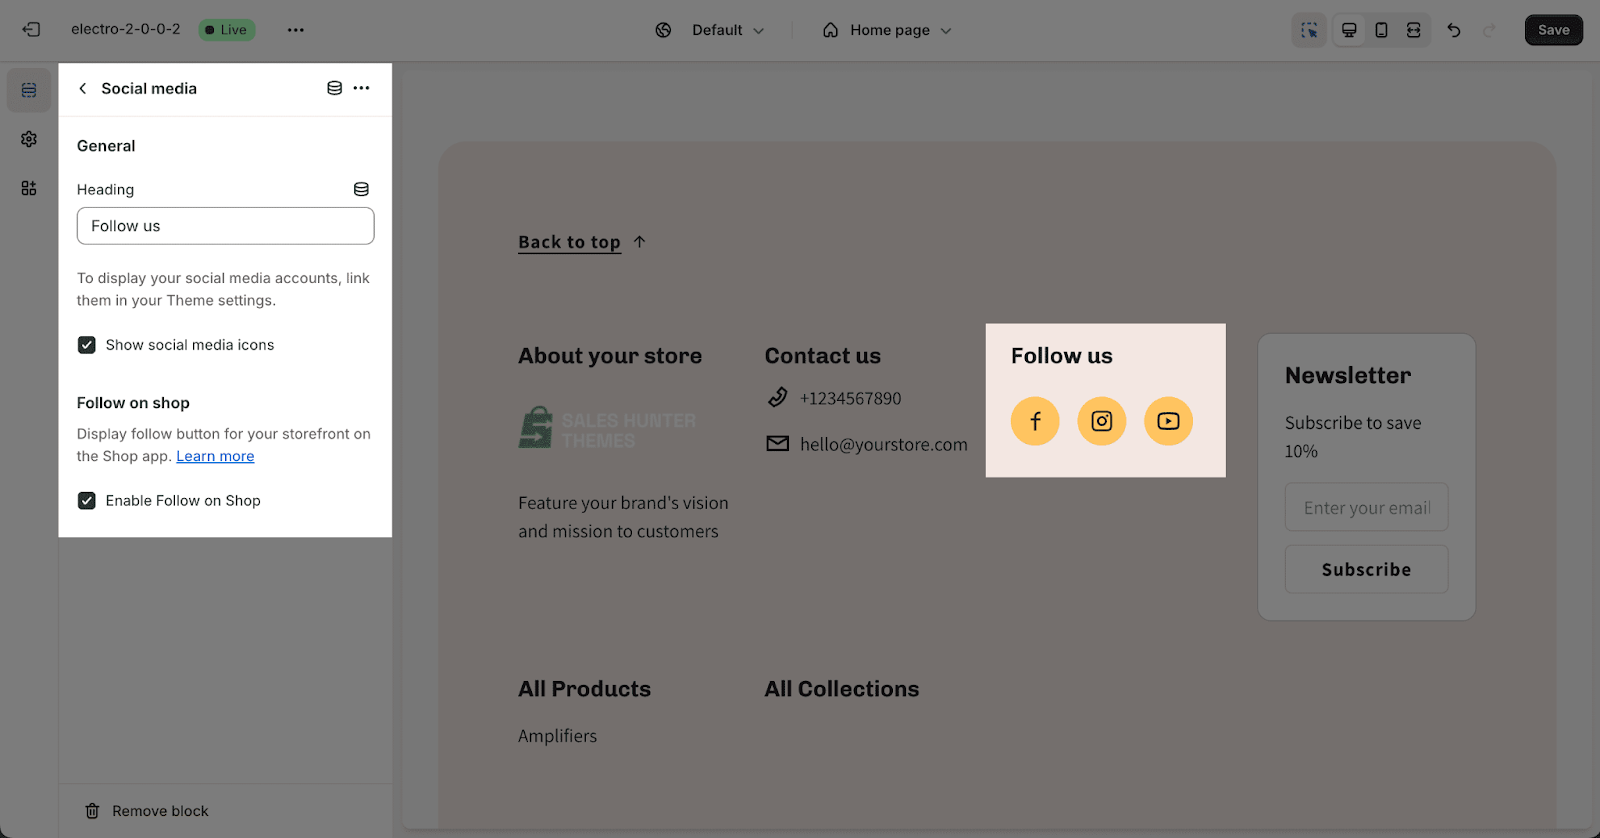
To set up the Social Media icon on the Footer section, please follow these steps:
- Step 1: You can enter the heading text for the social media icon here.
Note that to display your social media accounts, you must link them in your theme settings.
- Step 2: After that, you can enable or disable to show social media icons.
Newsletter
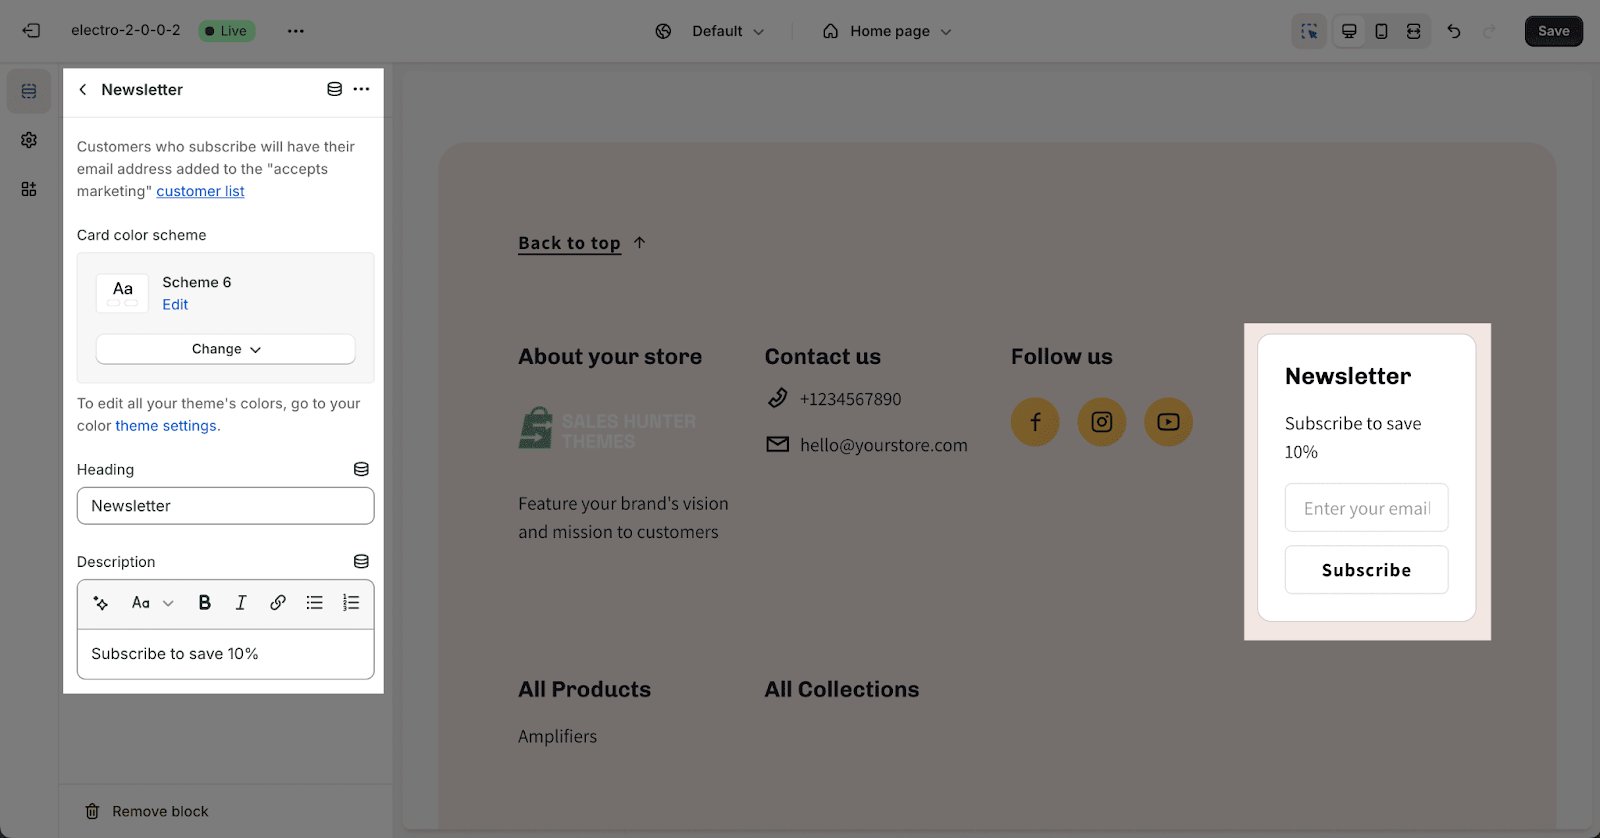
To customize the newsletter, you can follow these steps:
- Firstly, the Electro theme allows you to enable or disable the newsletter in the footer.
- Afterward, you can enter the heading text and description for the newsletter here.
- If you want to remove the text part, simply delete the content in the text box.
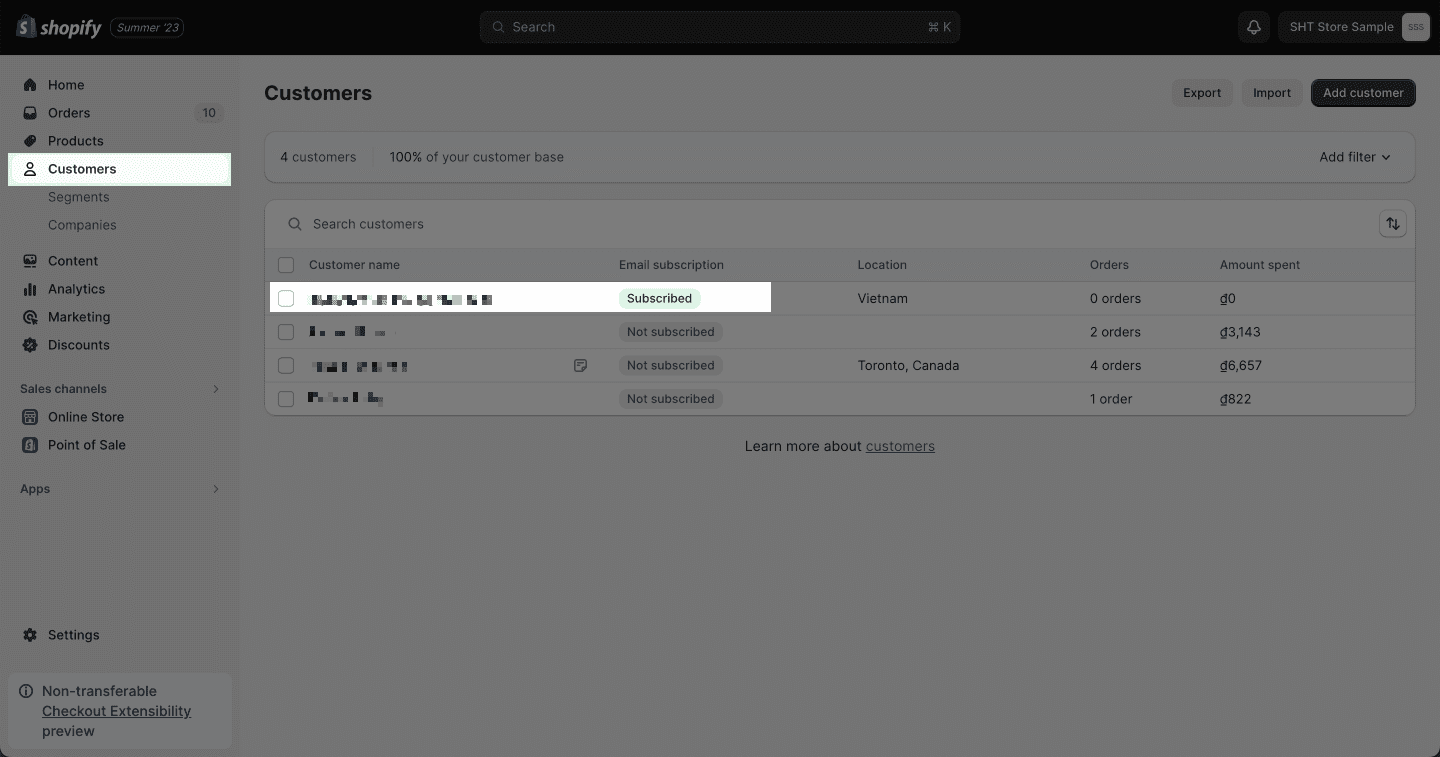
Once customers submit the newsletter form, their information will be stored in the Shopify admin > Customers.
Important: Each email address can be submitted once in this section.
Single Menu
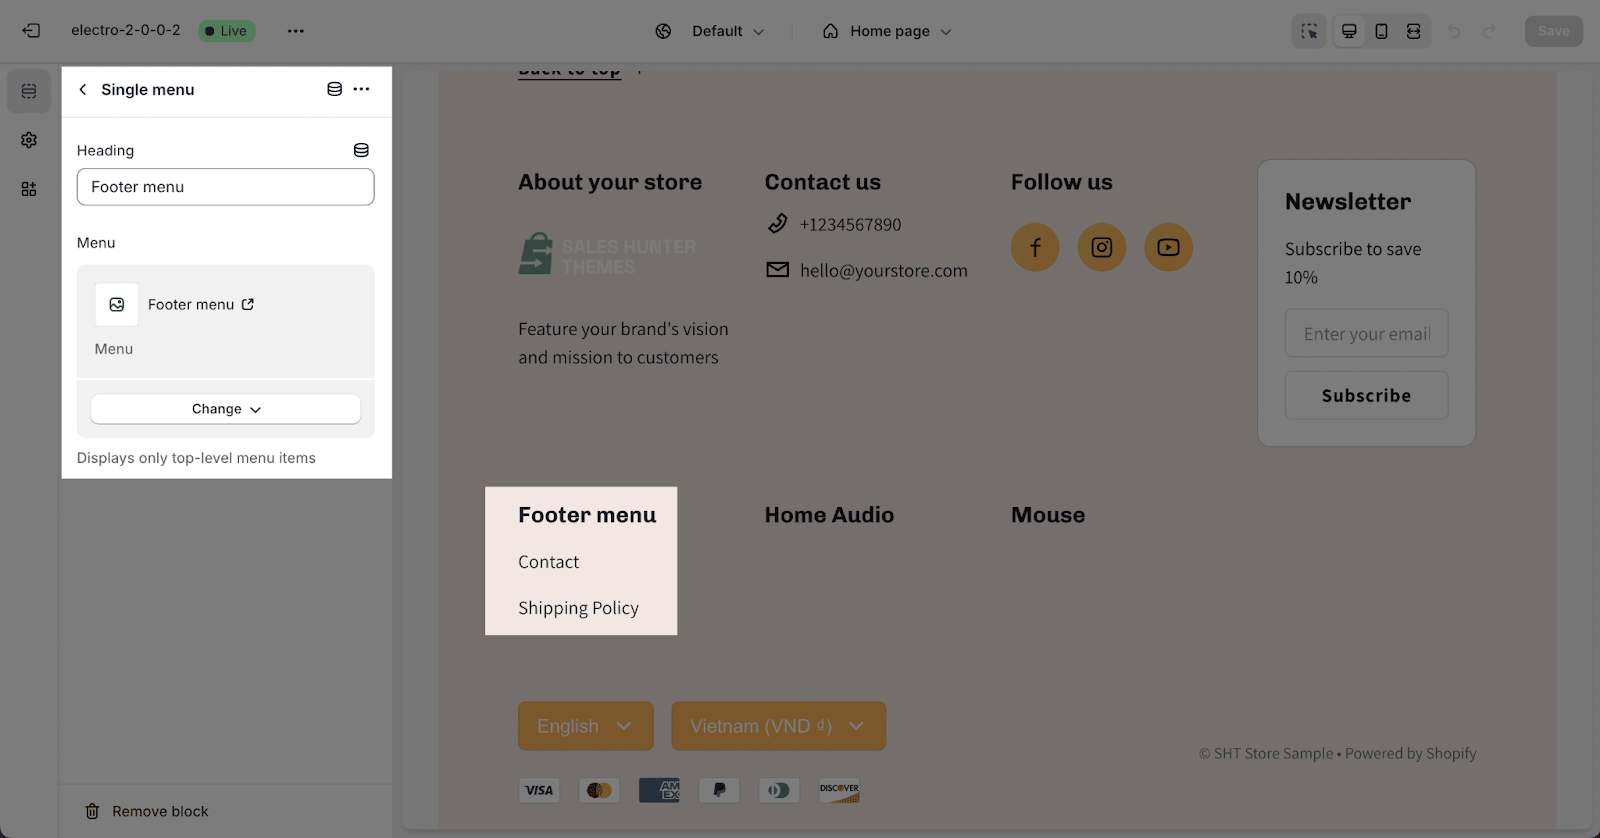
In the Single Menu, you can add a heading for the menu by filling in the Heading placeholder. Leave this field blank if you want to remove the heading. Choose the menu to show by clicking the Change button.
Menu Group
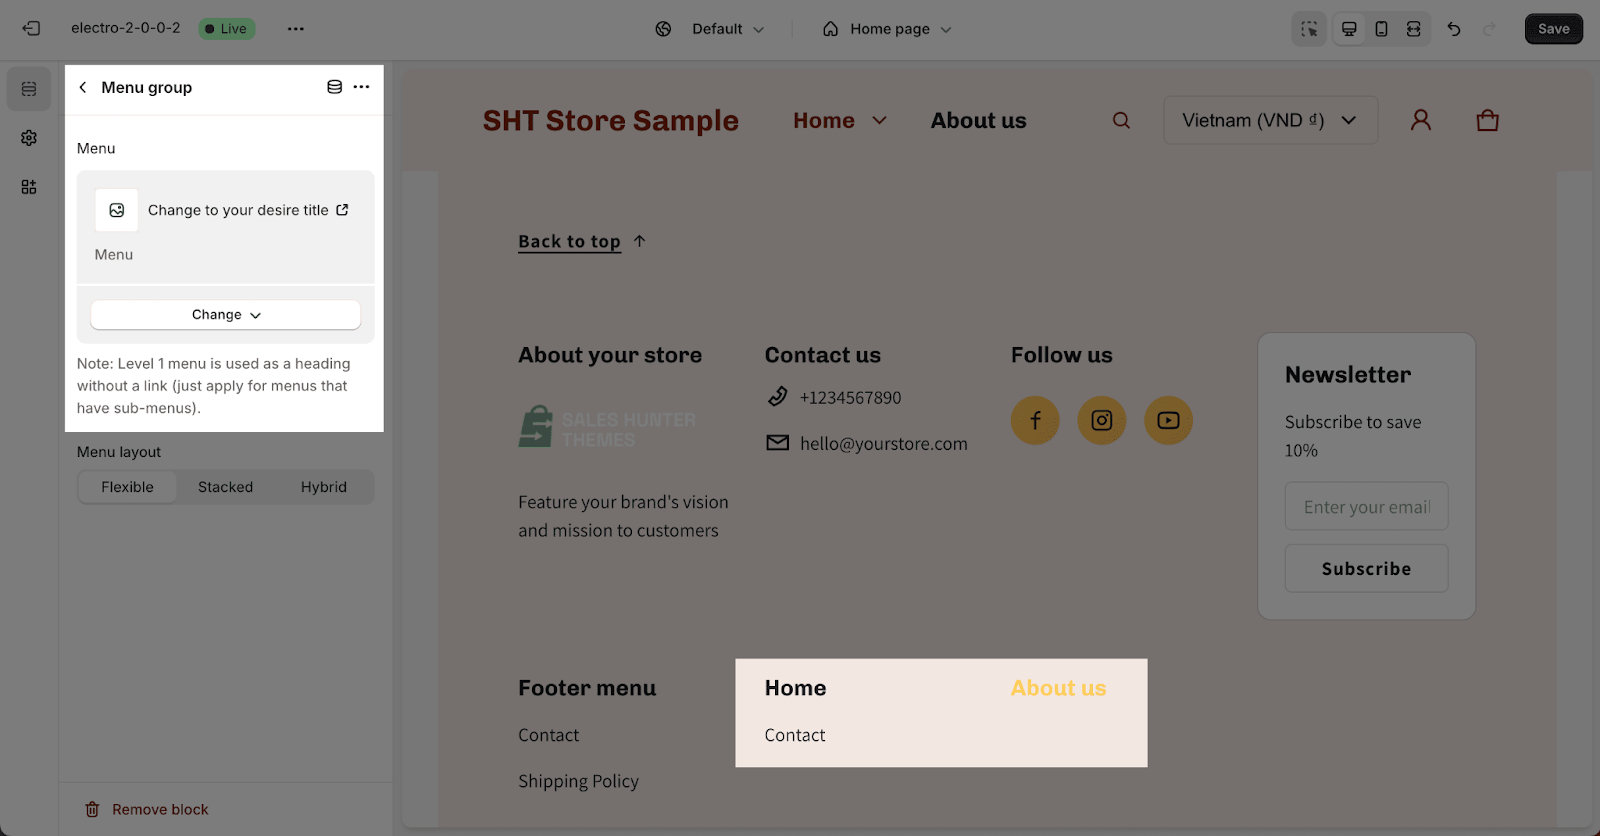
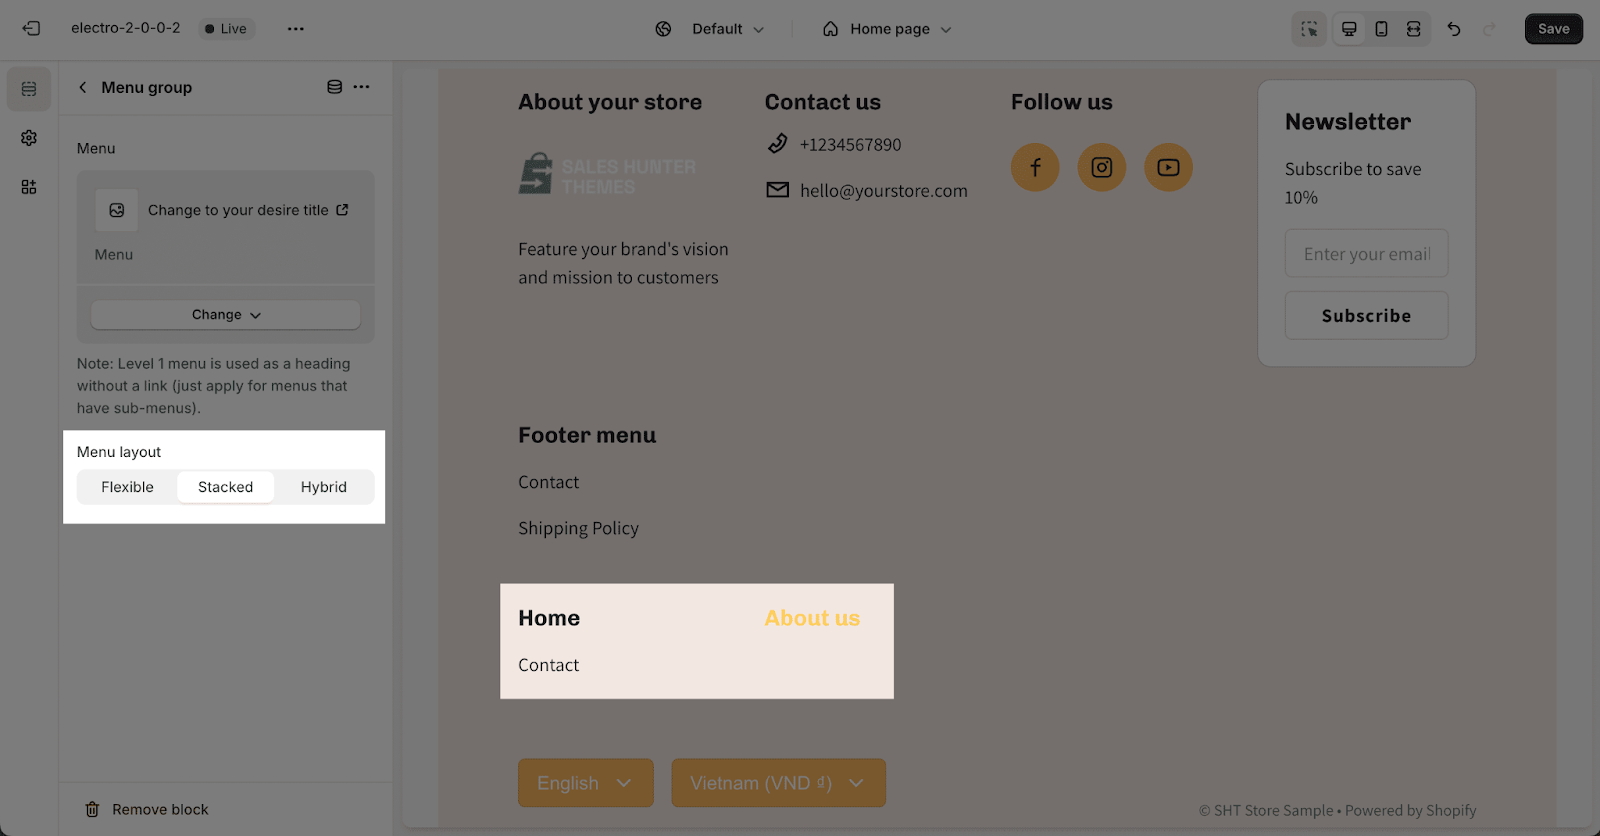
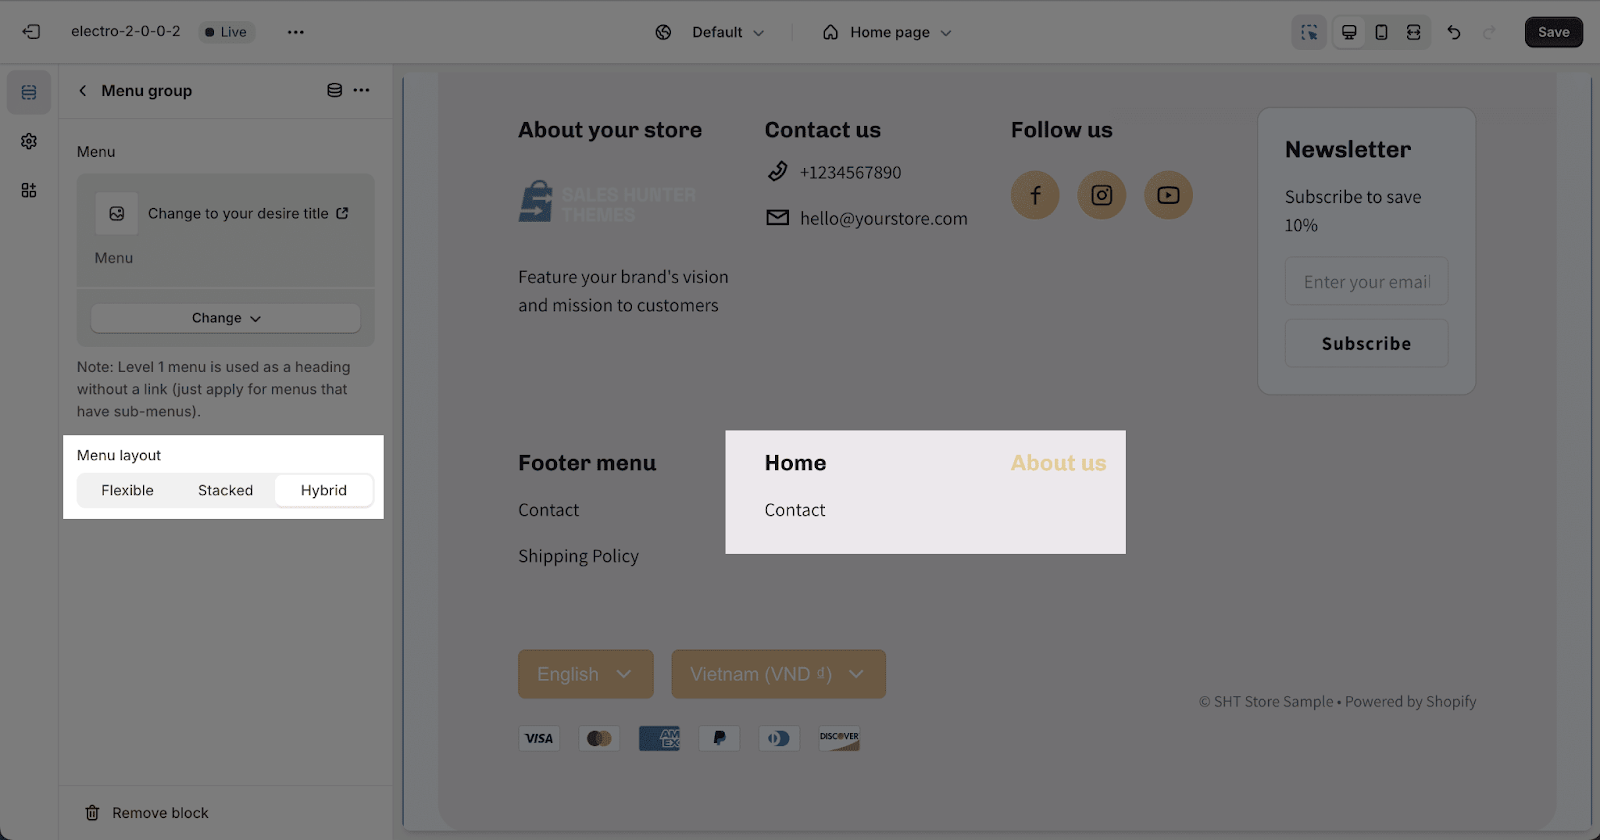
In the Menu Group, you can:
- Choose the menu to show.
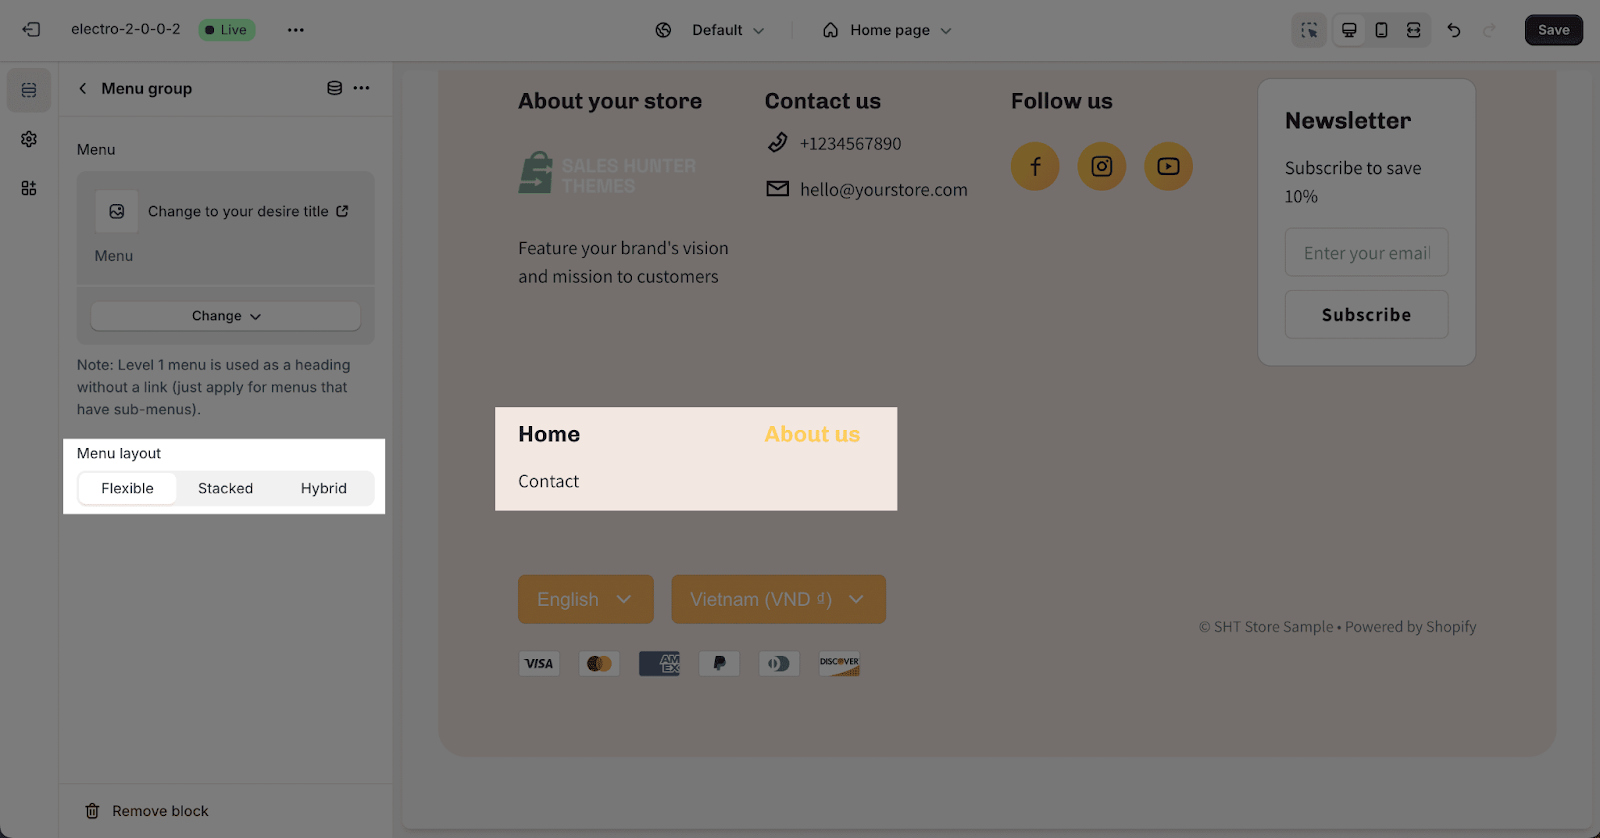
- Choose the layout for the menu display:
- Flexible
- Stacked
- Hybrid
Frequently Asked Questions
Overview
| What is the Electro footer logo max-width? | 160px by default |
| Can I insert Electro footer sections on other parts of the website? | Yes |
1. What is the footer of a website?
Website footer is the section of content at the very bottom of a web page, as this is the place storing all the air.
2. What should be included in the Electro footer section?
Store Information, Contact Details, and Newsletter, along with other functional features, including editing Currency, choosing languages, presenting payment methods, and providing quick navigation to different sections on the online store.
