How to Edit Electro Header
About Header Section
| Recommended Logo Size in the Header? | 280 x 80px |
| Type of image should I add as a Logo? | PNG |
| Where can I edit the phone number and email address on the header? | Header > Theme Settings
|
In this knowledge base article, you will know how to set up the Header in Electro theme.
How To Access Header Section
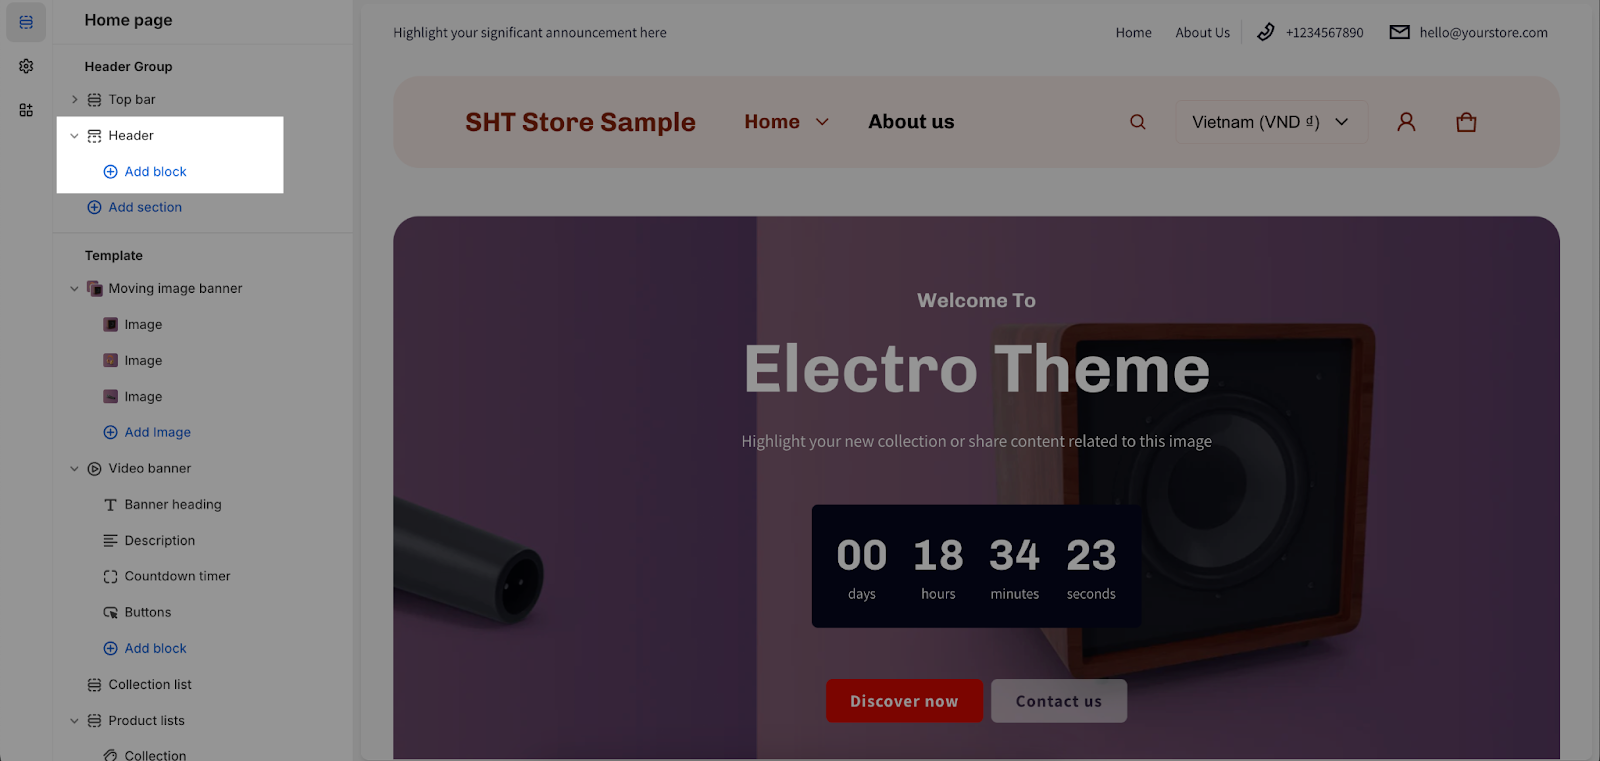
From any page in your Electro Admin Dashboard, please visit Header Group > Header.
Please note that, you still can add more sections within the header group, however it’s not recommended, as the header will remain the same on ALL pages, therefore only default and brand information should appear in the Header Group.
The Header is undeletable, but you still can erase the items within the Header.
How To Configure Header Section
General
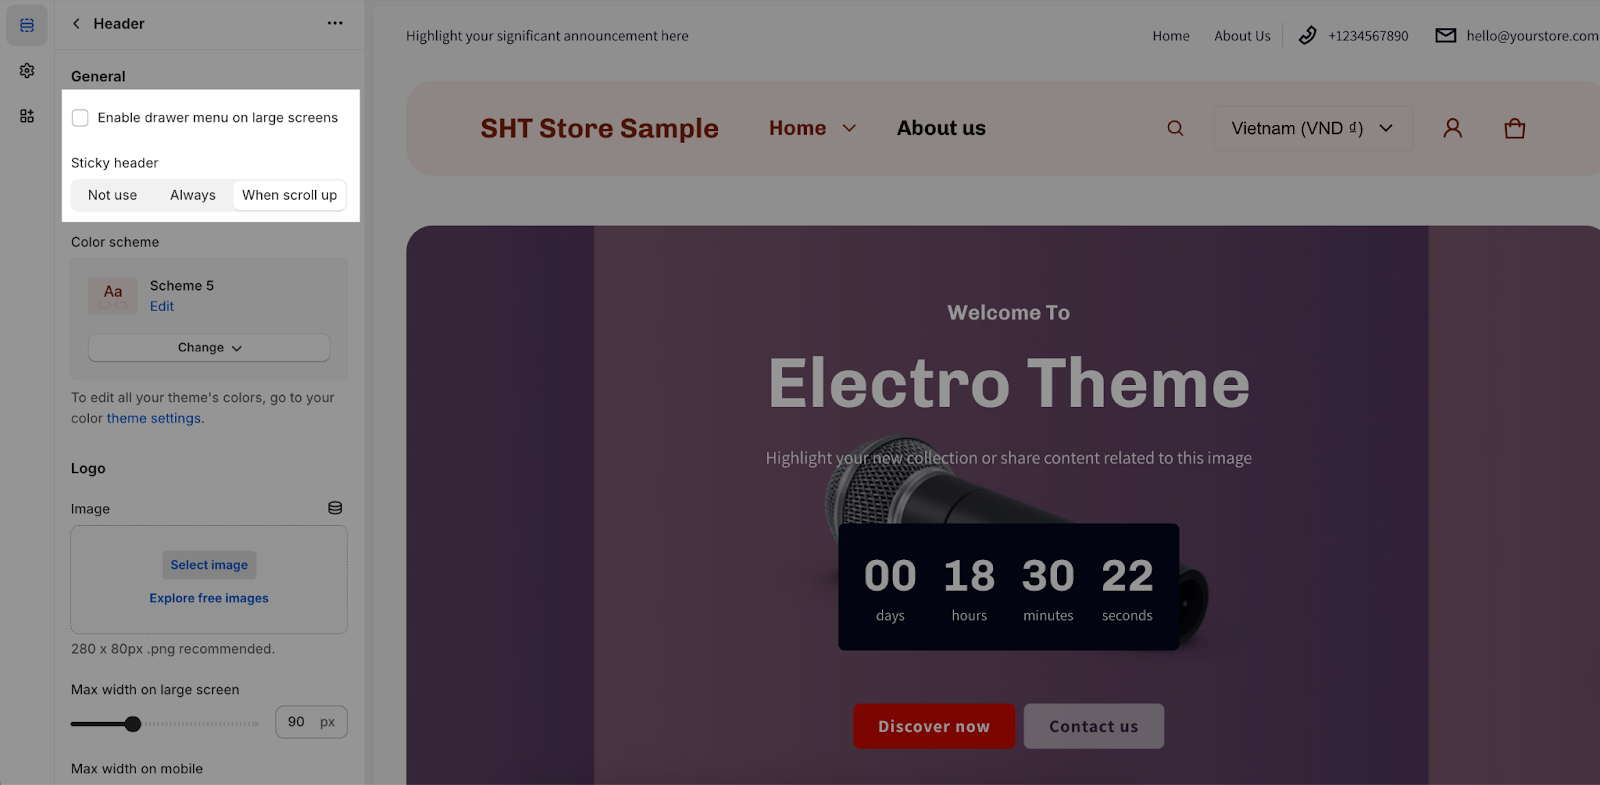
The Electro theme lets you activate or deactivate the drawer menu on large screens and sticky header.
The drawer menu is more commonly used on mobile devices to save screen space; additionally, when enabled on a larger screen, it can provide a clean and minimalist look to the store design.
You have 3 options for the Sticky header:
- Not use: The header will remain in its original position and won’t scroll with the page.
- Always: The header will be fixed at the top of the page, even when scrolling.
- When scroll up: The header will be hidden while scrolling down but will appear when you scroll back up.
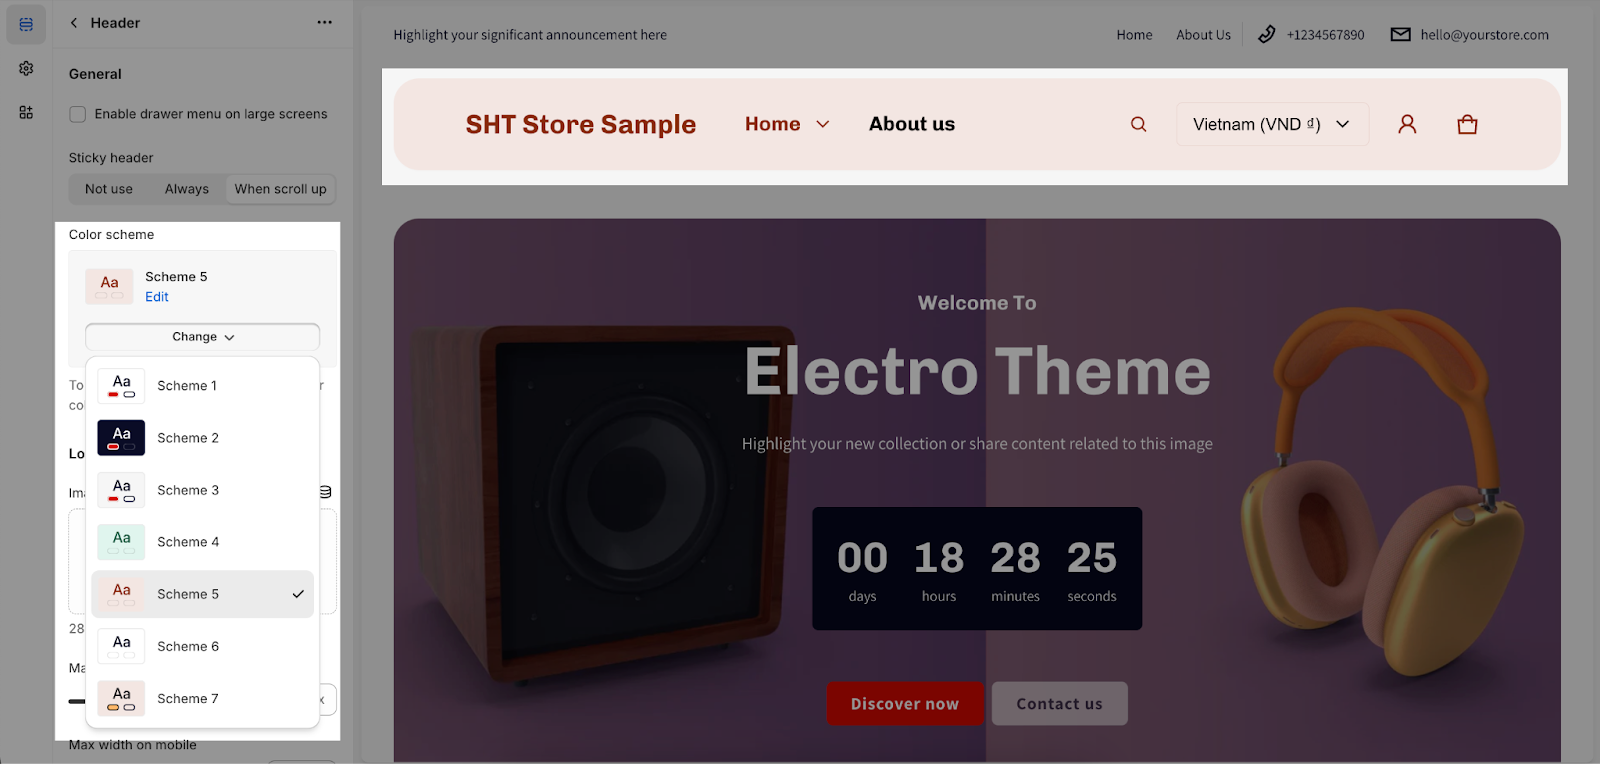
Then, you will be able to choose the color scheme for your header. To modify or add a new color scheme, go to Theme Settings > Colors.
Logo
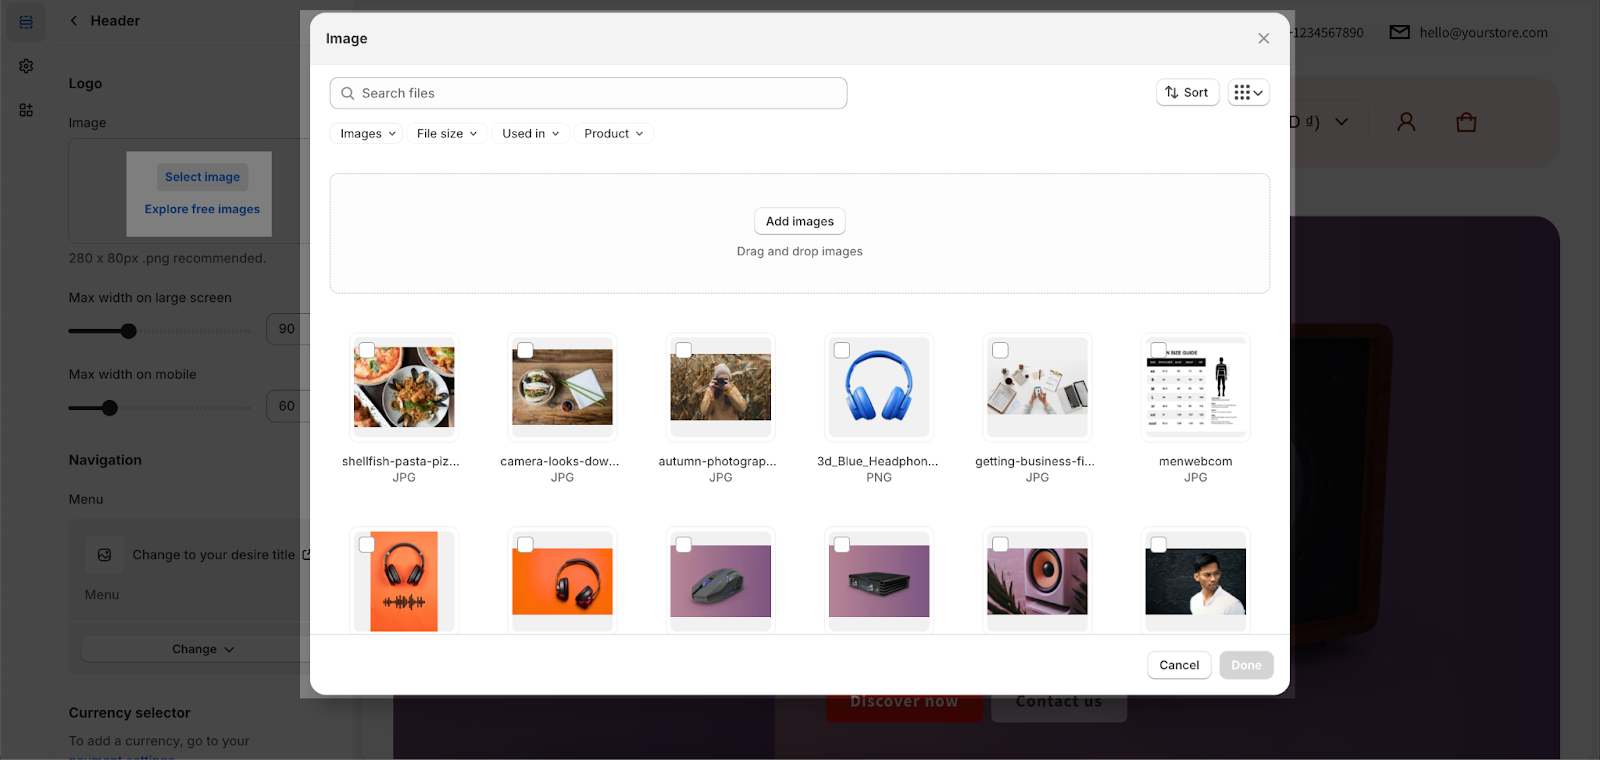
You can add the logo image in 2 steps as follows:
- Step 1: Click the Select image button. The media manager will open up. You can also explore free images from Shopify.
- Step 2: Drag and drop your logo, or select it if it is already uploaded.
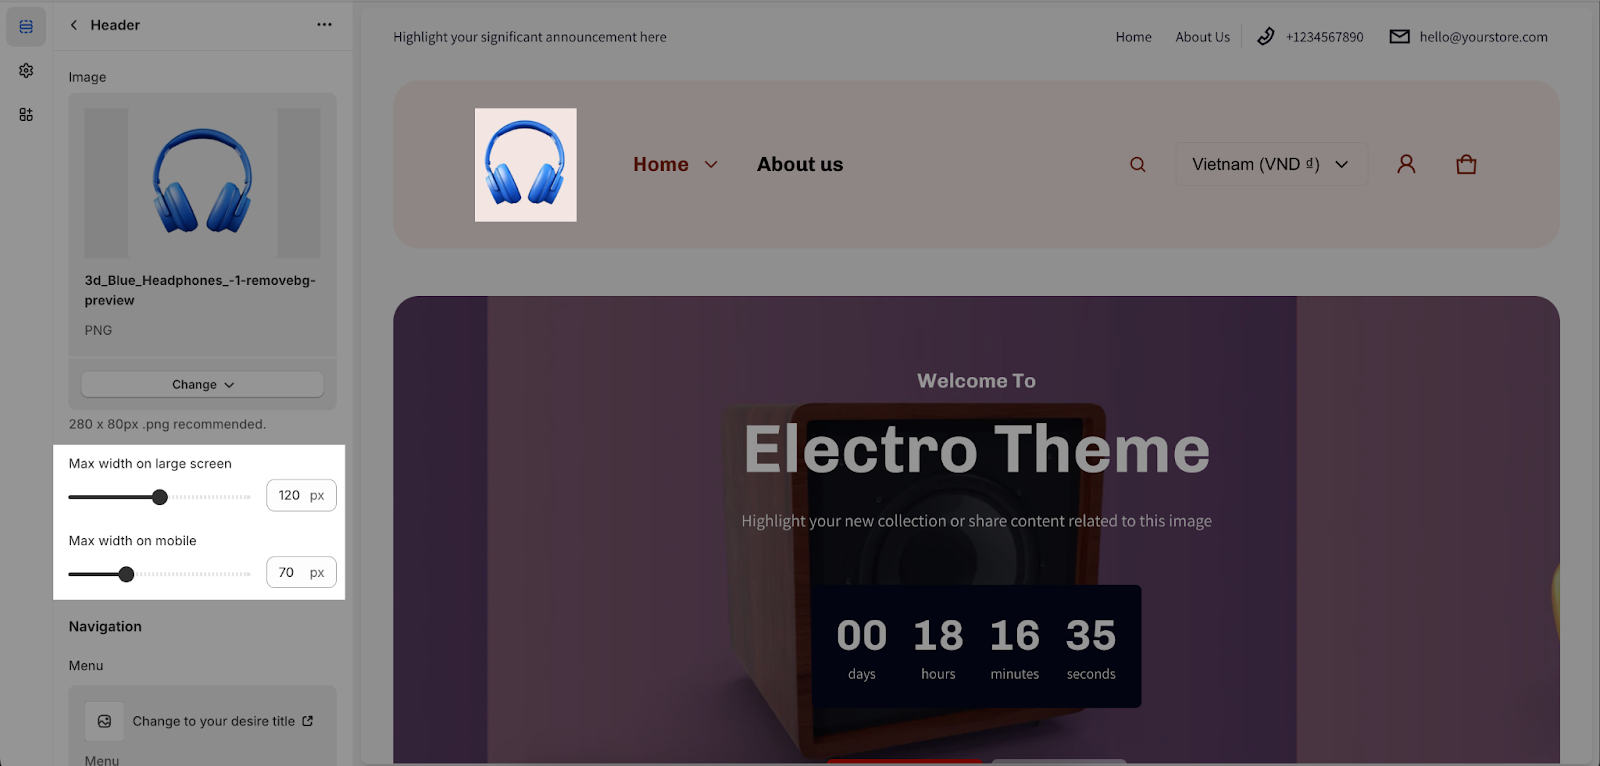
Note that you can adjust Logo max width from 40px – max 200px on a large screen and from 40px – max 140px on Mobile.
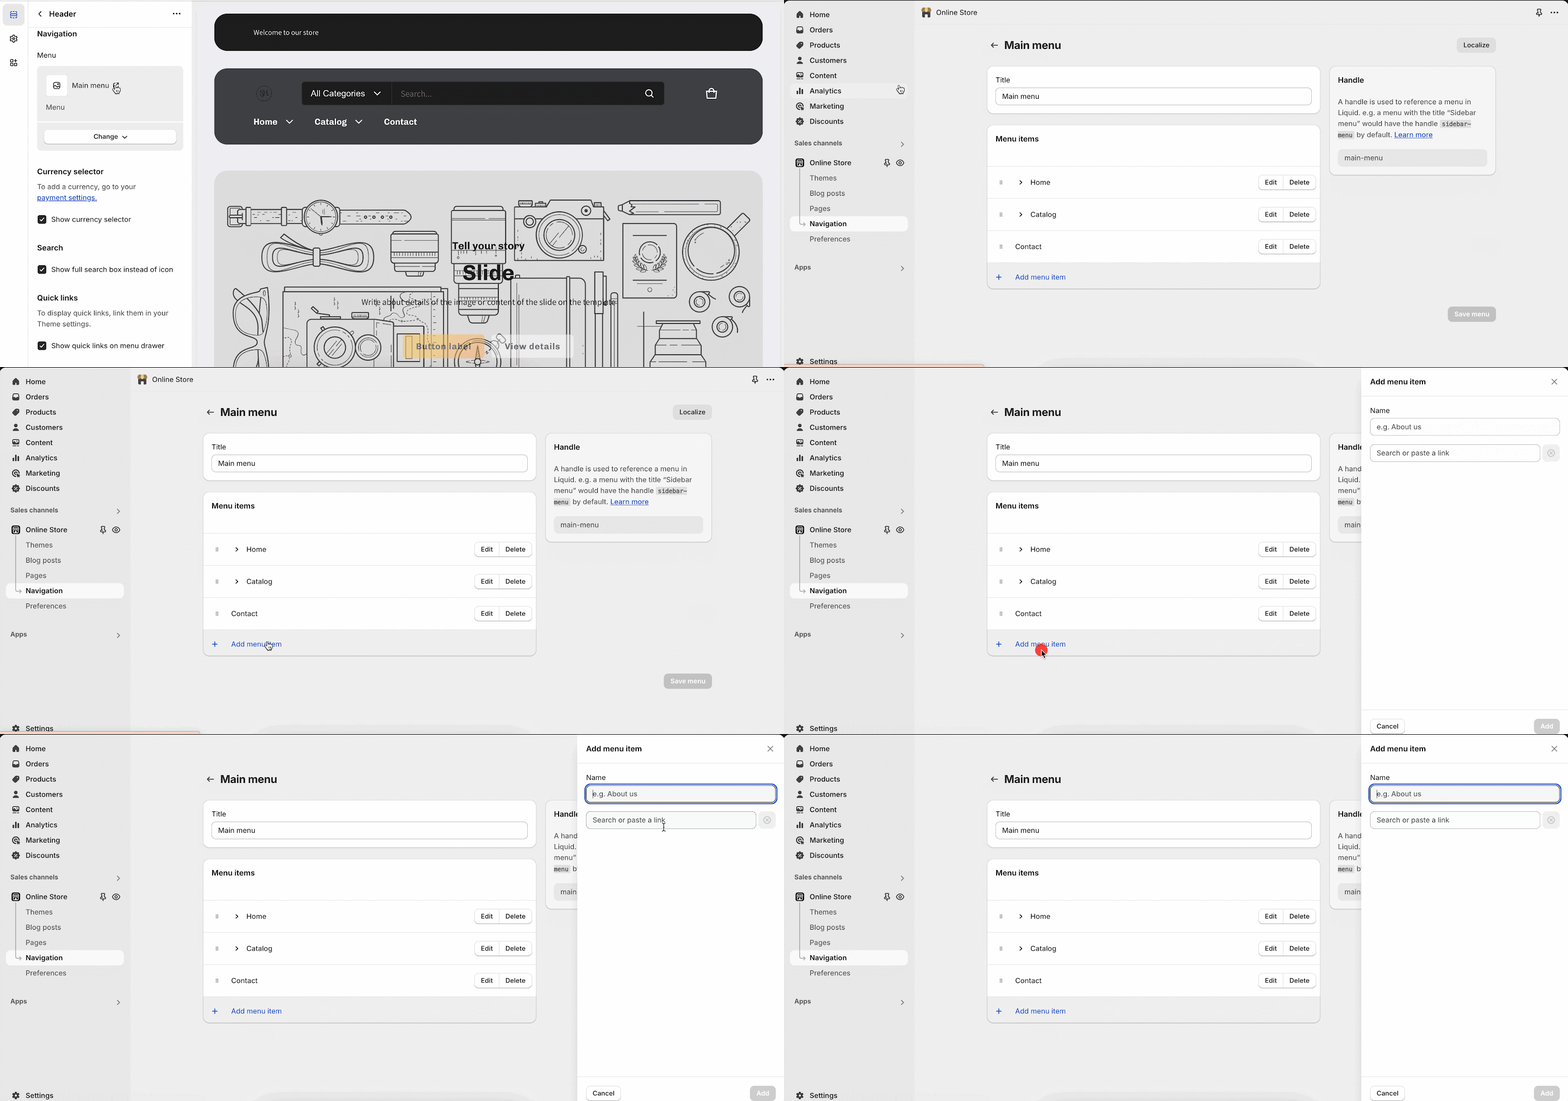
You can customize the navigation in 3 steps as follows:
- Step 1: Clicking on the Main menu, it will direct you to go to your Shopify store’s main menu page.
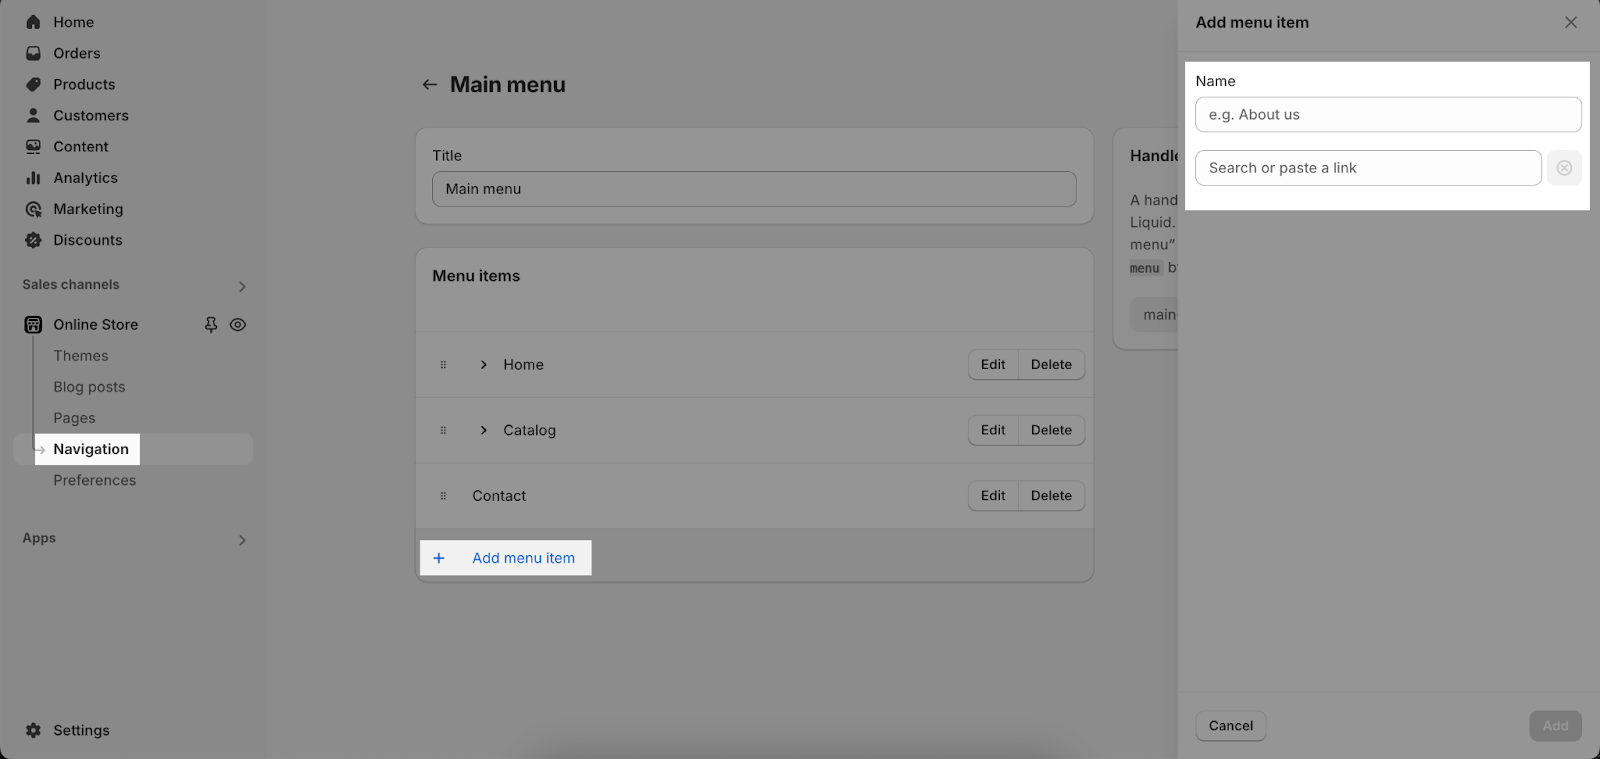
- Step 2: Click on the Add menu item then enter the menu item name and link
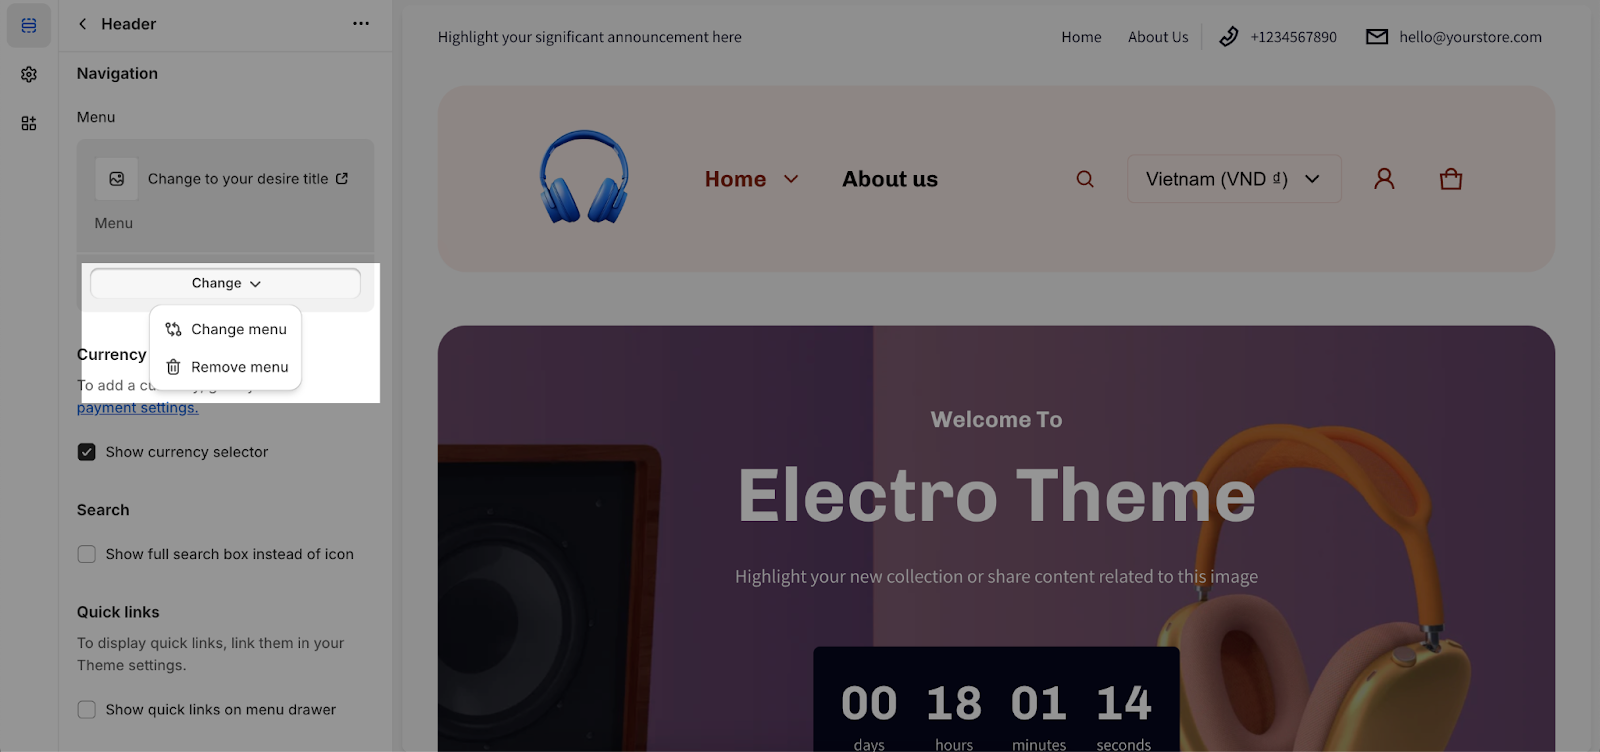
- Step 3: Clicking on the Change button, you will have 2 option here:
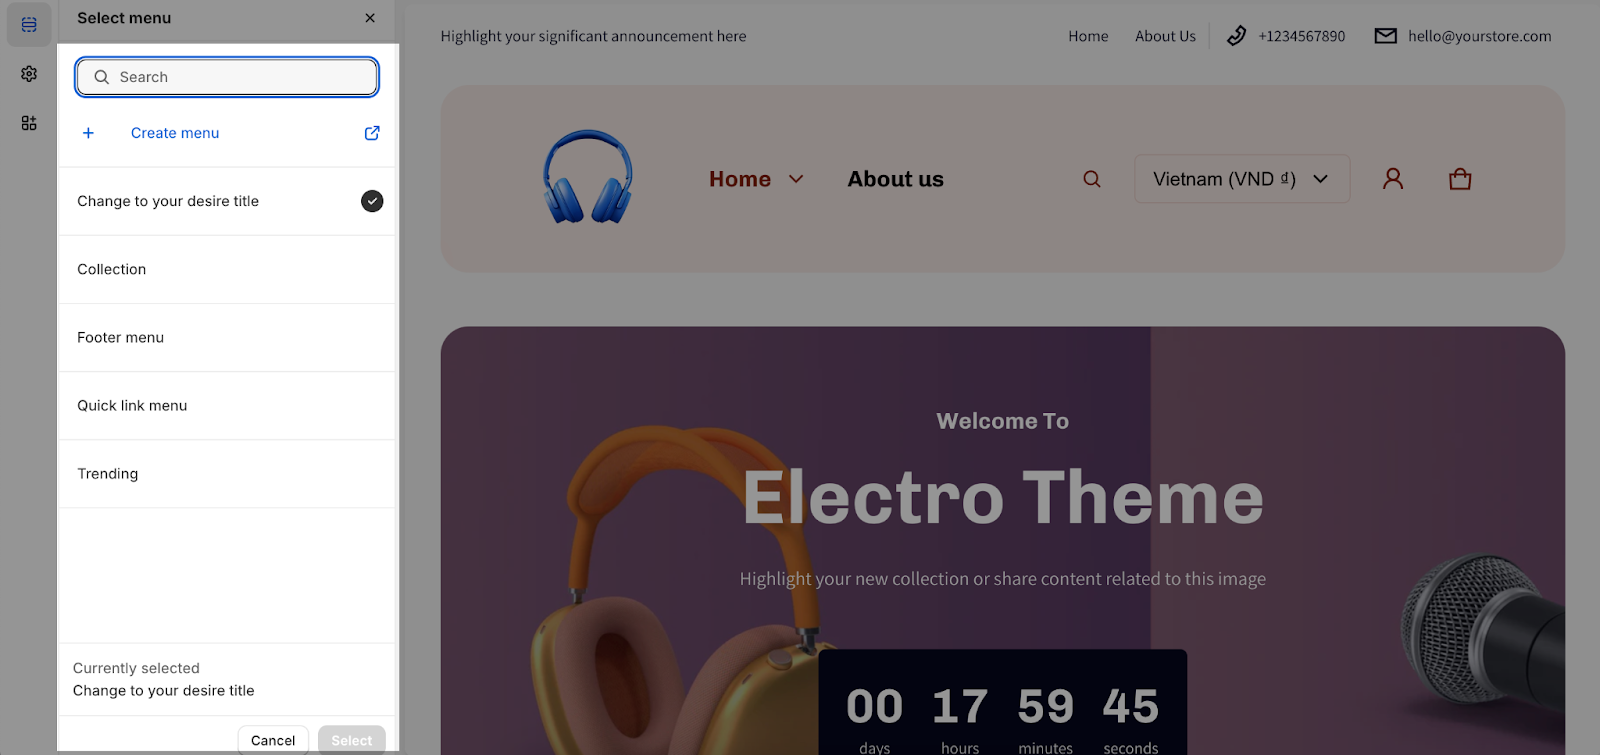
- Change menu: you can select the existing menu or create a new one
- Remove menu: remove the selected menu immediately.
Currency Selector
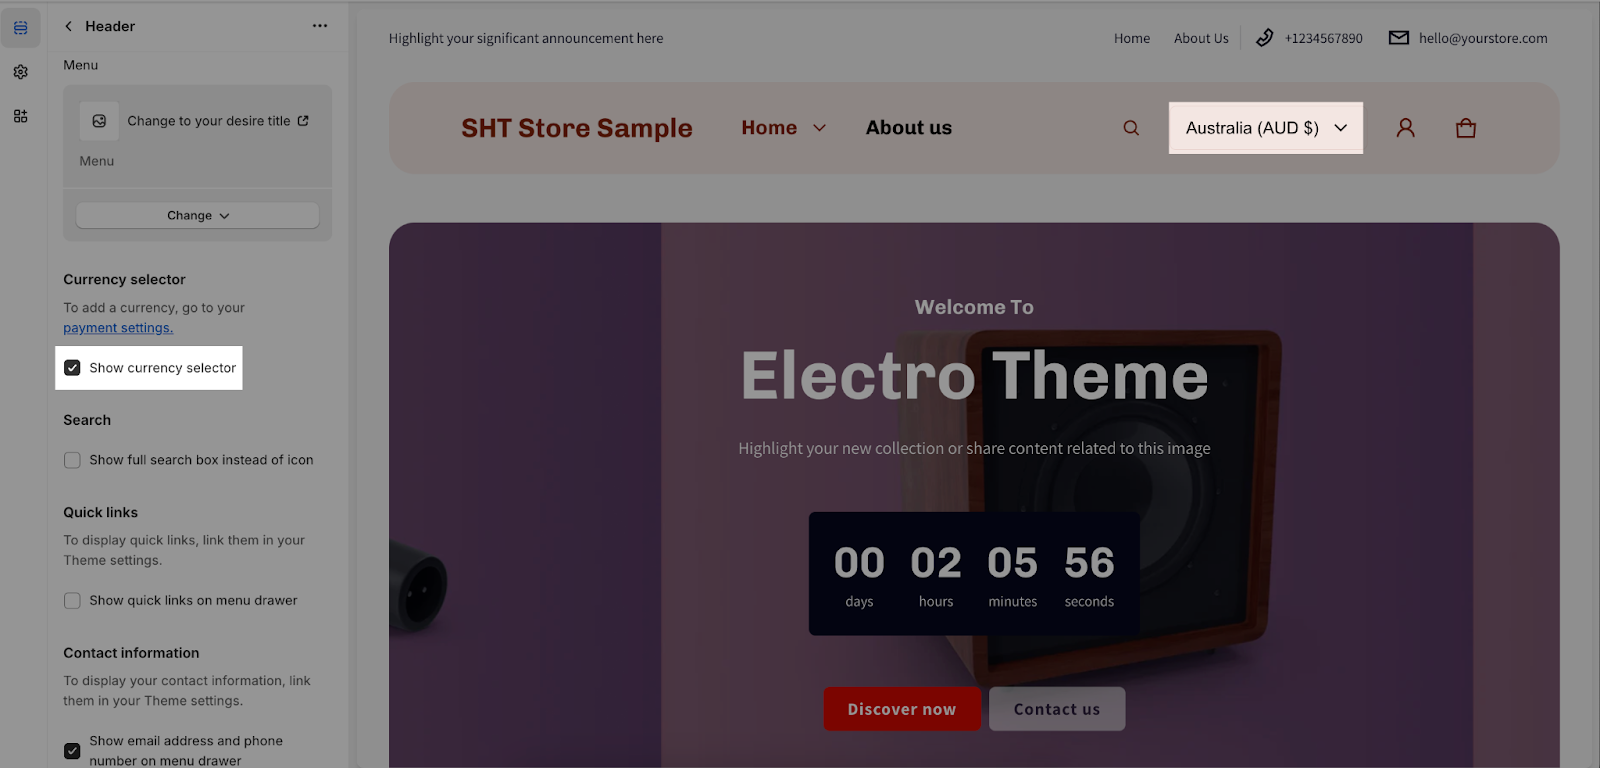
To enable the Show currency selector here, first, you need to add the currency in your Shopify store’s payment settings.
If the currency selector has been enabled, it will be displayed in the header, allowing customers to choose from the added currencies.
Search
You have the option to enable the full search box, which will display the entire search box rather than just an icon.
Login
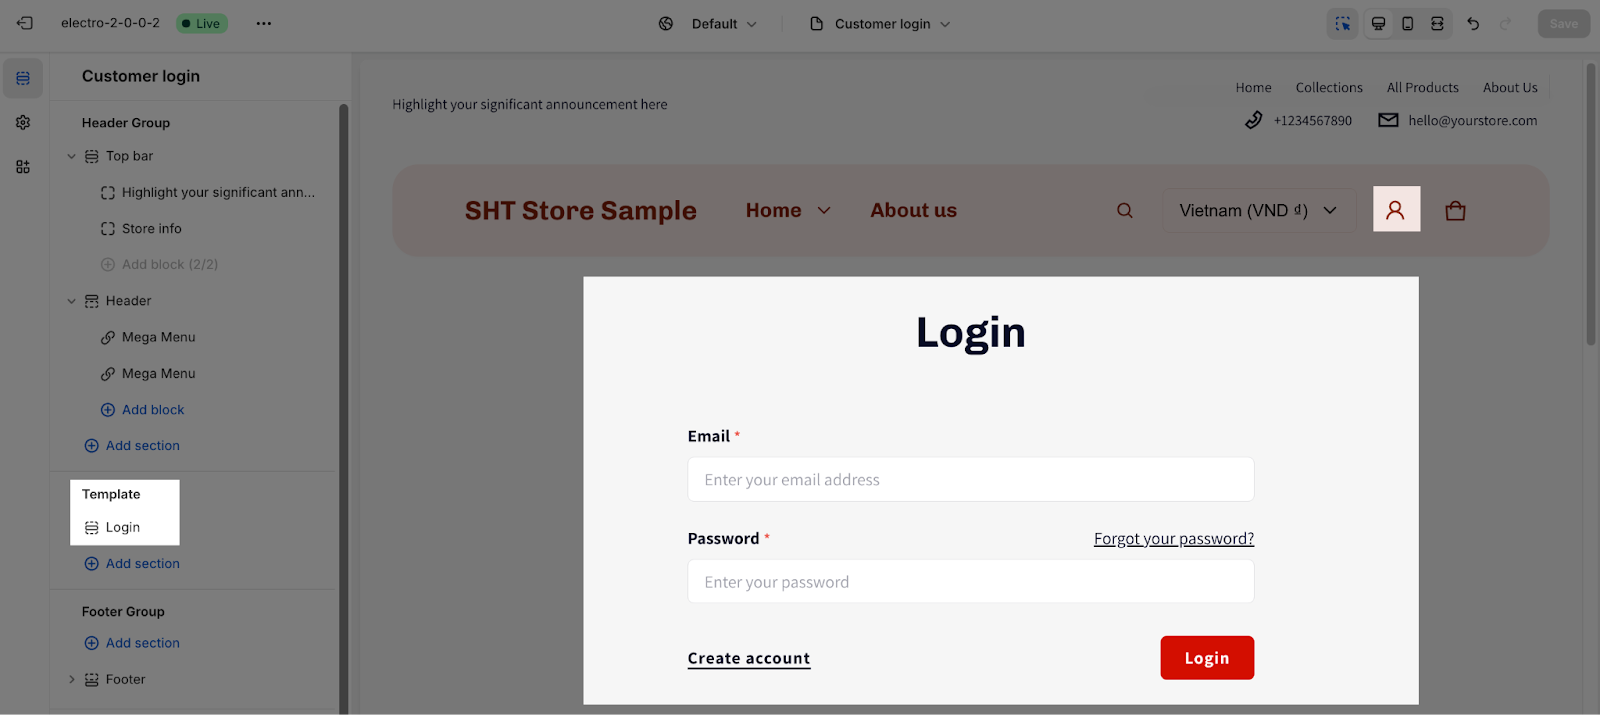
By clicking on the Login icon, your customers can access their account on your Shopify store. To login, customers must insert the Email and Password field and then hit the Login button.
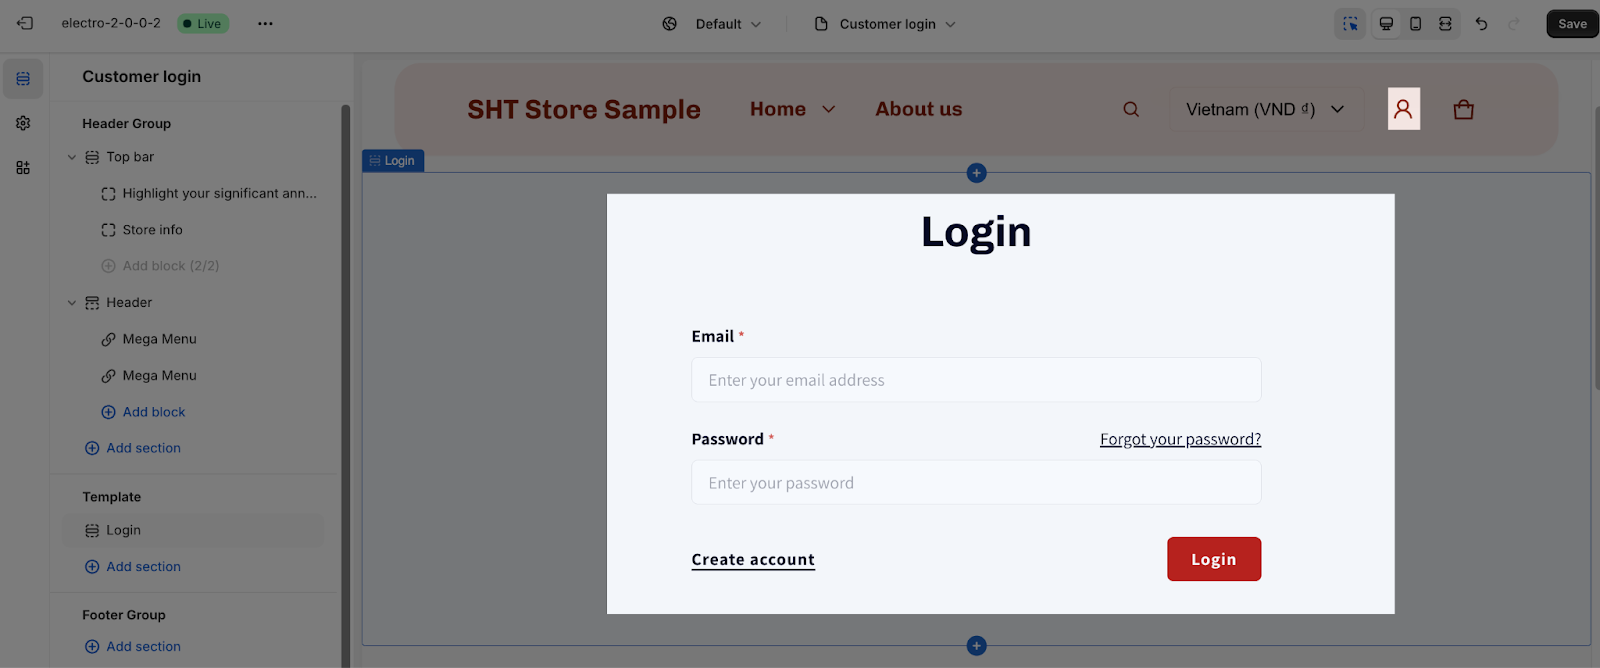 To customize the login section further, you can go to Template > Log in.
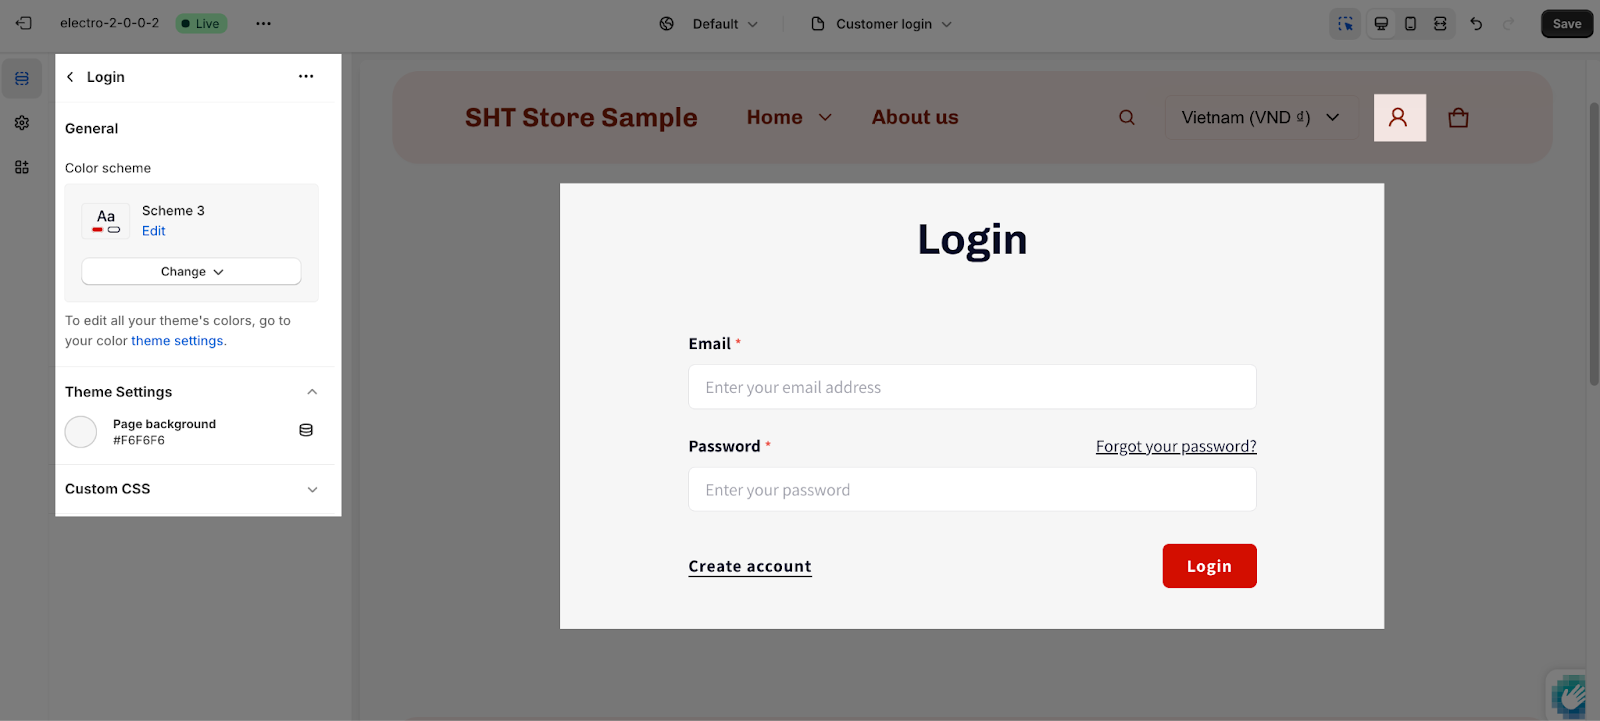
Afterward, you can adjust the color scheme and background color for the login section to suit your preference.
Quick Links
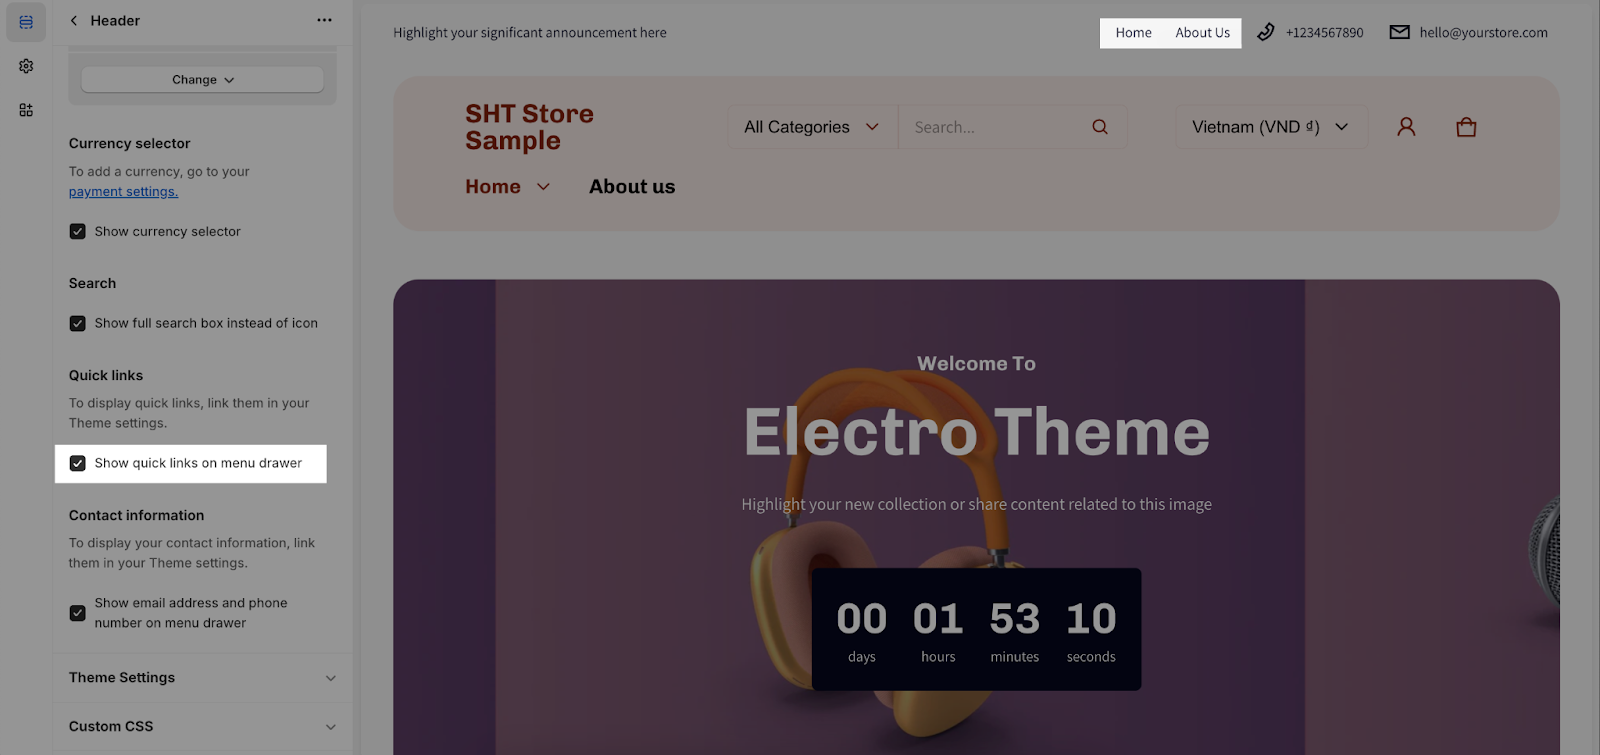
You can Show quick links on the menu drawer here. Please note that you have to set up the quick link from theme settings first.
Contact Information
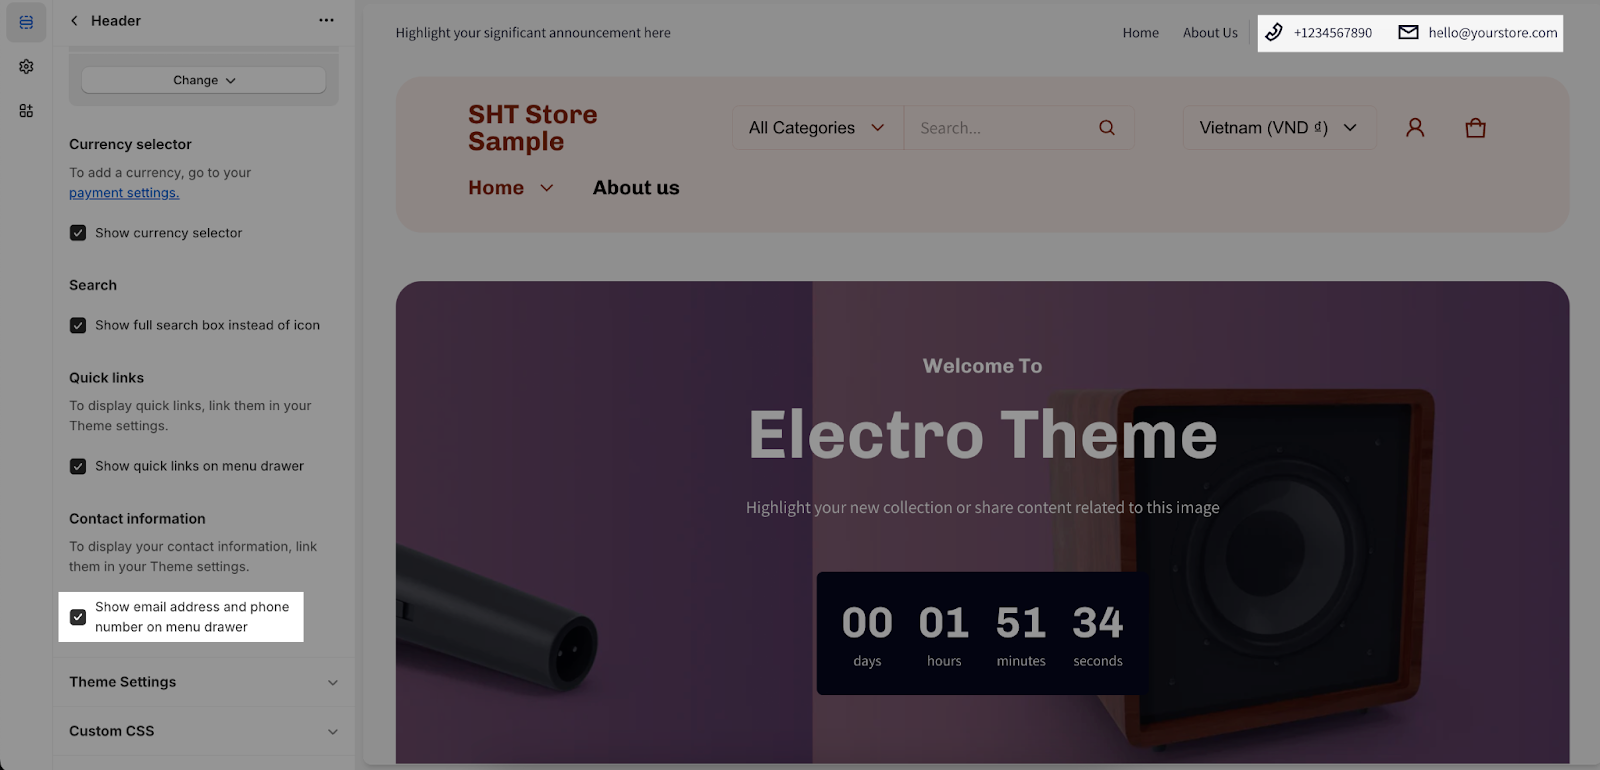
At this part, you can enable or disable the Show email address and phone number on the menu drawer. Please note that the email address and phone number which have been set up from Theme settings.
Theme Settings
Please note that changing the settings here will affect the appearance of other elements and sections.
Color Scheme
You can change the color scheme applied for the header’s dropdown:
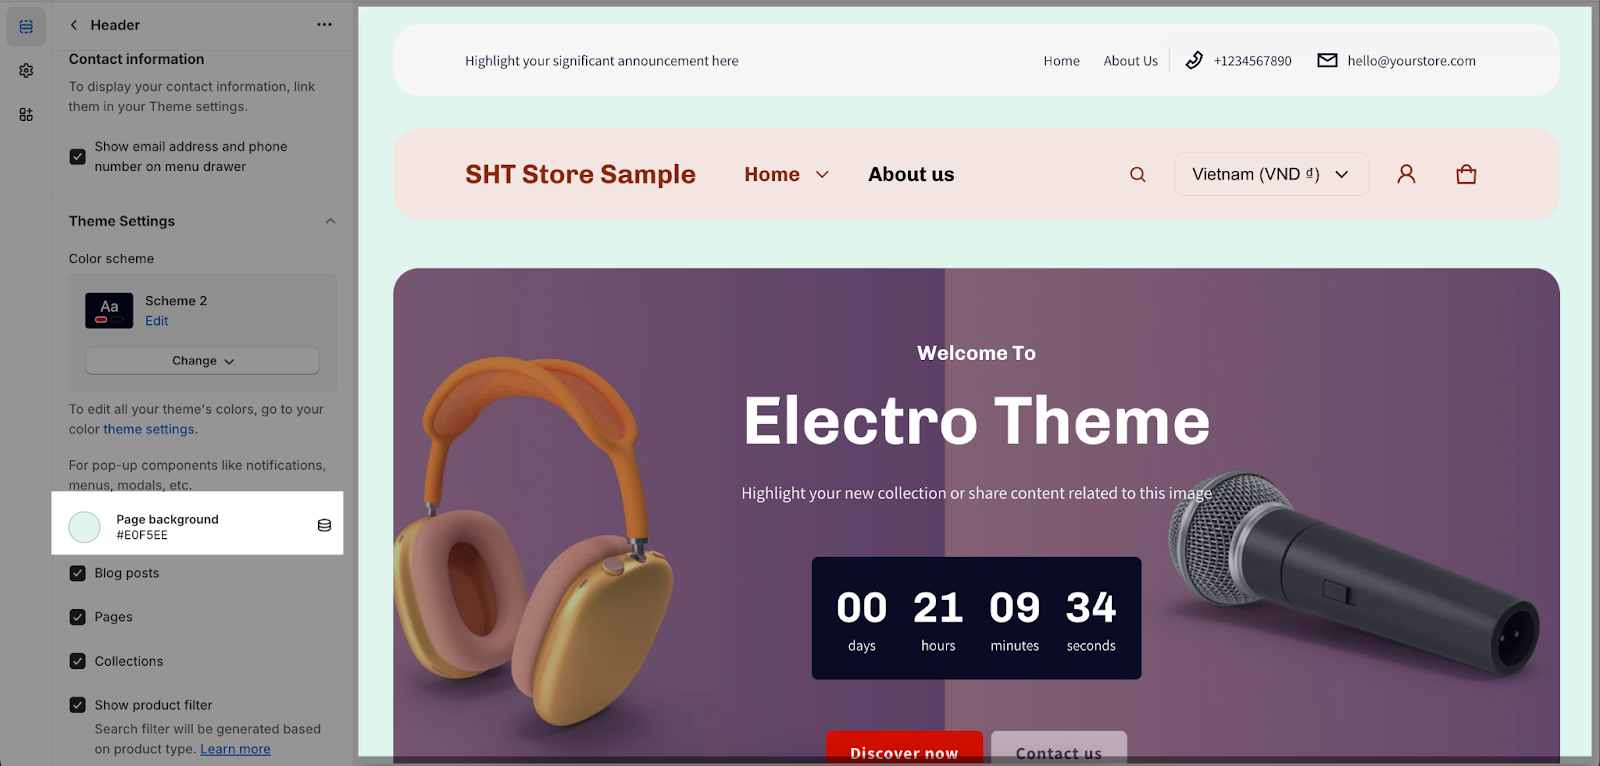
Page Background
You can change the background of the entire page by choosing a color or connect with a dynamic source:
Search
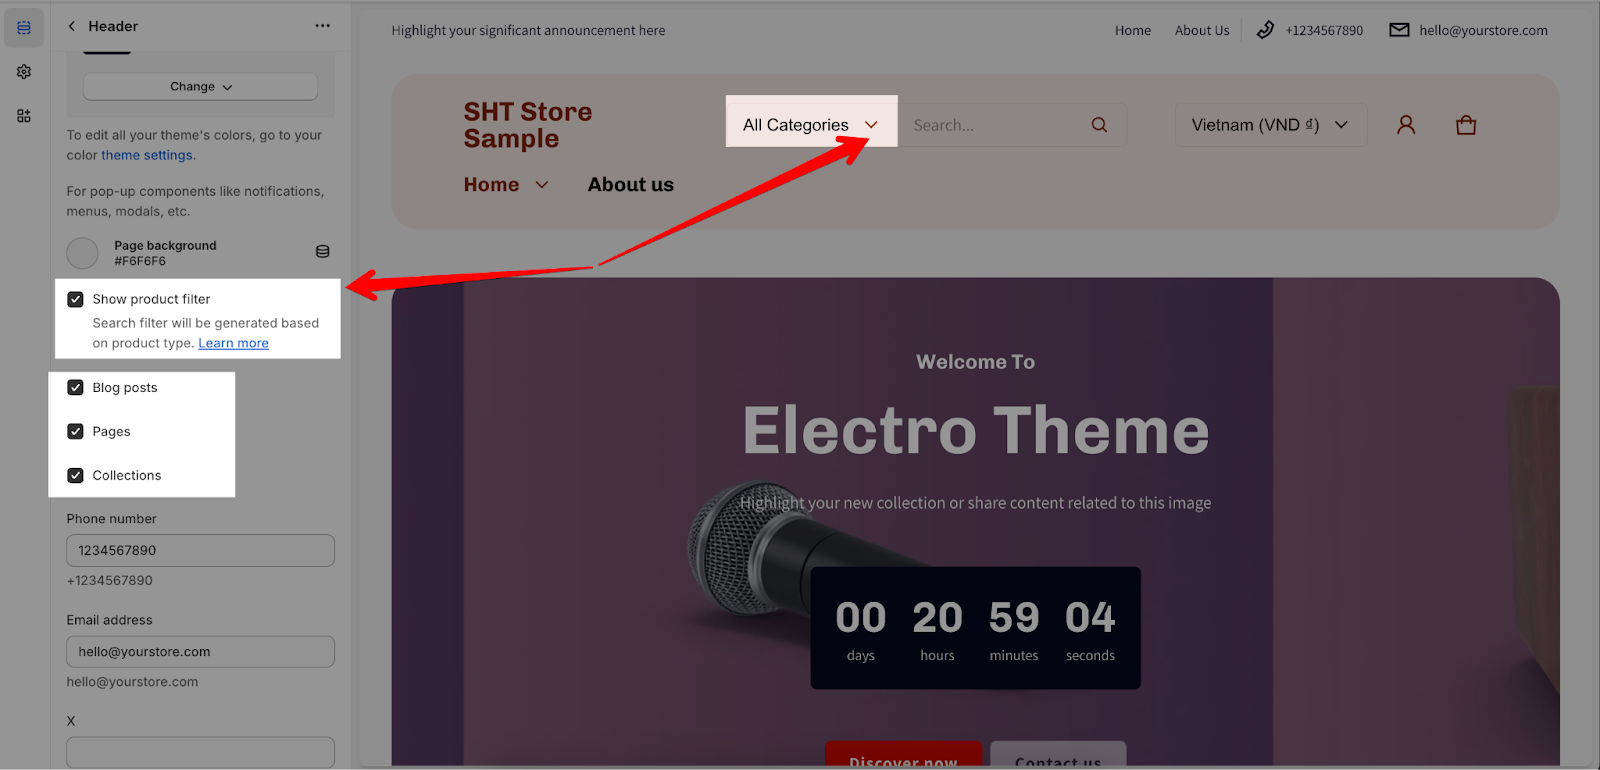
The Predictive search results allow you to choose which search results to show beside the product when customers are searching. There are 3 options:
- Blog posts
- Pages
- Collections.
You can also enable the ‘Show product filter’. This allows your customers to select specific product categories (e.g., Speakers, Headphones, Airpods) before entering their search query.
The search filter will be generated based on the product type. You can learn more about setting up product types here.
Contact Info And Social Media
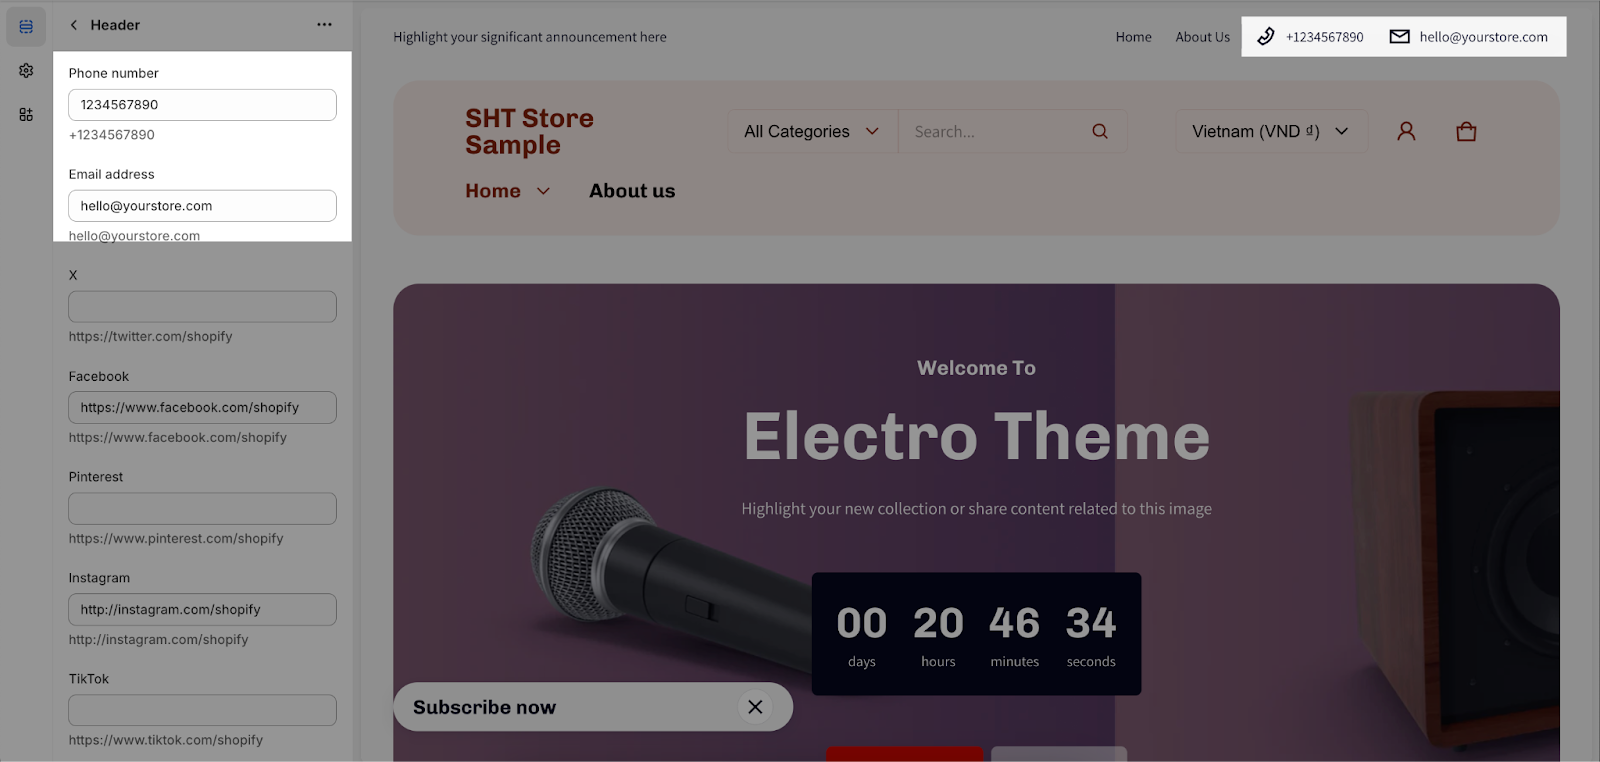
You can enter Phone number and Email address so they can show up nearby the Quick Links:
From here, you can also enter links to your social media like X, Facebook, Pinterest, Instagram, TikTok, Tumblr, Snapchat, YouTube and Vimeo. However, these icons will show up in the footer.
How To Configure Header Blocks
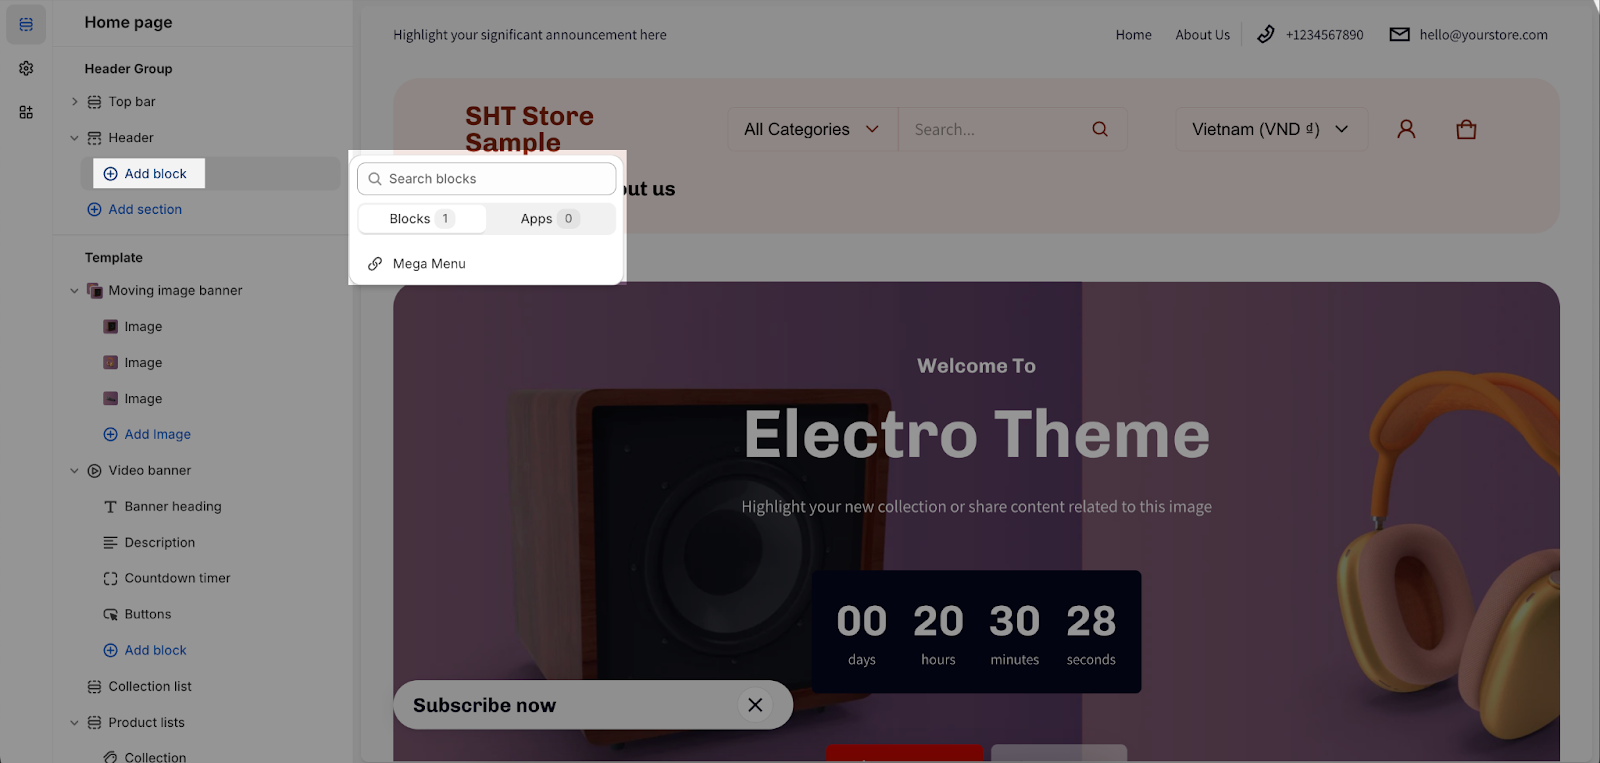
You can add 2 types of block into the Header: Mega Menu and Apps.
Mega Menu
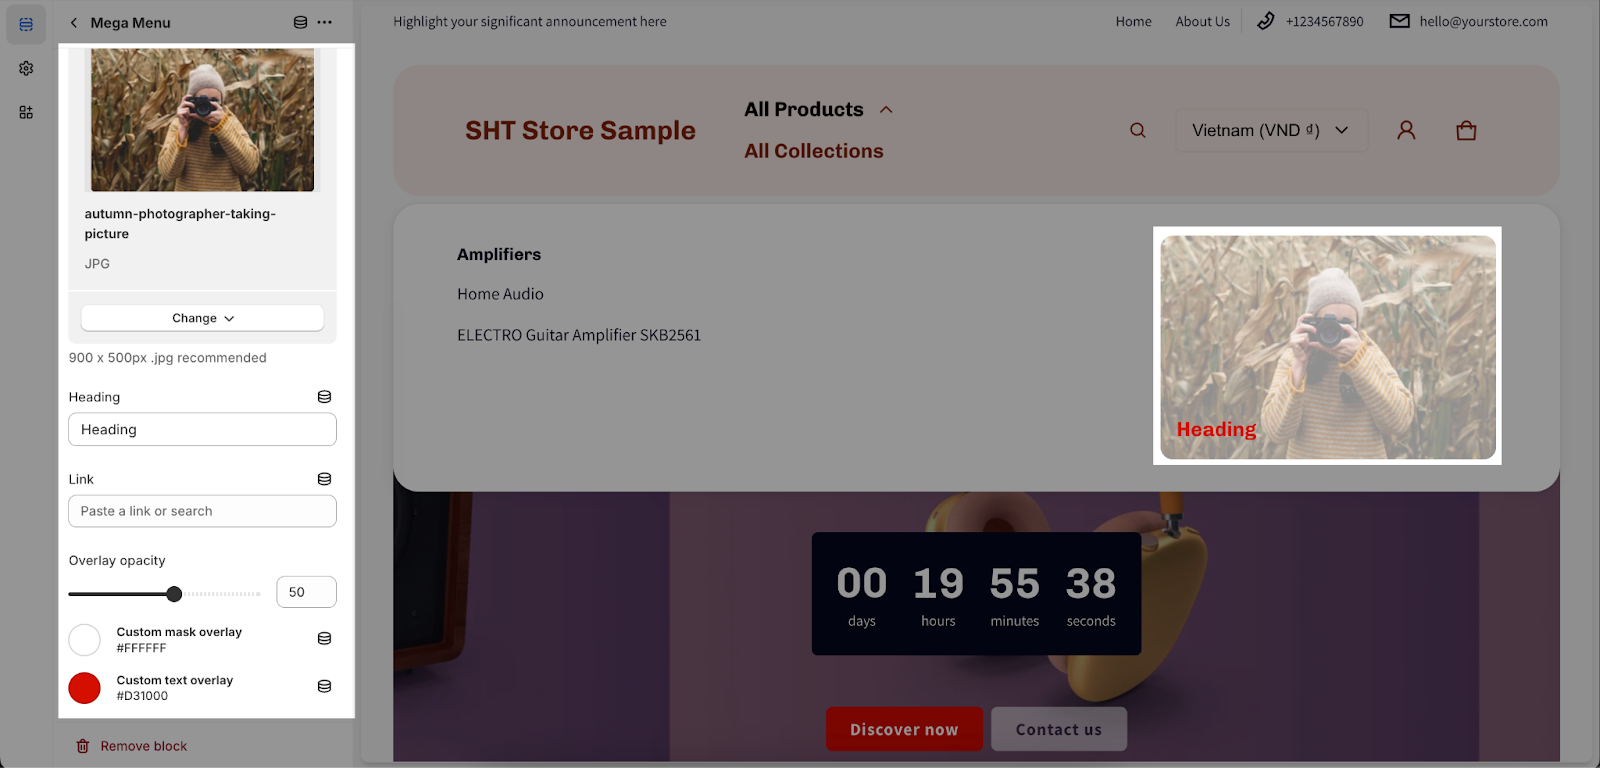
Mega menus allow you to create rich menus with multi-columns and optional images.
To set up Mega Menu, following the steps:
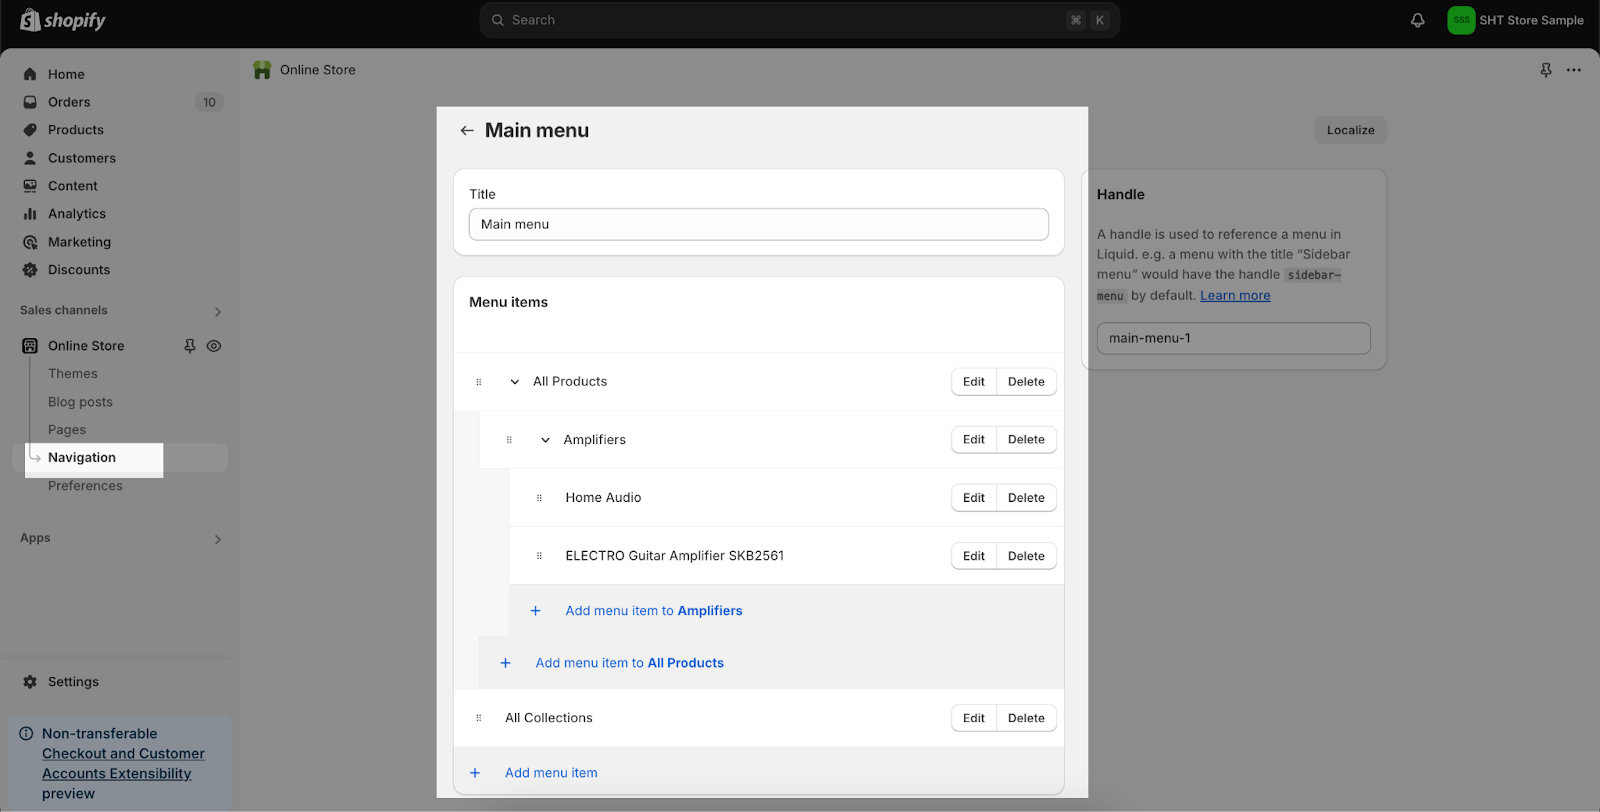
- Step 1: Create the menu and add child menu items in Shopify Admin > Online Store > Navigation > Menus. In this example, we will create a Mega Menu for All Products.
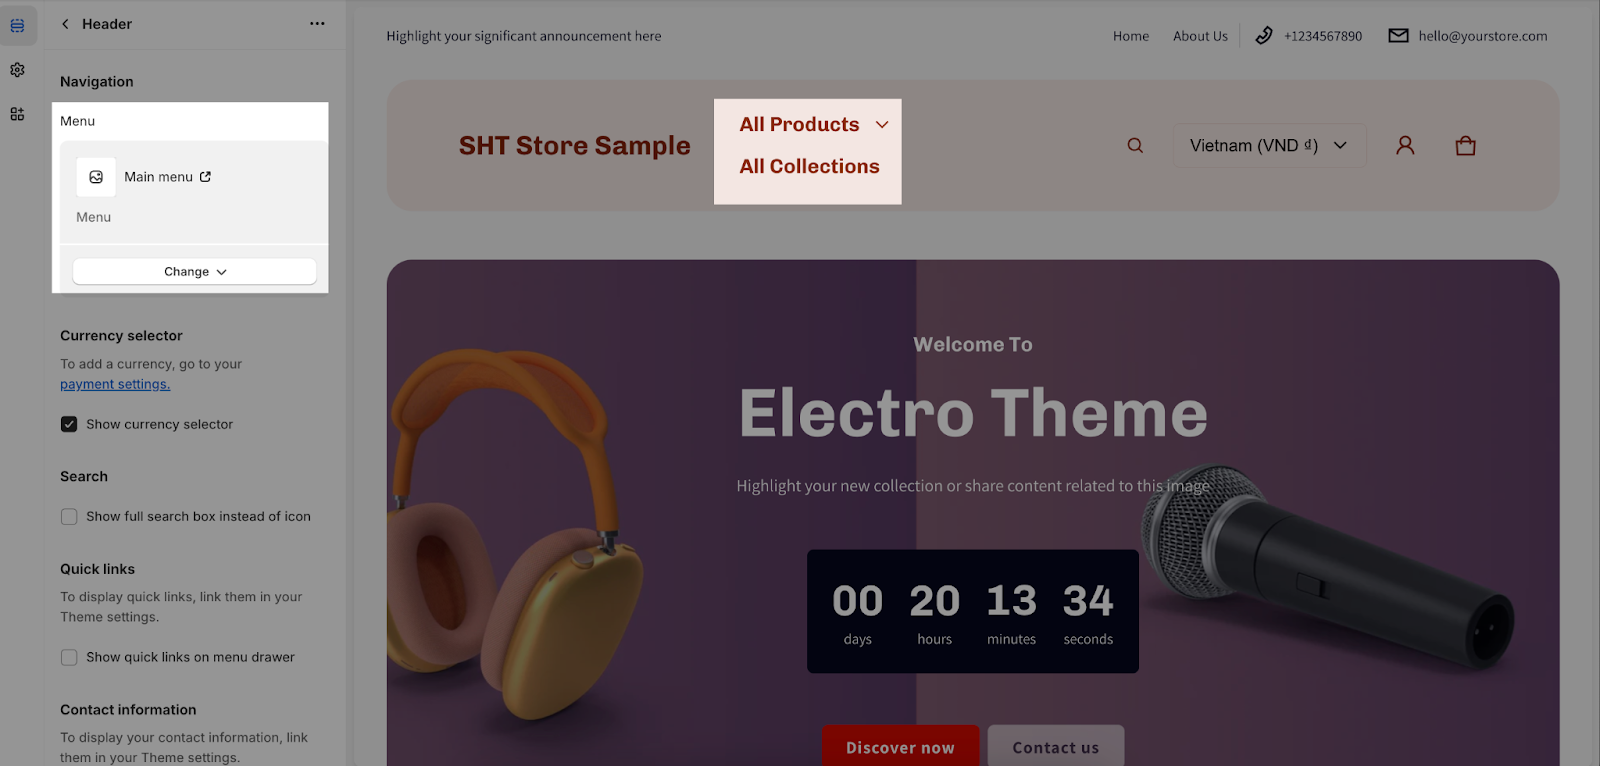
- Step 2: Go to your Theme Editor > Header > select the Menu you want to show:
- Step 3: Add Mega Menu and enter the name of the menu item:
In the Promotional Content, you can set up an image background, overlay opacity, heading text, and a link for the block.
- Image:
- Recommended dimensions: 900 x 500px for optimal quality.
- To add an image: Click “Select image” to choose from your store library or upload your own. Alternatively, click “Explore free images” for options from Shopify’s library.
- Heading: Insert the heading text by filling in the designated field. To remove the heading, simply delete the text in the heading field.
- Link: Select the page where you want to redirect visitors by entering the URL in the Link field.
- Overlay opacity: Control the opacity of the overlay image to enhance contrast between the heading and the image. You can also add:
- Custom mask overlay: Add a colored overlay to the image.
- Custom text overlay: Apply a colored overlay to the heading text.
The settings for Promotional Content 2 are totally the same as the first one.
Check this video tutorial below to learn more:
Frequently Asked Questions
1. Can I create a mega menu with an Electro theme?
Yes, you can create mega menus with the Electro theme. Mega menus in Electro theme allows you to organize your menu items into columns and add promotional images or other content to make them more engaging. To set up a mega menu, follow the steps outlined in our FAQ or consult the theme documentation.
2. How can I make the logo bigger?
To make your logo bigger in the Electro theme:
- Go to your Theme Editor: Navigate to Customize > Header.
- Locate the logo settings: Look for the section related to the logo.
- Adjust the logo size: You should find options to adjust the maximum width of the logo.
- Set the desired width based on your preference and the overall design of your header.
