Blog post template
About Blog Post Template
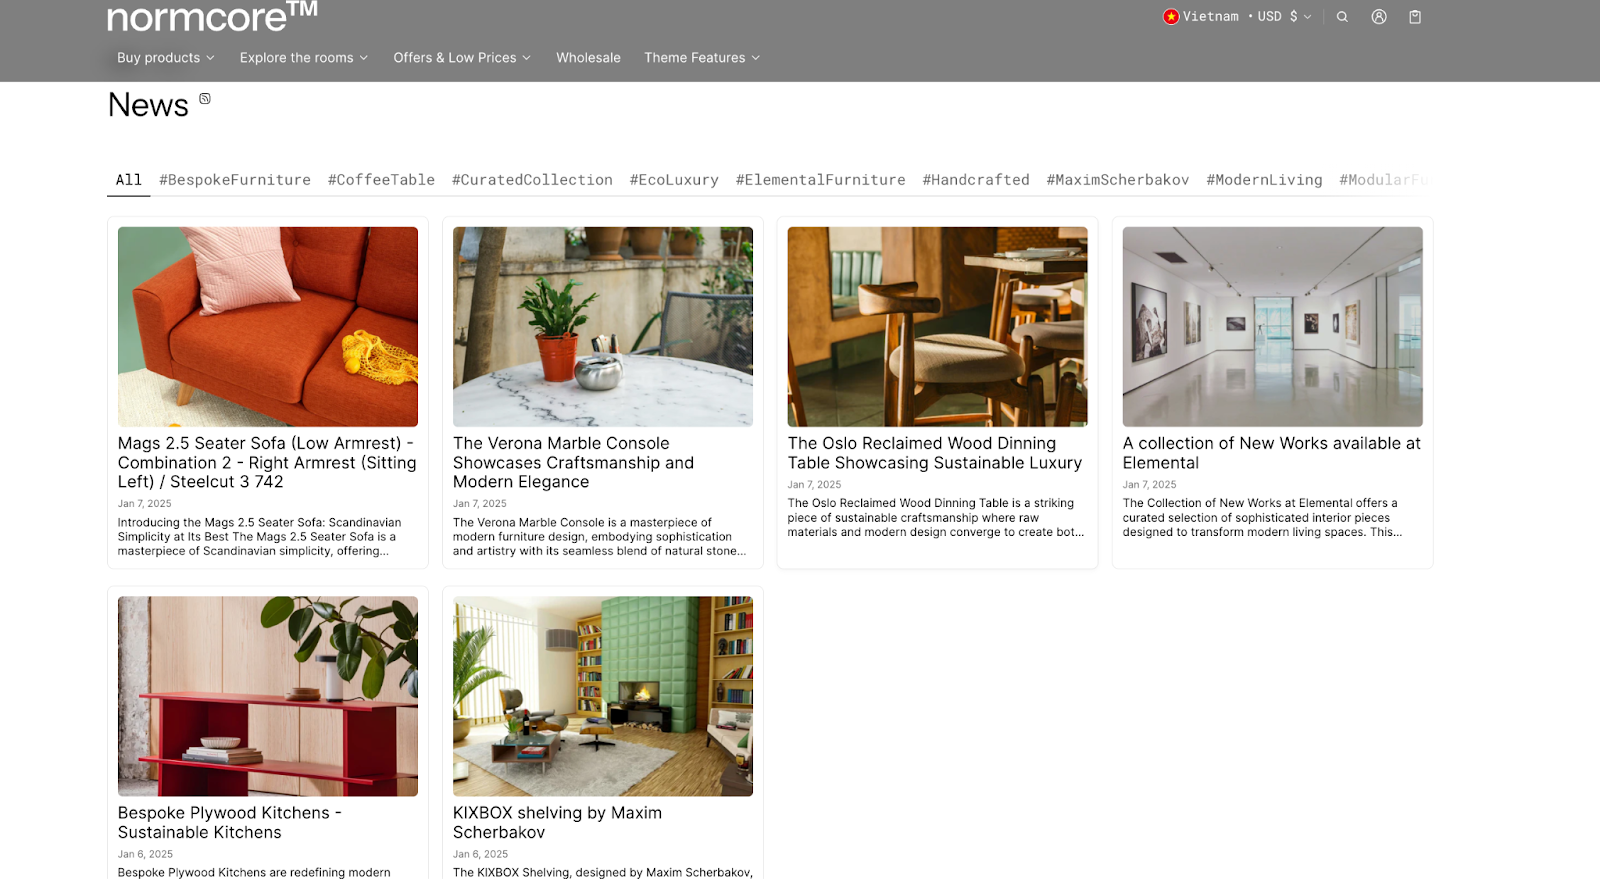
The Blog post template in the Normcore theme is a versatile tool that allows you to create a unique and visually appealing design for your blog posts. Below is a comprehensive guide to setting up and customizing the various sections within the blog post template.
How To Access Blog Post Template
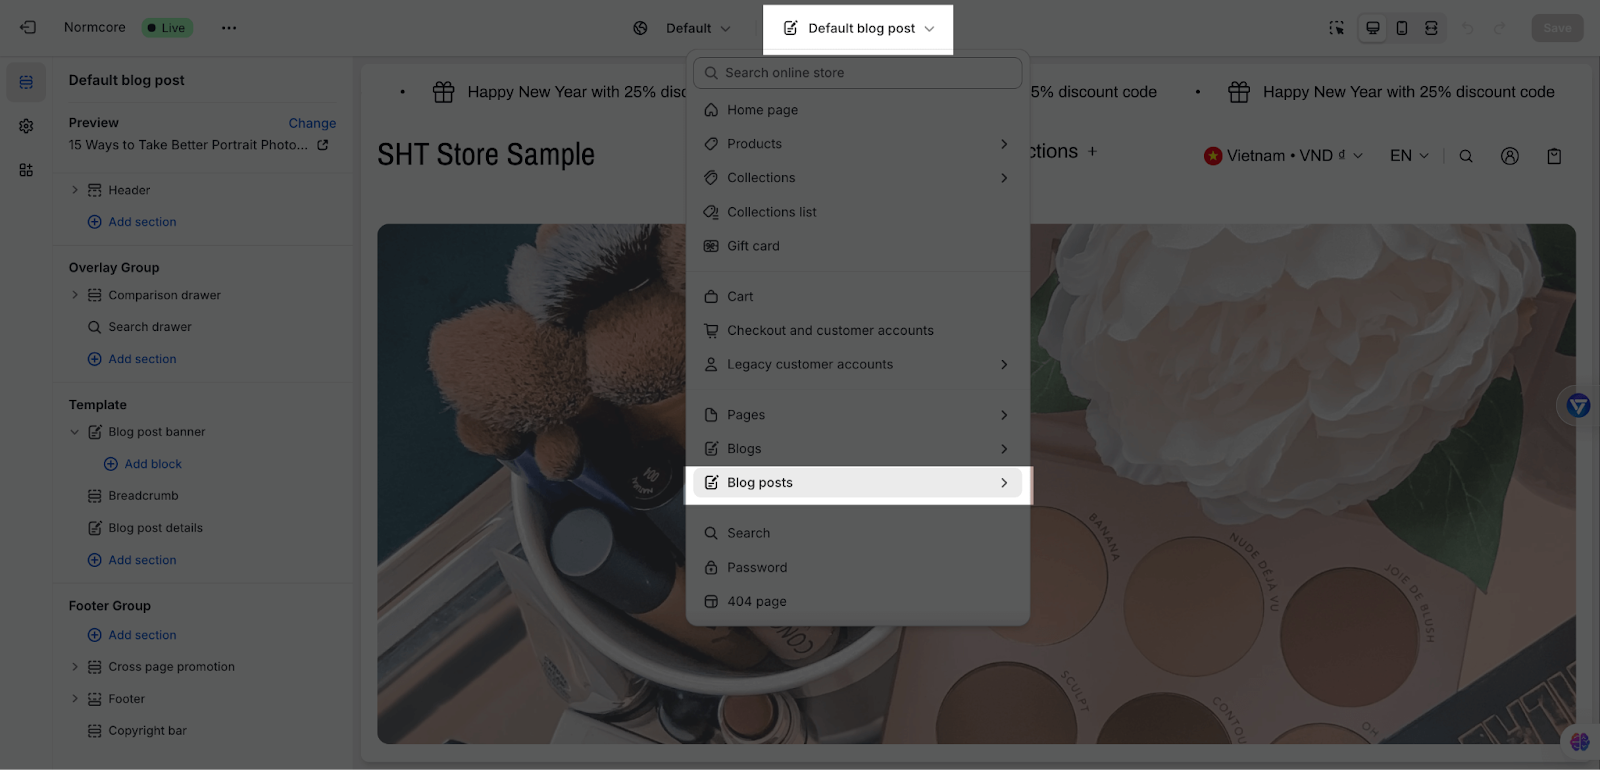
On the top center bar, click on the dropdown button > Blogs post.
How To Configure Blog Post Template
Basic Components
The blog template is structured into the following key sections:
- Blog Post Banner
- Breadcrumb
- Blog Post Details
- Additional Sections (optional)
You can add or modify these sections to achieve the desired layout and functionality.
Blog Post Banner
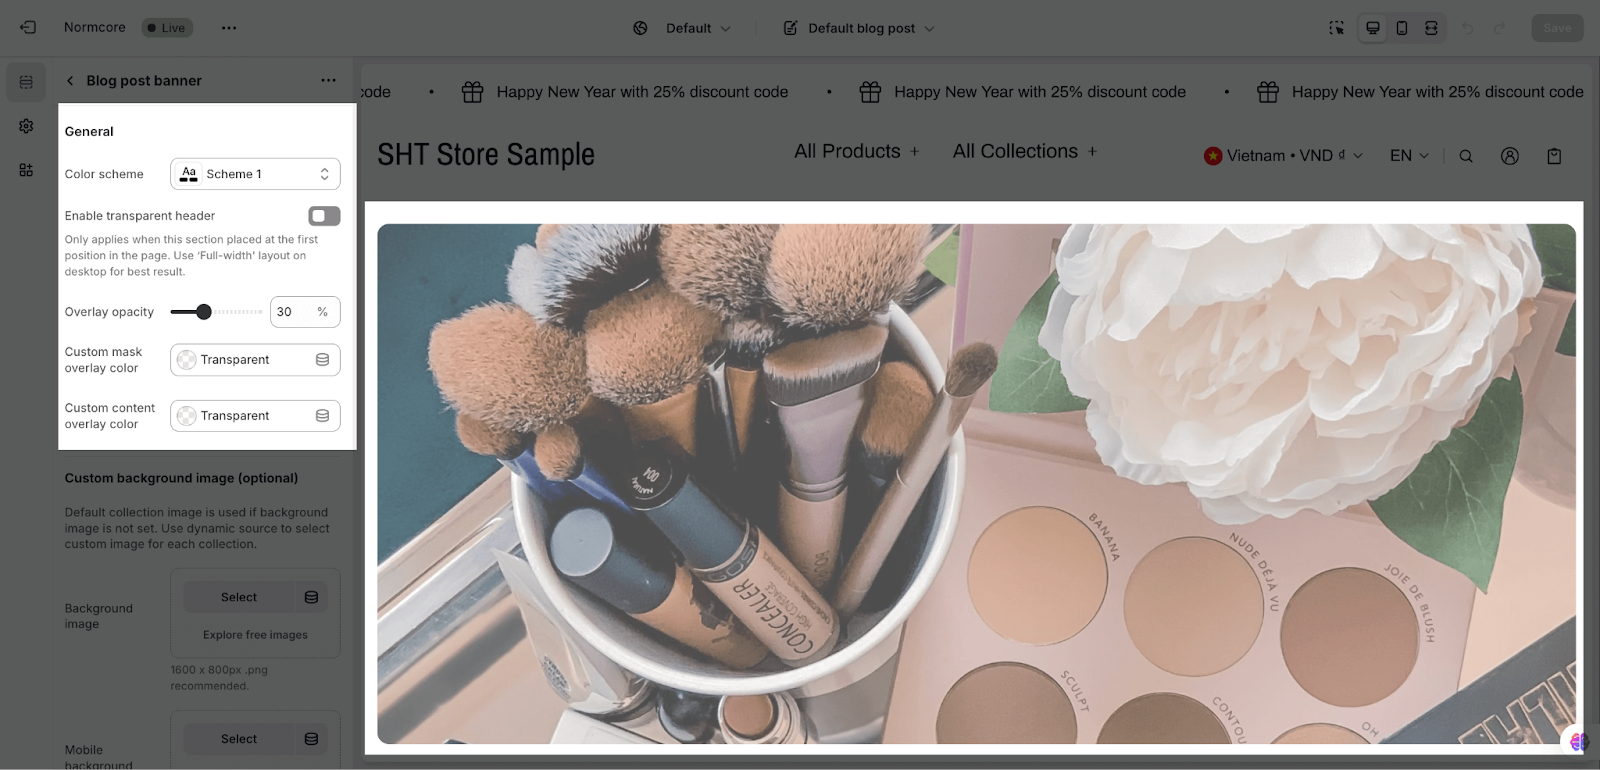
This section is designed to highlight the header area of your blog post with customizable features.
General Settings
- Color Scheme: Select a predefined color scheme to match your store’s branding.
- Enable Transparent Header: Toggle this setting to use a transparent header. This is recommended for full-width layouts on desktop.
- Overlay Opacity: Adjust the overlay opacity for the banner background (e.g., 30%).
- Custom Mask Overlay Color: Set a custom overlay color for the banner.
- Custom Content Overlay Color: Choose a unique color for the content overlay.
Custom Background Image (Optional)
- Background Image: Upload or select an image for the banner background (recommended size: 1600 x 800 px).
- Mobile Background Image: Upload a separate background image optimized for mobile view.
Layout Settings
With Layout settings, you can adjust the layout for Desktop and Mobile.
Breadcrumb
This section only has settings to change the color scheme, similar to other sections. In addition, you can add custom code to achieve special styling, such as changing the font, color, or size of the text.
Blog Post Details
This section contains the main content and metadata of your blog post.
General Settings
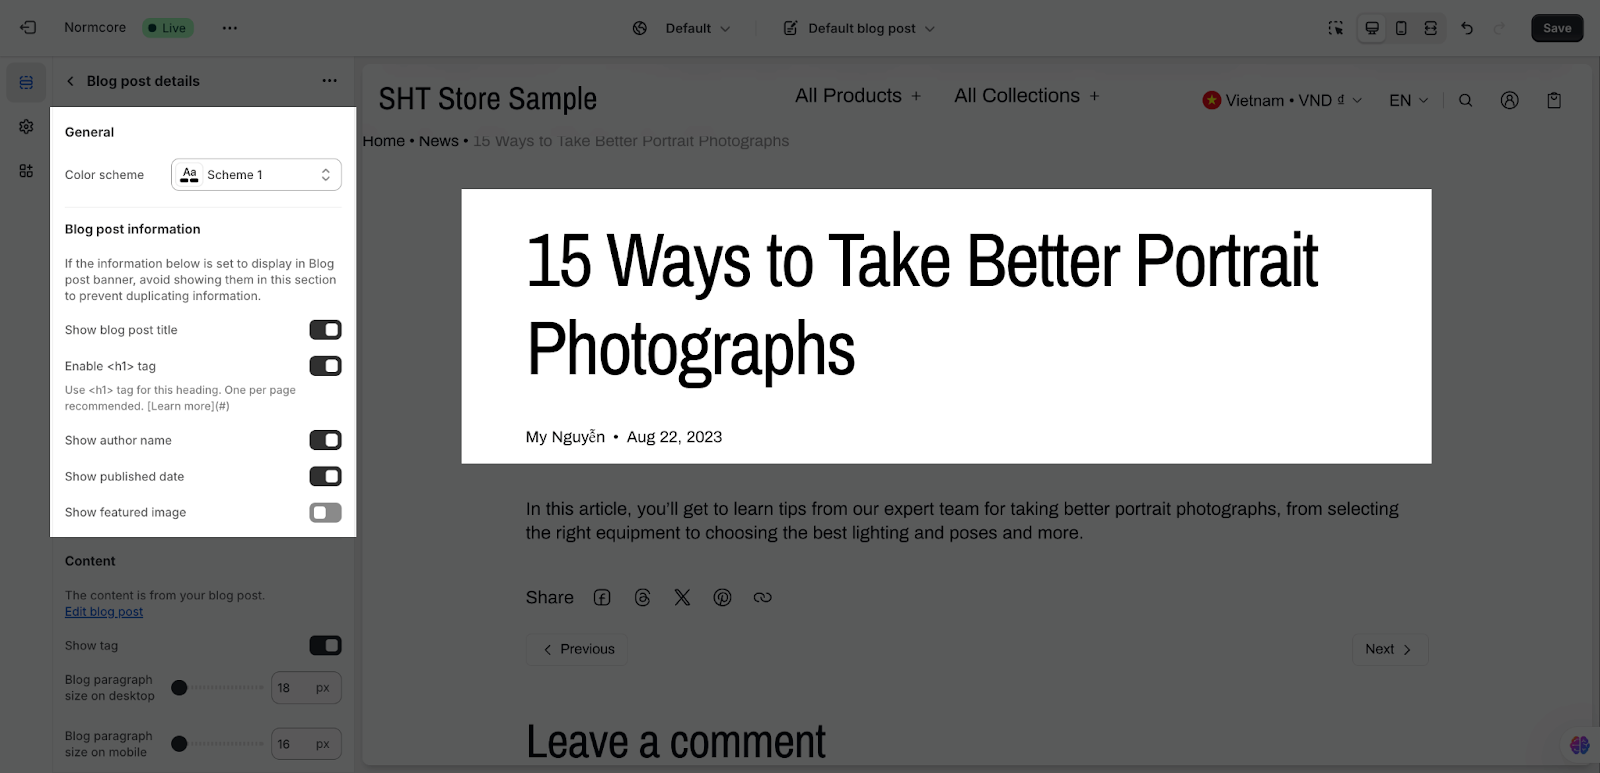
- Color Scheme: Align the color scheme with your store’s branding.
Blog Post Information
- Show Blog Post Title: Toggle to display the blog post title.
- Enable Tag: Activate the tag for the title to improve SEO. Note: Use only one tag per page.
- Show Author Name: Display the author’s name.
- Show Published Date: Include the date of publication.
- Show Featured Image: Display a featured image for the post.
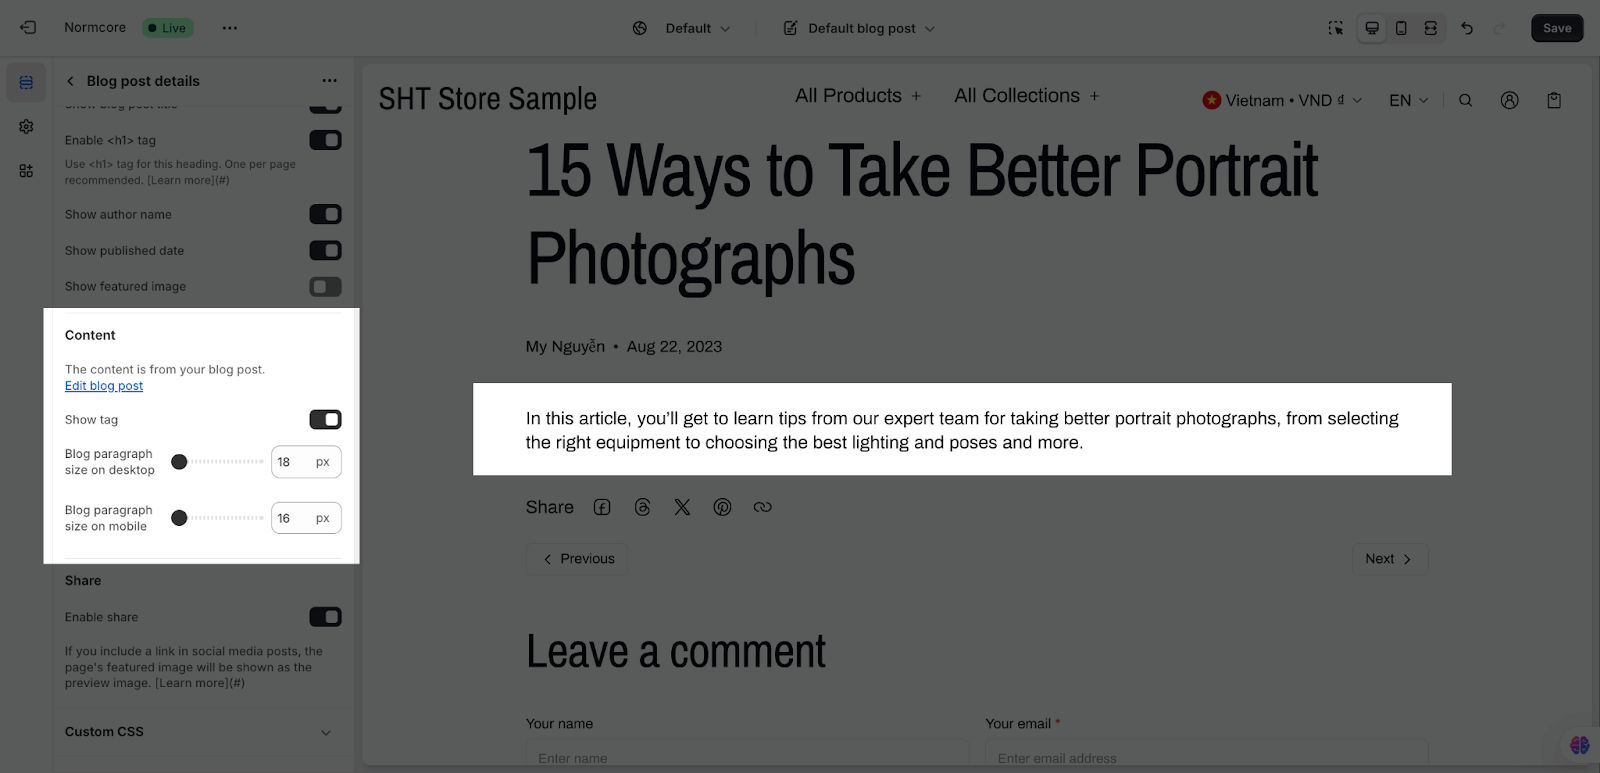
Content Settings
- Blog Paragraph Size on Desktop: Adjust the paragraph font size for desktop view (e.g., 18px).
- Blog Paragraph Size on Mobile: Set the font size for mobile view (e.g., 16px).
- Show Tag: Toggle to display tags associated with the blog post.
Share Settings
- Enable Share: Add sharing functionality to social media platforms. The post’s featured image will appear as a preview image when shared.
Common Cases & FAQs
1. Can I use different background images for desktop and mobile?
Yes, the template allows you to upload a separate background image for mobile devices under the “Custom Background Image” settings.
2. Why does changing banner height or alignment not reflect immediately on the live preview?
Ensure you save the changes and refresh the preview to reflect updates. If changes still don’t show, clear your browser cache or check for conflicts with custom CSS.
3. Are there specific formats or size recommendations for images uploaded in the banner or blog sections?
Recommended formats are .png or .jpg with specific resolutions (e.g., 1600×800 px for desktop and 750×1100 px for mobile). Ensure the file size is optimized for faster loading.
4. What should I do if my post’s featured image doesn’t appear when sharing to platforms like Facebook or Twitter?
Verify that the featured image meets platform requirements (e.g., Facebook prefers a 1200×630 px resolution). If the image doesn’t appear, recheck the sharing settings under “Enable Share” in the Blog Post Details section.
