How to use custom font in SalesHunterThemes theme
About Using Custom Font In SalesHunterThemes
Customizing your online store’s typography is a great way to reinforce your brand’s identity and create a cohesive, visually appealing experience for your customers. While SalesHunterThemes offers a selection of pre-installed font options, you may want to incorporate your own custom fonts to achieve a truly unique look.
In this article, we’ll guide you through the process of adding custom fonts to your store with SalesHunterTheme’s themes.
Check out our video tutorials for more visualization
How To Use Custom Font In SalesHunterThemes
To use custom fonts with SalesHunterThemes, follow these steps:
Step 1: Prepare Your Font Files
- Obtain your desired font files in a web-friendly format like TTF (TrueType Font).
- Convert the font files to the WOFF2 (Web Open Font Format 2) format using online tools like Transfonter. This format provides better compression and performance for web fonts.
- Ensure you have a valid license to use the font on the web.
Step 2: Upload Font Files To Your Shopify Store
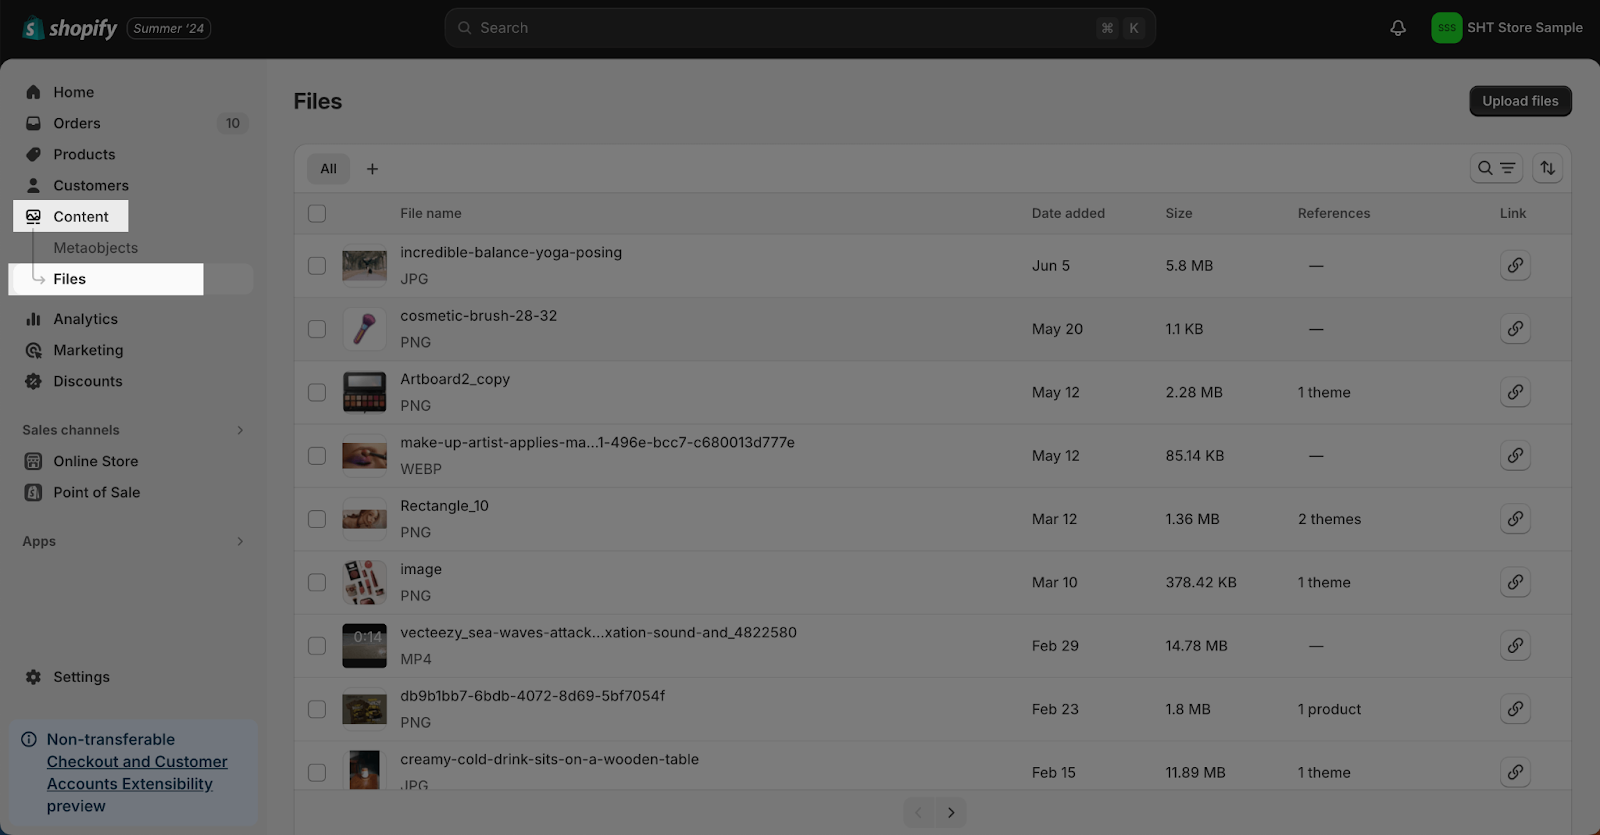
- In your Shopify admin, navigate to Content > Files.
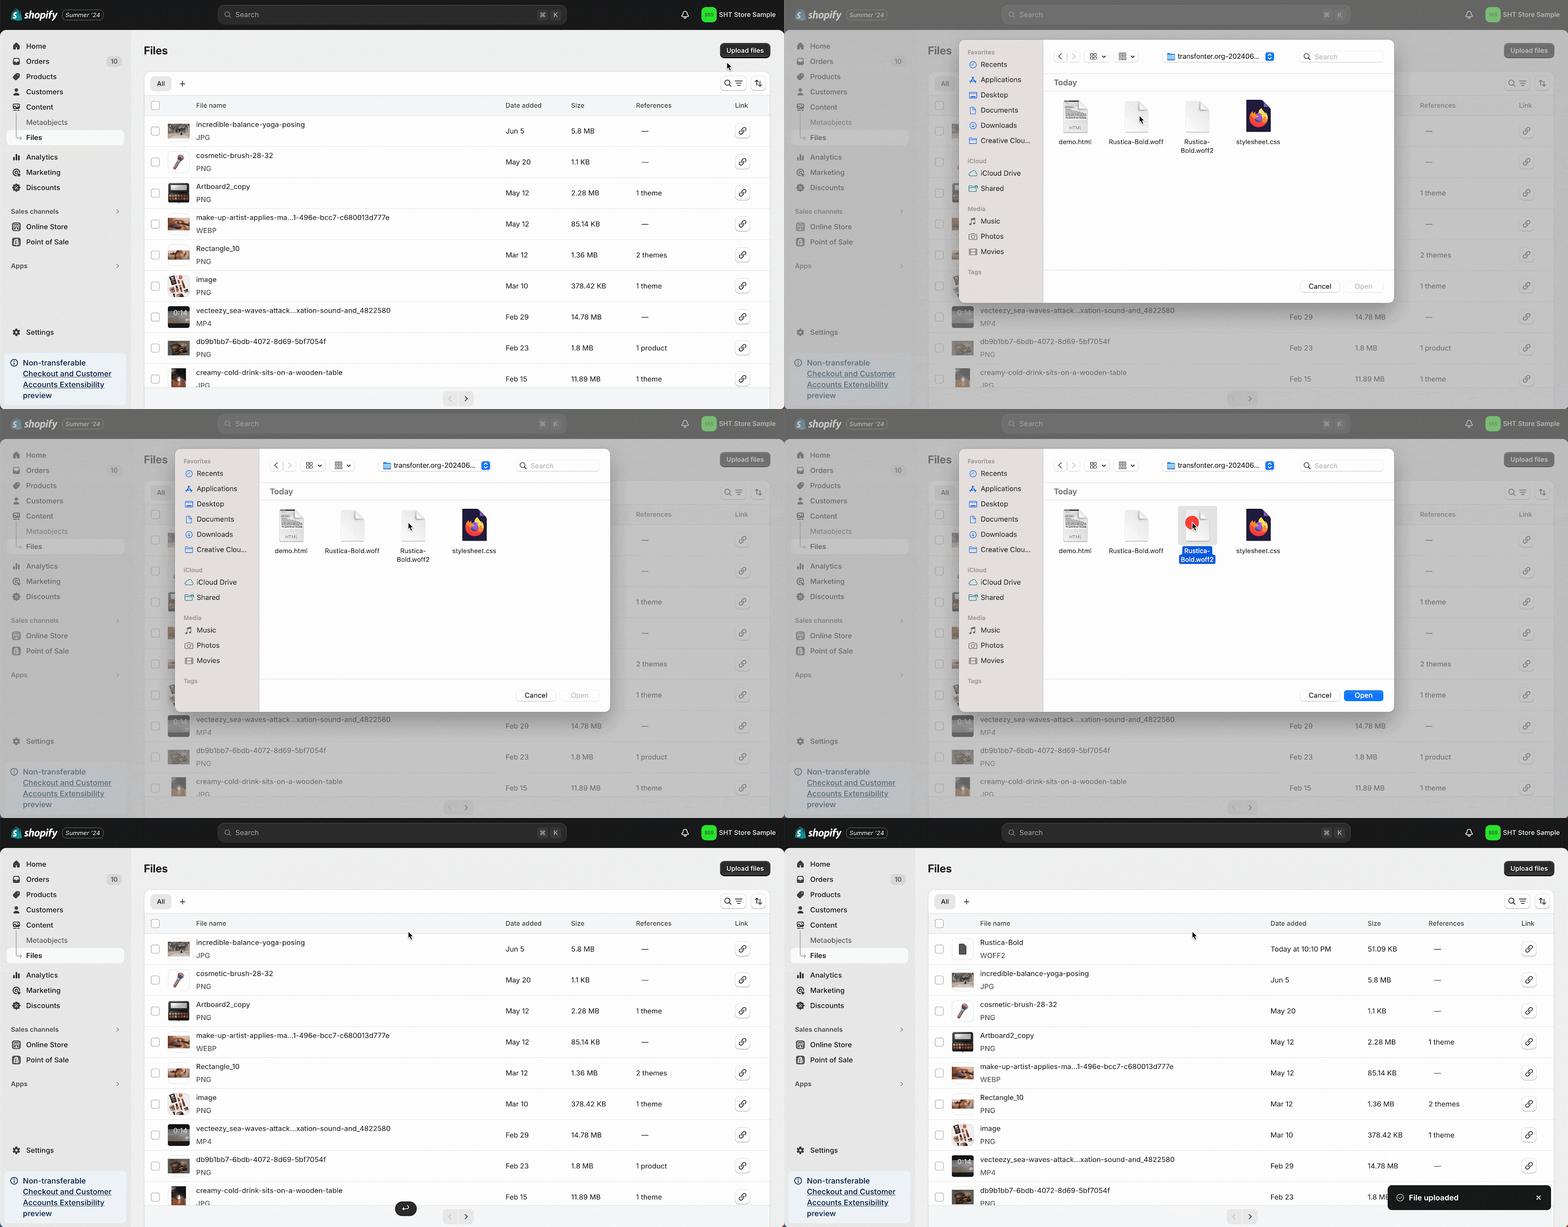
- Click “Upload files” to upload your WOFF2 and WOFF font files.
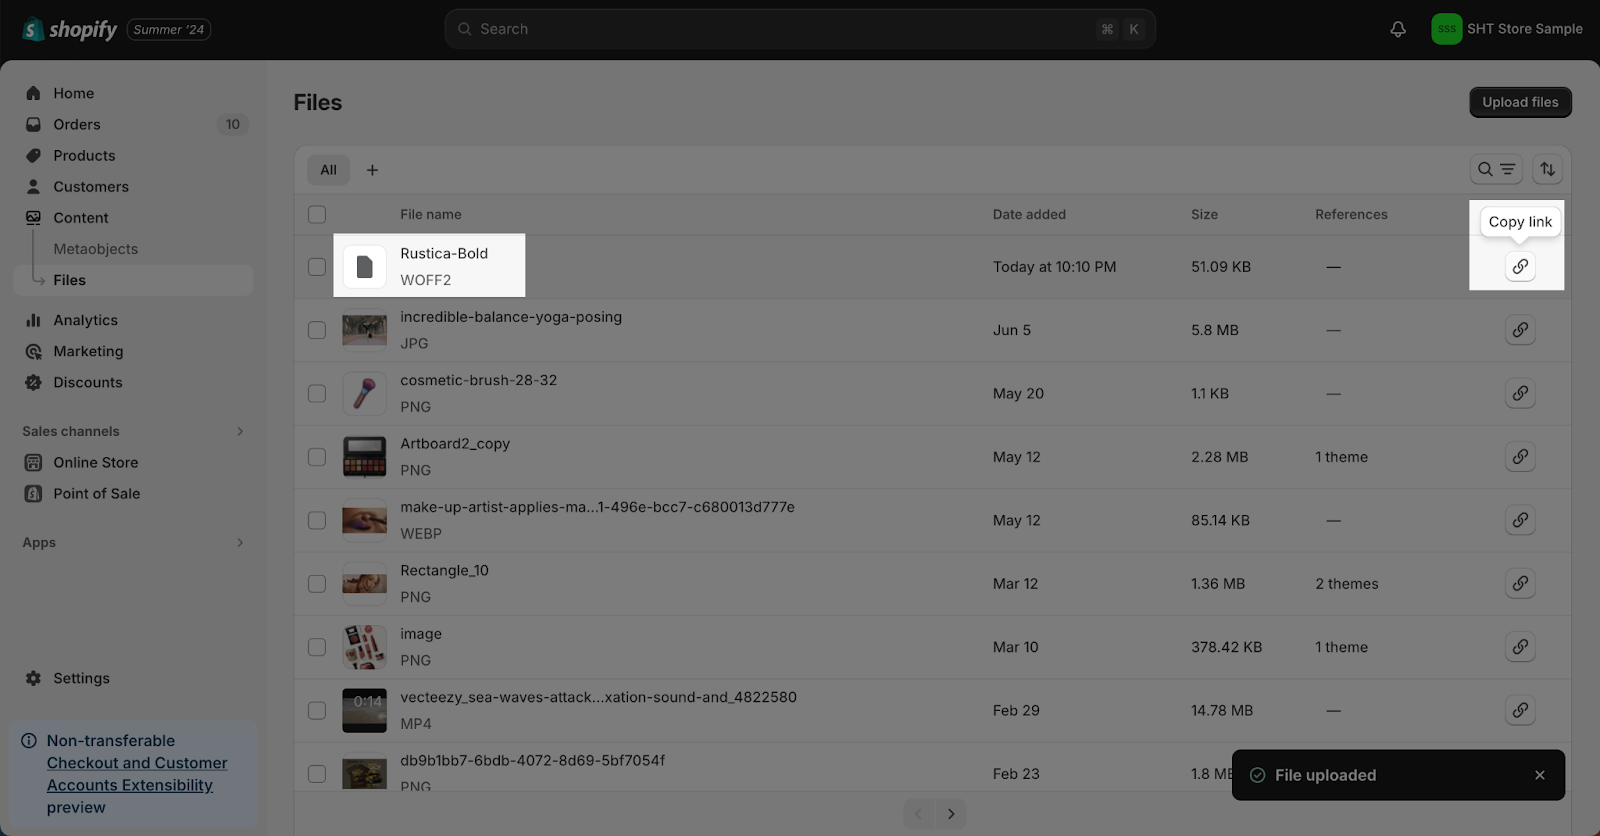
- Click the link icon to copy the file’s link.
Step 3: Add Font-Face Declarations To Your Theme’s CSS
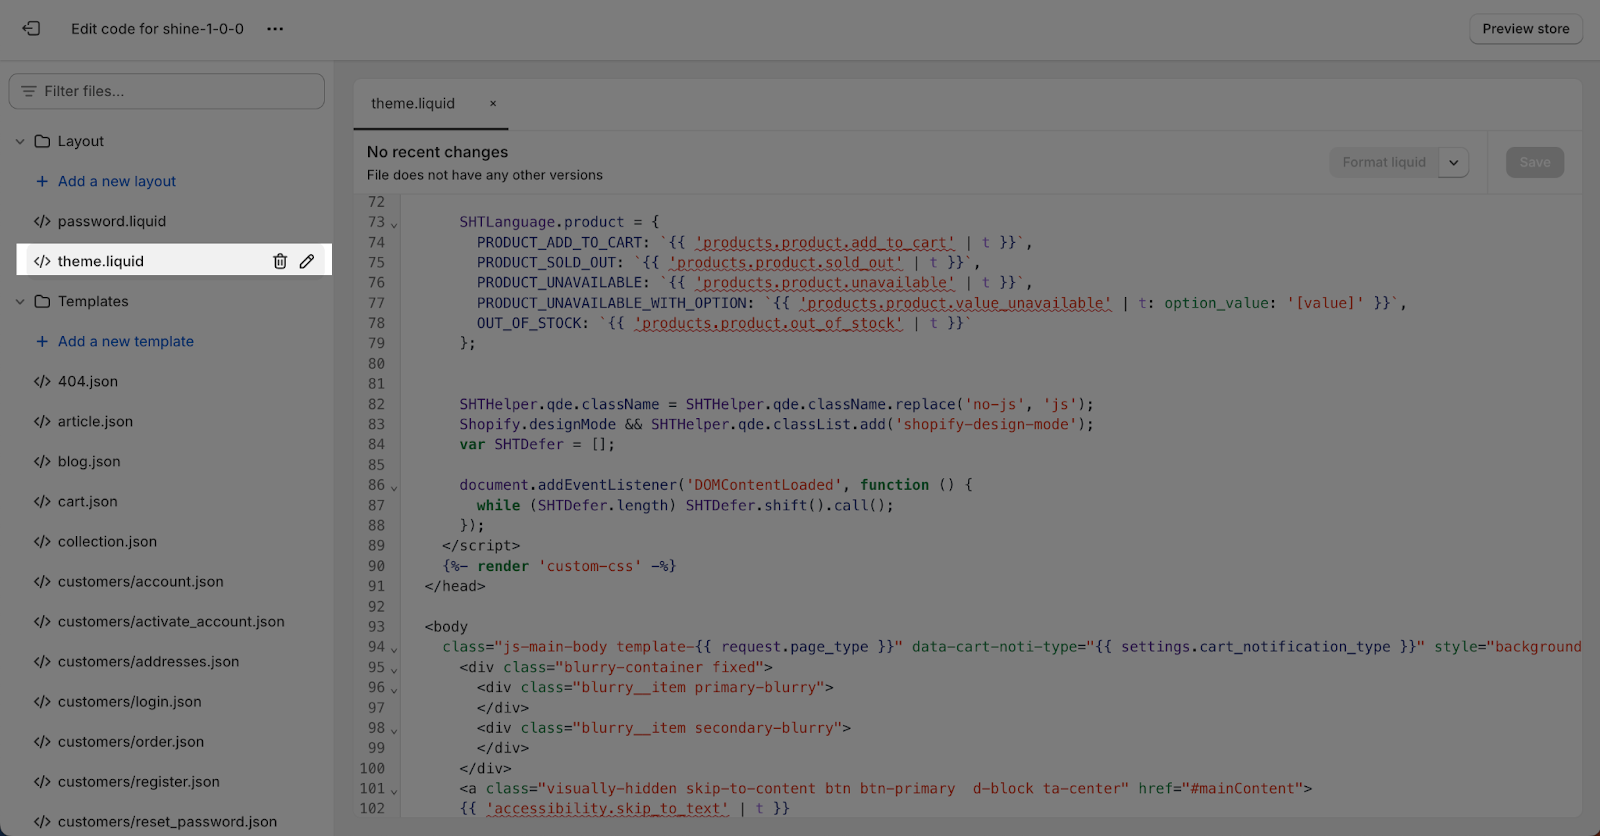
- In the theme’s code editor, access the “theme.liquid” file. Click on the file to start applying the custom font.
- Add the following code snippet between the <style> tag and before the </head> tag. Replace “YOUR_FONT_NAME” with your font’s name, and replace “YOUR_FONT_LINK_WOFF2_TYPE” and “YOUR_FONT_LINK_WOFF_TYPE” with your actual links to your font file:
@font-face {
font-family: ‘YOUR_FONT_NAME’;
src: url(‘YOUR_FONT_LINK_WOFF2_TYPE’) format(‘woff2’),
url(‘YOUR_FONT_LINK_WOFF_TYPE’) format(‘woff’);
font-weight: normal;
font-style: normal;
font-display: swap;
}
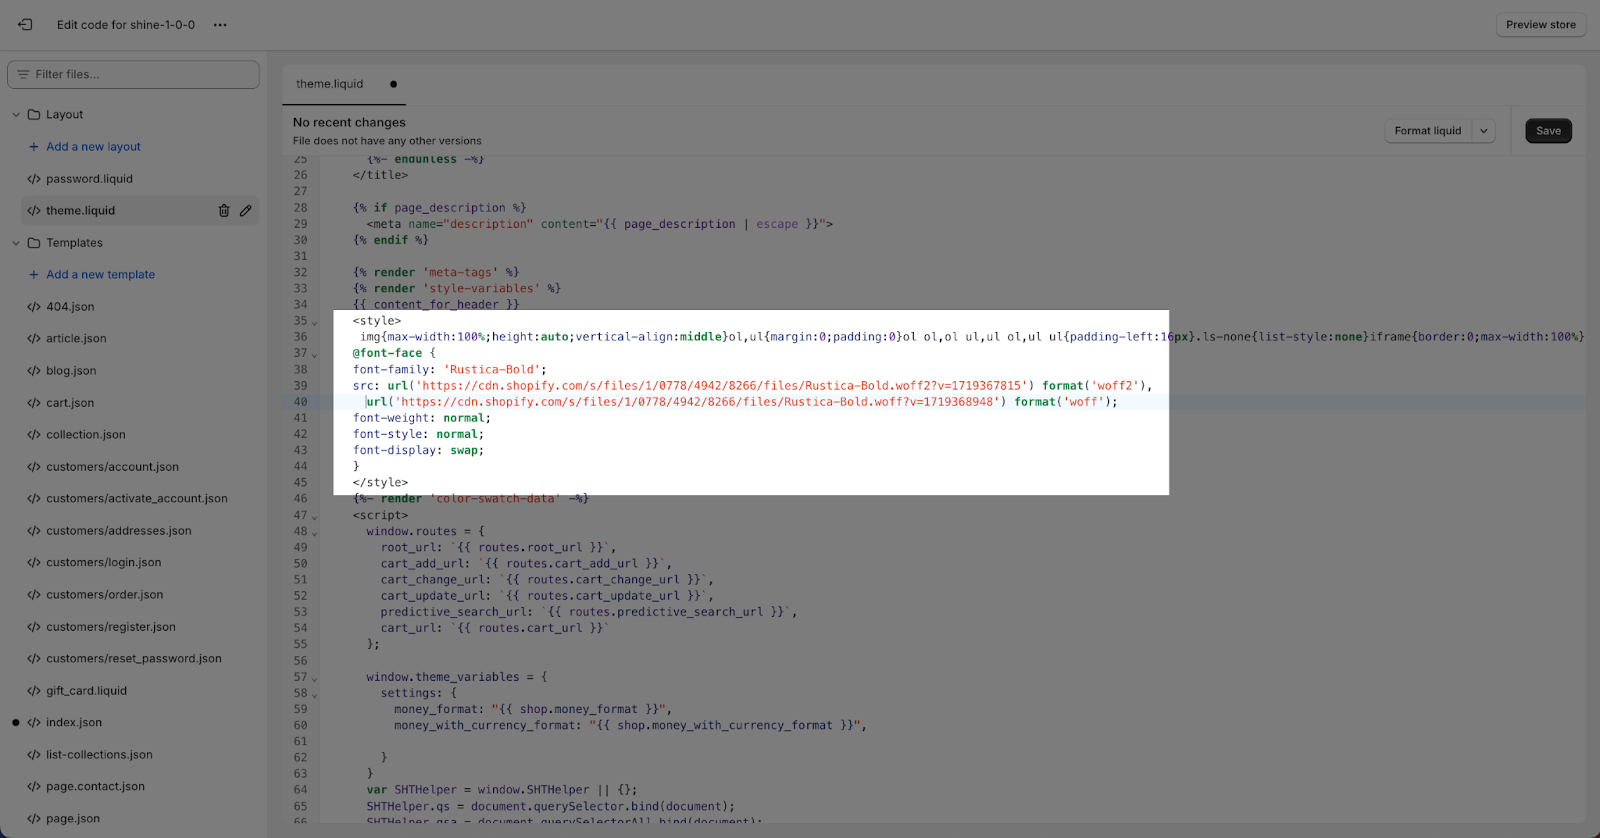
For example, here I have the font name ‘Rustica-Bold’ and the code will be:
Step 4: Set Your Custom Font As The Default Font
- In the same “style-variables.liquid” file, locate the following line:
- If you want to apply the font for Heading elements:
–font-heading-family: {{ settings.type_header_font.family }}, {{ settings.type_header_font.fallback_families }};
- If you want to apply the font for other elements such as body text, button,… please find the corresponding lines with structure above. For example, to apply for body text, the lines will be: –font-body-family: {{ settings.type_body_font.family }}, {{ settings.type_body_font.fallback_families }};
- Replace this line with the following, using your font’s name in place of “MyFont“:
–font-heading-family: ‘MyFont’;
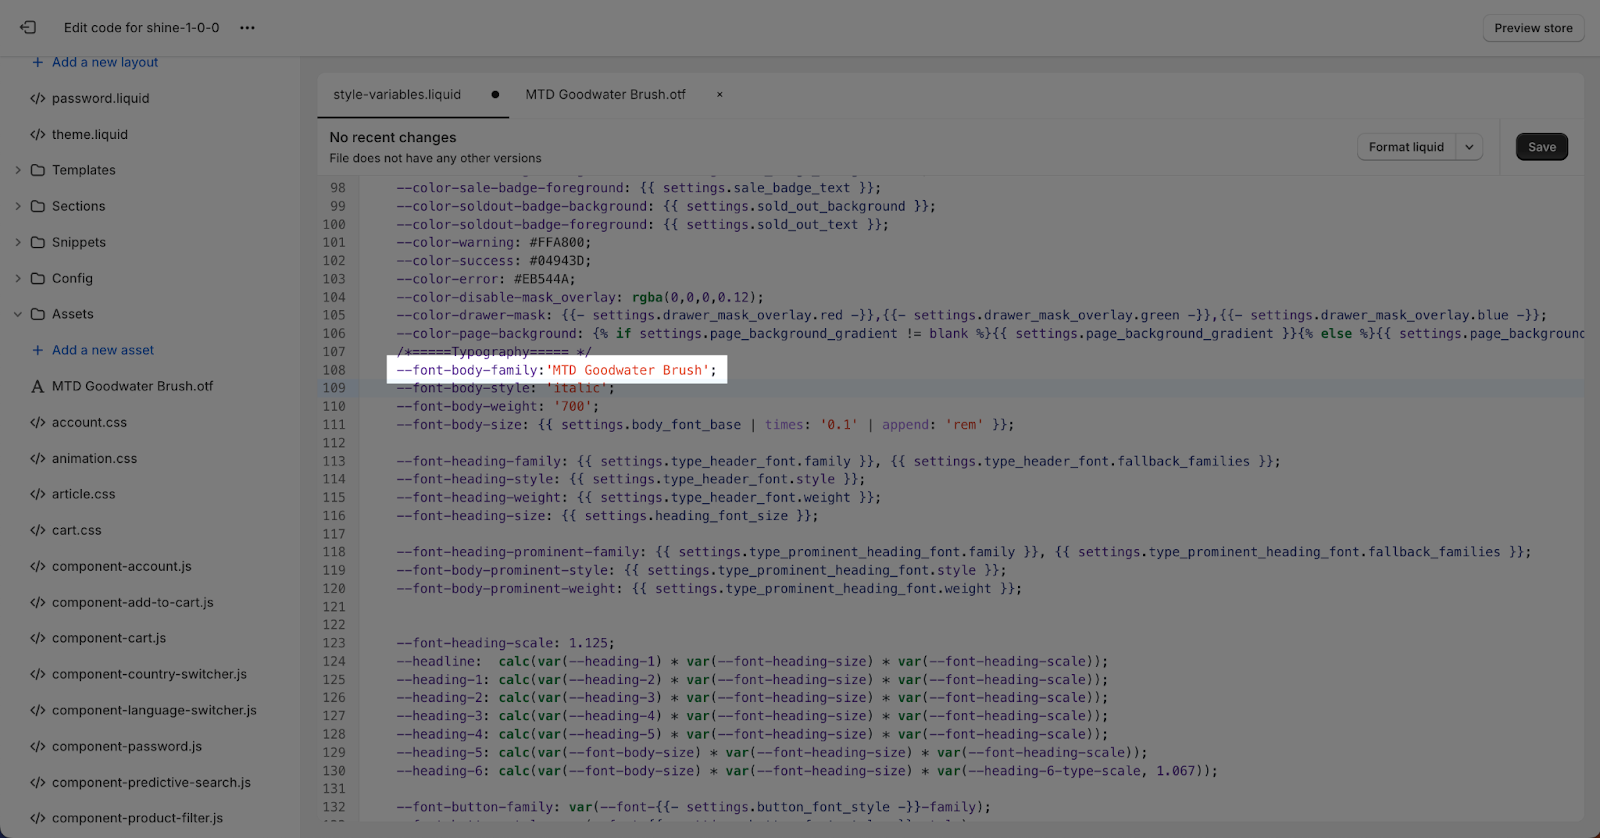
For example, here I have the font name ‘MTD Goodwater Brush’ and the code will be:
- Adjust the font weight and style for your custom font by modifying the following lines in the same file:
–font-body-style: {{ settings.type_body_font.style }};
–font-body-weight: {{ settings.type_body_font.weight }};
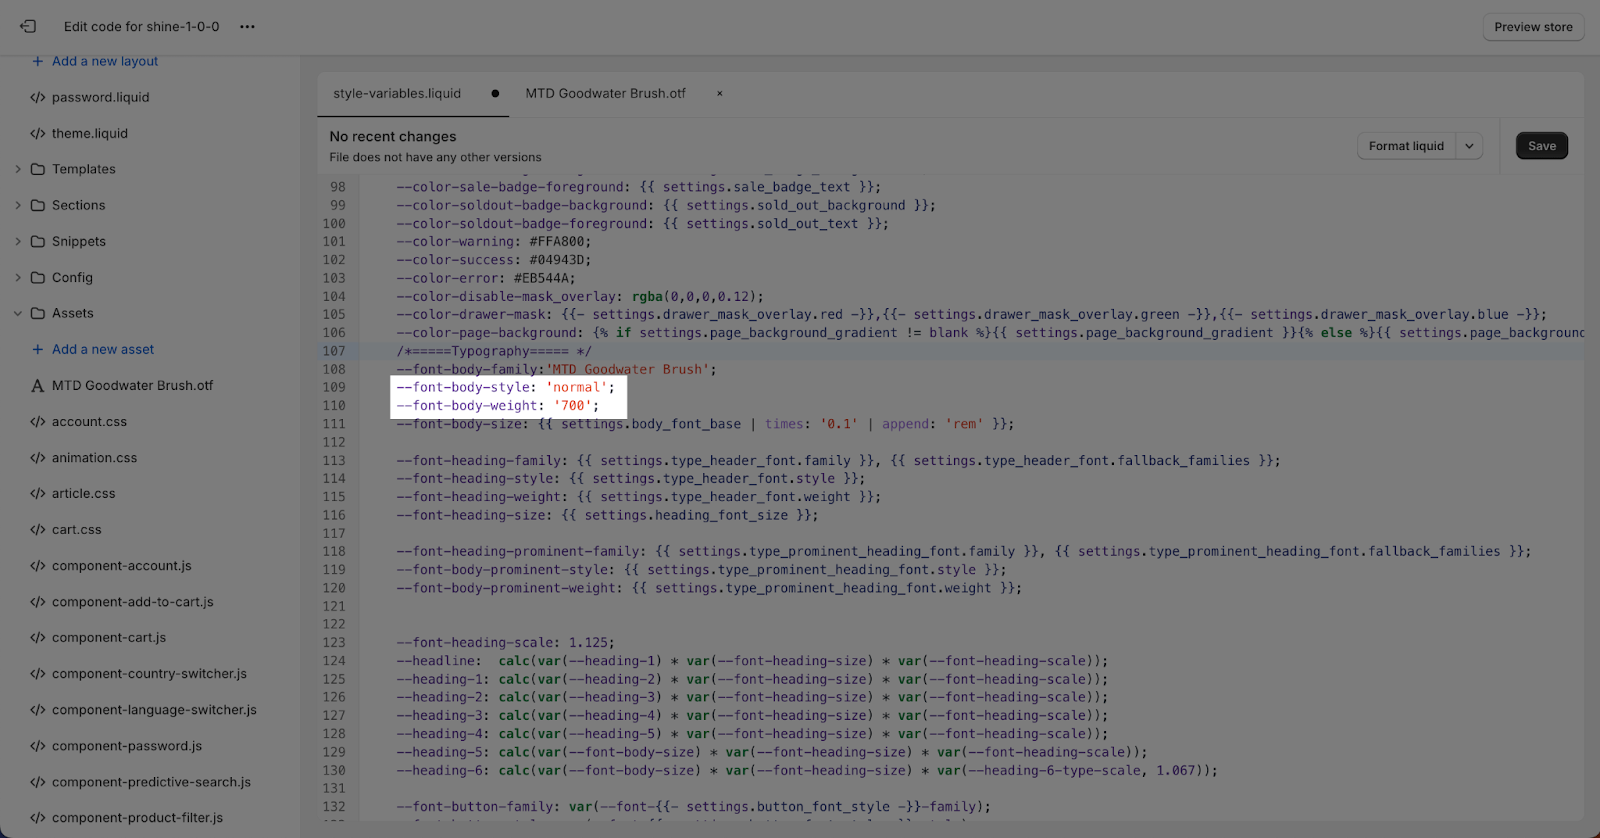
Replace these lines with the appropriate weight and style values for your custom font, such as:
–font-body-style: ‘normal’;
–font-body-weight: ‘700’;
Step 5: Save And Preview Your Changes
- After making the necessary changes to your theme’s code, save your changes and preview your store to ensure your custom font is applied correctly.
- You may need to clear your browser’s cache or try a different browser to see the changes.
If you encounter any issues or need further assistance, you can reach out to the SalesHunterThemes support team or consider hiring a Shopify Expert for more advanced customizations.
